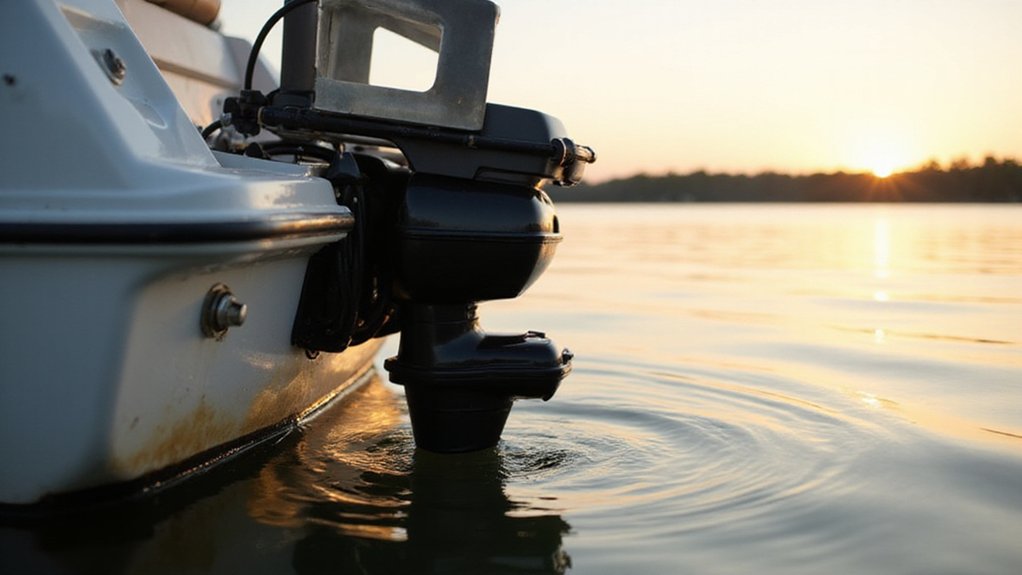
Mounting your transom transducer in the right spot is key to getting clear, reliable sonar readings.
You want it positioned where the hull gets clean water flow and away from turbulence caused by propellers or rivets.
Proper placement, height, and angle make all the difference for accurate depth and fish detection—this guide will show you exactly how to get it right.
Why Transducer Placement Matters (and Where Most Boaters Get It Wrong)
Proper transducer placement is crucial because it determines whether your sonar provides clear, accurate readings or chaotic, unreliable data. Mounting it poorly forces the transducer to contend with hull turbulence, wake, and obstructions like rivets or strakes, which disrupt water flow around the device. Even a slight misplacement—such as placing it behind a protrusion—can create turbulence that scrambles the sonar signal, resulting in cluttered screens, intermittent bottom locks, or false readings when on the move. Prop wash, in particular, aerates the water and causes your transducer to lose contact entirely. Achieving clean water flow isn’t just a convenience; it’s essential for reliable, crisp readings. For those considering newer units, models reviewed in top ice fishing fish finders offer excellent sonar performance for winter applications. For those selecting a new unit, choosing a top speedometer pick ensures the display matches your transducer’s performance. Test different positions, adjusting height or angle just a little, because minor changes can significantly improve your sonar’s clarity and accuracy. Additionally, ensuring the transducer is mounted at a height roughly 1/8 inch below the hull edge on fiberglass is critical for keeping it in solid water flow at speed. For anglers seeking reliable all-season sonar, a unit evaluated for quality and performance can simplify your installation decision.
Where to Mount the Transducer for the Cleanest Water Flow
The best spot to mount your transducer is on the transom where the water flows smoothly and consistently. To find this location, observe your boat’s wake while underway. Look for areas where the water is calm, without bubbles or turbulence. The transducer should stay in contact with non-turbulent water even at higher speeds. Avoid mounting behind hull features like strakes, fittings, or irregularities that cause flow disturbance. Steer clear of water intakes or propeller wash, which can interfere with readings. For single-engine boats, the starboard side often offers better flow, but prioritizing smooth water is more important than side selection. On twin-engine boats, consider mounting between the engines if the flow remains clean there. Keep the transducer close to the centerline to maintain proper immersion during turns, but ensure it stays clear of the propeller’s swing path. For optimal nighttime visibility, ensure your mounting location does not obstruct the beam of navigation lights for jon boats, which require clear sight lines for safety compliance. To secure the transducer cable, a top ram mount can provide a stable and adjustable base for the fish finder display unit. Additionally, on single-engine boats, the starboard side typically offers better water flow due to propeller rotation effects, enhancing reading accuracy at speed.

Complete Kit for Easy Installation: Our no drill transducer mount kit includes all necessary accessories for a seamless installation: 1 transducer pad block, 1 scouring pad, 1 cleaning wipe, and 3 black cable clips; Simply clean the installation surface, peel off the adhesive, align the position, and press firmly for a few minutes; (Note: Please wait 18 hours before mounting the transducer to ensure the adhesive sets firmly, reducing the risk of detachment during use

Please see the "Stern Pad Strength Demo Video" on You-tube

🛥️[Product Overview] Stern Pad, Screwless Transducer Mounting Plate kit, Marine-Grade Transducer Mounting Board Hardware Kit.
How Far Below the Hull Should the Transducer Sit?
The transducer should sit about 1/8 inch (3.5 mm) below the hull for fiberglass boats and around 3/8 inch (10 mm) below for aluminum hulls. This positioning helps ensure the transducer stays submerged at cruising speed without creating extra drag or turbulence. To find the optimal depth, start with these measurements and then adjust in 1/8 inch increments if you notice the loss of bottom readings at higher speeds. Too shallow causes intermittent sonar signals, while too deep increases drag and turbulence. For a smooth boating experience, it is important to choose a fish finder that matches your specific hull material and performance needs. Prioritize maintaining constant water contact over aesthetic concealment. For a clean look, match the transducer color to your hull, but don’t compromise performance. The goal is to find the shallowest depth that reliably stays underwater during use. For best results, consider choosing a model from the best saltwater fish finders that offers advanced sonar optimization for your hull type. Many beginner-friendly models come with adjustable mounting brackets that make fine-tuning this placement simple and precise.

Wide Compatibility with XNT Transducers: The MXNT metal transducer mount serves as a suitable metal alternative for all "XNT" model transducers. Compatible with: XM 9 MDI T, XNT 9 20, XNT 9 20 T, XNT 9 DB 74 T, XNT 9 DI T, XNT 9 HW DI T, XNT 9 HW MDI 75 T, XNT 9 HW MSI 150 T, XNT 9 HW SI T, XNT 14 20 T, XNT 14 74 T, XNT 14 DI T, XM 14 20 MDI T, and XNT 14 HW T. Extensive compatibility ensures easy integration into various transducer mounting plate

Aluminum Construction with black power coat paint

【Enjoy Fishing Life Better】 Frustrated because the picture on your electronics wasn’t the same as advertised? 7400931 MHX XNT Transducer Bracket is a nice addition for your boat that helps your skimmer transom mount transducer to find fish easier to find and get the right scan image. Efficiently improve your transducer running performance without letting go of any fish!
How to Angle Your Transducer for Reliable Sonar
To ensure reliable sonar readings, you should angle your transducer correctly. Begin by aligning the transducer face parallel to the waterline so that the sonar beam points directly downward. This positioning helps prevent image distortion caused by the boat’s running attitude. Match the transducer bracket to your transom’s angle, which is usually around 12° to 13°, using shims if necessary. Keep the leading edge slightly higher than the trailing edge—by about 1/16 to 1/8 inch—to avoid aeration and maintain clear signals. For catfish anglers who fish in deep or murky waters, selecting a model with high CHIRP sonar can significantly improve target separation and bottom detail.
A slight bow-high slant like this stabilizes the sonar returns, especially at higher speeds. For proper beam alignment, make small adjustments until the sonar beam is aimed straight at the bottom. Refer to your manufacturer’s instructions—Down Imaging units often perform best with a parallel setup, while traditional sonar prefers a slight downward slope. Correctly angling the transducer prevents weak or distorted signals and ensures consistent, reliable readings. For a comparable approach to audio clarity on the water, consider how marine sound bars are reviewed for their placement and angle to optimize sound projection.

Replace Part: 000-12603-001 Transom Transducer Mount Bracket

Professional:The transducer mounting plate is specially designed for XNT transducer, Compatible models XNT 9 20, XNT 9 20 T, XNT 9 QB 90 T, XNT 9 QB 90, XNT 9 SI 180 T

Total Scan and Structure Scan 3D Plastic Replacement Bracket
3 Transducer Mounting Mistakes That Ruin Sonar Readings
Mounting your transducer correctly is essential for accurate sonar readings. The biggest mistake is placing it in turbulent water. Mounting behind strakes, struts, or intake ports exposes the transducer to bubbles and aerated flow, which weaken echoes and generate false signals. This turbulence causes the sonar to lose depth accuracy, especially at higher speeds. High-quality units like the Garmin Striker 4CV are designed for precise readings, but poor placement will nullify their performance.
Another common error is installing the transducer too close to the propeller or engine—less than 15 inches of clearance. Prop wash and cavitation noise there interfere with the transducer, resulting in unstable or erratic readings. Additionally, mechanical interference from the lower unit can corrupt your sonar signals, making data unreliable. For trolling motors, improper transducer orientation on the shaft can also create turbulence that disrupts sonar returns.
Mounting behind hull features that block flow such as strakes or rivets is also problematic. These protrusions create bubble trails that break sonar contact, leading to intermittent bottom lock and blurry images. Even small bumps can severely degrade sonar performance. Just like wiring a horn incorrectly can cause electrical failure, improper transducer placement ruins sonar reliability.
Finally, setting the correct mounting height is crucial. If the transducer rides too high, it loses water contact when you’re on plane, causing an immediate drop in depth readings. The ideal position is even with or slightly below the hull bottom, ensuring continuous water contact at all speeds.

🛥️[Product Overview] Stern Pad, Screwless Transducer Mounting Plate kit, Marine-Grade Transducer Mounting Board Hardware Kit.

【Application】Transom Mount Bracket K00-00118-01 perfectly fits for 010-10272-00 Transducer. Also suitable for Garmin Fishfinder series, for GPSMAP series, and digital remote sounder.

【Enjoy Fishing Life Better】 Frustrated because the picture on your electronics wasn’t the same as advertised? 000-10262-001 Transducer Mounting Bracket is a nice addition for your boat that helps your skimmer transom mount transducer to find fish easier to find and get the right scan image. Efficiently improve your transducer running performance without letting go of any fish!