If you need to update your Humminbird Helix 7 software, it might seem tricky at first, but it’s actually pretty straightforward once you know the steps. By updating your device, you’ll ensure it runs smoothly with the latest features and bug fixes.
In this guide, you’ll learn how to check your current software version, download the correct firmware, prepare your SD card, and complete the update process.
Let’s walk through each step so you can keep your Helix 7 running at its best.
Check Your HELIX 7 Model and Current Software Version
To confirm your HELIX 7 model and current software version, start by locating the serial number plate on the back of the unit. The model name, such as CHIRP, MEGA SI, or G3N, is displayed there. Different HELIX 7 models may have similar hardware features but belong to distinct generations with unique software versions.
Power on the device and wait for it to fully load. Then, press and hold the View button to access the express menu. Navigate to System and select System Status. The software version will appear in the middle of the screen, serving as your key reference. This screen also shows your model name and serial number, so verify that your model family matches the information displayed.
Your HELIX 7’s user interface simplifies this process. Cross-check the installed software version with Humminbird’s current software list by visiting their support site. Since exact software updates depend on your model, ensure you find the correct update page. Some updates require specific previous versions to be installed beforehand. For catfish anglers, selecting the best fish finders involves comparing features like side imaging and GPS, which are common on updated HELIX units. Beginners often look for models with simple user interfaces and clear sonar readings to get started easily. If your fuel gauge behaves erratically, you can test the boat fuel sending unit following similar steps to diagnose a faulty component.

Protect Your Fish Finder: Durable silicone cover helps keep your HELIX 7 unit protected when not in use
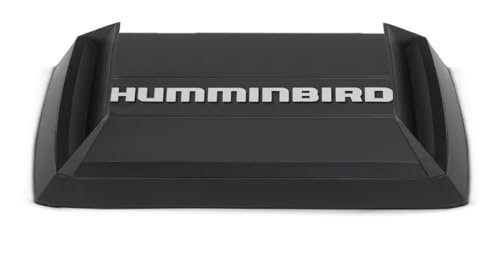
Durable & Perfect Fit: The black Helix7 silicone cover is made from 6mm thick silicone, heavy and durable enough to last a life time. It is specially designed according to Helix 7 units from 1:1 model and has a beautiful cut to fit the button, and the reserved grooves perfectly correspond to the buttons on the surface, so the flexible silicone protector tightly fits and snug on your fish finder’s screen. The boat fisher will not worry about damage of fish finder any more.

【Perfect Compatibility】Filter Power Cord Compatible with Helix and earlier models with Down Imaging and Side Imaging Sonar,such as HELIX 8, HELIX 9, HELIX 10, HELIX 12, HELIX 15 Series, 800 Series, 900 Series, 1100 Series products, 797, 798 Series 720057-1 products
Download the Correct HELIX 7 Firmware
Once you’ve identified your specific HELIX 7 model and software version, proceed to download the correct firmware from Humminbird’s official software updates page. This is the only secure source for firmware files. Avoid generic or unofficial download links to prevent potential issues with compatibility. Select the update that matches your unit exactly, such as “CHIRP MEGA SI GPS G4N.” Ensuring the firmware version corresponds precisely to your model guarantees compatibility and successful installation. Typically, the download will be a .UPD file to save to your computer. Some packages may include a ZIP file containing basemaps or additional files; confirm the file type and whether extraction is necessary by carefully reading the page’s instructions. Choosing the correct firmware and following these steps minimizes errors and facilitates a smooth update process. For boat owners familiar with other brands, it is helpful to understand how Garmin ECHOMAP updates work as a comparison for maintaining your unit’s functionality. Following the correct update steps in order prevents a failed install and ensures the unit remains operational. Additionally, comparing features with other top options like the best fish finders for boats can help you evaluate overall performance.
Prepare Your SD Card for the Update
To prepare your SD card for the update, start by selecting a Class 10 card no larger than 32 GB. Format it to FAT32 on Windows or MS-DOS (FAT) on Mac. This process erases all existing data, so back up anything important beforehand. Ensure the card has at least 150 MB of free space after formatting to accommodate the update files. For comparison, the Lowrance Elite FS 9 also requires a similarly formatted card for its own software updates. For sound on the water, choosing top marine Bluetooth speakers can offer a similar update in audio quality over standard options. Similarly, when choosing a reliable anchor light for your sailboat, ensuring it provides adequate visibility during night anchoring is essential for safety.
After formatting, use a careful file transfer process. Only copy the extracted update file—never the ZIP archive—to the root directory of the SD card. Do not place it inside any folders. Mixing old maps or data can cause recognition problems, so dedicate this card solely to the update. Confirm that the file system remains FAT32 and verify the card appears correctly on your computer before unplugging. Avoid inserting the SD card into your device until the next step.

SanDisk 32GB Ultra microSDHC 120MB/s A1 Class 10 UHS-I

Up To 48MB/s Read Speed

32GB Micro SD Card
Install the New Software on Your HELIX 7
Insert the prepared SD card into the HELIX 7 control head’s card slot, ensuring it is fully seated. Power on the unit immediately; the control head will detect the card during startup. Recognition might take a few minutes, so be patient. Follow the on-screen prompts carefully. When prompted to install the displayed software version, select “Yes” using the RIGHT Cursor key. If you see a prompt to abort the installation, select “No” with the LEFT Cursor key to proceed. Maintain stable power throughout the process—avoid turning off the unit or removing the SD card during installation. Interrupting the installation can brick your device and cause permanent issues. Always double-check that your hardware model, such as G4N or G3N, is compatible with the software to prevent errors. If prompts do not appear or the process stalls, consult Humminbird’s official firmware support page for troubleshooting tips. Remember, the control head handles the installation directly; your phone is not involved in this process. You should also confirm the correct software files are on the SD card before beginning.

Foundation for Custom Mapping: Use this 32 GB card with AutoChart or AutoChart Live to create your own detailed contour maps; Includes 16 GB of free space to maintain your custom maps

Dakotas + Nebraska Map Compatibility: Works with Humminbird HELIX G3/G3N and newer models, all SOLIX units, all APEX units, and all XPLORE units

Wide Compatibility: Ideal for your security camera, digital camera, dash cam and gaming console. Premium memory solution for smartphones and tablets
Confirm the Update and Verify the Version
After the installation finishes and your HELIX 7 restarts, you need to confirm that the update took effect by checking the software version directly on the unit. To do this, press and hold the View button immediately after startup. Then, navigate to System and select System Status. Your current software version will be displayed in the center of the screen. Compare this number to the version listed on Humminbird’s software updates page for your specific model—whether G2N, G3N, or G4N. A matching number confirms the update was successful. If the version is lower, the update did not install correctly. It’s also important to verify Software compatibility by checking both the unit and basemap versions if included in the update. Remember, the displayed version on your device is your proof of a completed update; do not rely solely on the update files. This step helps prevent troubleshooting later and ensures your HELIX 7 runs the correct firmware version. When selecting a fish finder for shore fishing, consider top fish finders that offer reliable performance for your needs. Additionally, to avoid data conflicts, remove the Lake Master chip before starting the update process. For organizing your boat’s electrical systems, a well-designed switch panel can simplify control and improve reliability. A similar level of attention to quality is needed when choosing bimini top stern lights for your boat’s safety setup.
Update via the One Boat Network App (If Supported)
To update your HELIX 7 G3N or G4N model via the One-Boat Network app, follow these steps. First, install the app on your mobile device and sign in. Ensure you complete any necessary battery and screen calibration beforehand to prevent interruptions during the update process.
Next, tap Network + Updates, then pick Download Update for your unit. When the download finishes, tap Transfer Software and choose between internal storage or an SD card. The app displays transfer progress, and your HELIX will prompt you to complete the installation once the transfer is complete.
If your device does not appear in the app, you might need an AS EC QDE adapter to establish proper connectivity. After the transfer, the app manages the file transfer, and your HELIX takes over the final installation. Always verify your model’s compatibility before starting the update to avoid issues.