If you’ve ever wondered how to properly wire your boat’s navigation lights, you’re not alone. Ensuring they’re wired correctly is essential for safety, visibility, and legal compliance on the water.
By understanding the right components and steps, you’ll set up a reliable system that keeps you in line with regulations. Read on for a straightforward guide to wiring your boat lights safely and effectively.
Plan Your Navigation Light Circuit: Fuse, Switch, and Wire Gauge
To ensure a safe and reliable navigation light circuit, start by placing the fuse as close to the power source as possible. A fuse rated between 2A and 5A is suitable for LED navigation lights, protecting the wiring from overload without blowing prematurely. Always size the fuse to match the wire’s ampacity, not the light fixture, to prevent potential fire hazards. Use marine-grade tinned copper wire for corrosion resistance and crimp connectors for secure termination, especially in a marine environment. For optimal performance, the mounting location of your lights benefits from a top radar mount for stability and clearance. For the best sound on the water, consider pairing your lights with Top Marine Bluetooth Speakers for high-quality audio performance. Proper wiring and fuse placement help avoid troubleshooting issues and enhance circuit longevity. When selecting components, verified fuel tank sending units ensure reliable fuel level readings in your boat’s electrical system.

Heavy Duty 16 Gauge Marine Wire:Our 16 AWG marine wire is made of tinned copper to make sure good conductivity,corrosion resistance, high durability,flexibility,stability for a long-lasting performance

High Quality:Our marine wire is made of tinned copper to make sure good conductivity,Anti-corrosion, high durability,flexibility,stability for a long-lasting performance

High Quality:Our marine wire is made of real copper strands and tinned to make sure conduct well,resist corrosion, high durability,flexibility,stability for a long-lasting performance
Mount Navigation Lights: Port, Starboard, and Stern Positions
Position your port, starboard, and stern navigation lights precisely according to regulations. Mount the port (red) sidelight near the bow so its unbroken 112.5° arc is visible from dead ahead to 22.5° abaft the beam on the port side. The starboard (green) sidelight should be opposite, also with a 112.5° arc visible from dead ahead to 22.5° abaft the beam on the starboard side. For the stern, place a white light as close to the vessel’s stern as possible, showing a 135° arc. These lights work together to form a complete 360° pattern around the vessel. Ensure all mounting heights keep the arcs clear of rails, sails, or other hardware. Confirm that the red light is only visible from port, the green only from starboard, and the white from directly astern and both quarters. Always check for any masking or obstructions before finalizing the placement. For optimal visibility, choose lights with high-quality LED bulbs that offer bright, energy-efficient illumination. A horn relay can simplify power routing to your lights and ensure consistent voltage at the fixtures. For additional peace of mind, a top speedometer can also help you monitor your vessel’s performance during night runs.

Lighting | Navigation Lights
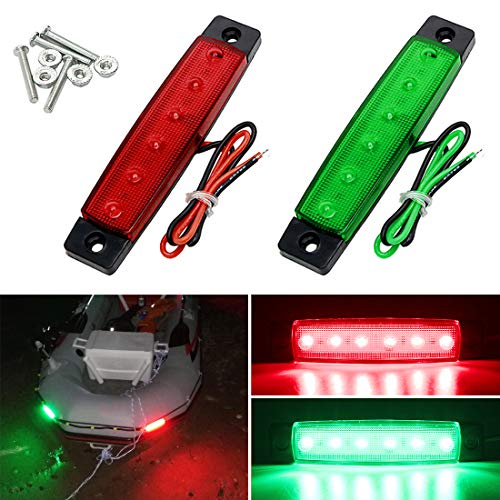
Red & Green Boat Navigation Lights: Includes 1 red port light and 1 green starboard light, designed to improve visibility for small boats, kayaks, jon boats, pontoons, fishing boats, sailboats and other 12V marine applications during low-light or nighttime use.

1.Enhanced Visibility & USCG Compliance:Our boat navigation lights feature a proprietary optical design with red and green lenses housed in a corrosion-resistant, triple chrome-plated zinc cover. Ideal for late-night boating, these LED navigation lights ensure 2 nautical mile visibility, meeting USCG requirements for safety in fog and mist.
Run the Wiring: Secure Cables and Make Waterproof Connections
Running the wiring begins with securing a path for each cable that protects it from damage and moisture. Use marine-grade tinned copper conductors to resist corrosion in the harsh aquatic environment. Route wires away from steering cables, moving parts, and areas prone to abrasion. At bulkheads, install grommets or conduit to prevent chafing and provide a waterproof seal. Secure cables at regular intervals with clips or straps to keep them organized and prevent movement that could lead to wear. Avoid tight bends; maintain gentle curves to prevent stress on the wires and connections. Keep wiring away from bilge areas where water may accumulate or splash. When running wires near the horn, follow similar precautions as wiring a boat horn to avoid sharp edges and excessive vibration. For marine engine monitoring, a mechanical oil pressure gauge provides reliable, direct readings without electrical failure points. Ensure the stern light wiring reaches the correct location, as regulations require a white stern light visible from behind the vessel.
For waterproof connection sealing, utilize adhesive-lined heat-shrink connectors at every junction exposed to moisture. These connectors provide a water-resistant barrier that prevents ingress of water, salt, and oil, extending the lifespan of your wiring system. Standard crimp terminals are not suitable in wet environments as they fail quickly under repeated exposure to moisture. Always fully seal all joints and splices to protect copper strands from corrosion. Before starting, disconnect the negative battery terminal to ensure safety, and verify that each connection is tight, fully covered, and protected from the elements. Minimize splices to reduce potential failure points, and double-check all connections before powering up to ensure reliability.

Package Included: 50 pcs red waterproof wiring connectors for 22, 20, 18, 16 gauge wires, 40 pcs blue waterproof wiring connectors for 16, 14 gauge wires, 10 pcs yellow waterproof wiring connectors for 12, 10 gauge wires—total 100 pcs

Time Saver: Solderless,crimpless, all you need is just a heat gun to finish the joint, much faster and easier than the old way

Tinned Copper Core: Butt connectors use a heavy-duty copper core, strong crimp, higher conductivity
Wire the Switch and Connect Power to the Circuit
To wire the switch and connect power to the circuit, start by choosing a three-position marine rocker switch, preferably a double-pole double-throw (DPDT) model, to control your navigation and anchor lights independently. Ensure the switch can handle the total current load of your lights; check its amperage rating against your system’s requirements. Run a fused positive wire from your battery to the switch’s common terminal to provide circuit protection. The fuse or breaker, placed close to the power source, safeguards against short circuits and overloads. For reliable performance, choose a switch with a durable gauge housing that resists corrosion and vibration, similar to top-rated boat gauges. High-quality electronics like the Garmin EchoMap UHD 93SV also benefit from robust housings in demanding marine environments. If a pitot tube becomes blocked at sea, inaccurate speed readings can lead to dangerous navigational errors for the operator.
Connect the navigation light output to one of the switch’s switch terminals, and the anchor light output to another. If your switch has isolated poles, jumper its input terminals so both sides receive power from the same source. Specifically, a jumper between terminals 1 and 6 supplies constant power to the anchor light junction. Attach the negative wires from all lights to the battery negative terminal or a common ground bus. Finally, tighten all terminal connections securely to prevent loose contacts, as poor connections can cause flickering or voltage drops.

Easy to install and use: 7 pin on off on rocker switch with DPDT design (double pole double Throw), rated at 20AMP/12VDC and 10AMP/24VDC. Can be installed or replaced on the original rocker switch panels. It is easy and simple to set up. Can control 2 loads.

Product: Marine rocker switch 12v, DPDT maintained ON-OFF-ON 3 way blue LED lighted rocker switch toggle

Sturdy and Durable: Made of high-quality plastic and well-conductive pins; ensure long lasting durability,highly optimized for general use and will give you a pleasant experience.This rocker switch is a non-light design
Test Your Navigation Lights With a Multimeter
To test your navigation lights with a multimeter, start by confirming your meter setup for accurate readings. Set it to DC voltage on the 20V range to perform live checks. Begin with the battery— a healthy 12V system should read between 12.5 and 14 volts. Next, turn on the navigation lights. Place the black probe on a known ground and the red probe on the fixture’s positive contact. A reading near the system’s voltage indicates power is reaching the fixture; a zero or significantly lower reading suggests an issue upstream in the wiring or fuse. A DIY fish finder mount can similarly benefit from a clean wiring setup to ensure reliable voltage delivery. For a boat, selecting the best fish finder often involves checking that its power supply is wired just as cleanly to avoid voltage drops. Switch the multimeter to continuity mode with power off to check the fuse. Touch each probe to opposite ends of the fuse; a near-zero resistance reading confirms the fuse is intact. If the multimeter beeps or shows high resistance, the fuse is blown and needs replacing. To test the bulb or LED, check continuity across its terminals. An open circuit signifies the component has failed. This process isolates the fault to the lamp, fuse, or wiring without unnecessary guesswork. A top depth finder review recommends similarly verifying power delivery to your electronics for consistent performance on the water.
Troubleshoot Common Wiring Issues and Verify Legal Compliance
If power is missing at the fixture, begin by tracing the circuit backward. Check the switch, fuse, and circuit breaker to identify where the disruption occurs. Instead of simply replacing a blown fuse, investigate the cause to prevent repeat issues. Look for voltage drops exceeding 0.5 volts along wires, as this indicates that the wire gauge may be too small for the length of the run. Using wire that’s too thin leads to increased resistance and potential safety hazards. For enhanced navigation safety, consider pairing your wiring work with a Lowrance Eagle 7 fish finder and chartplotter to better interpret underwater hazards. Using live sonar technology from top fish finders can also help you locate submerged obstacles that might damage your boat or wiring. A beginner fish finder can simplify identifying underwater structures near your dock. Finally, confirm that your lighting fixtures meet UL 1104 certification and ABYC A-16 standards. Only use LED replacements that are Coast Guard-compliant, as non-certified units may not produce the correct arc of visibility needed for safety on marine vessels. Proper verification ensures both legal compliance and optimal performance.
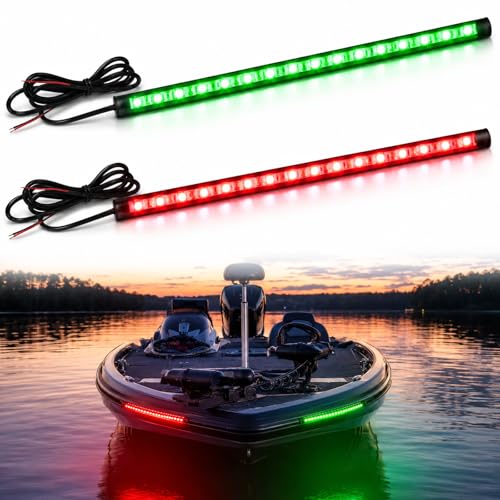
GIFT IDEA FOR MEN OR WOMEN: These boat navigation lights are designed to enhance safety for boat owners and make the boat look nicer at night. Therefore, they will be great gifts for the boat owners who have everything.
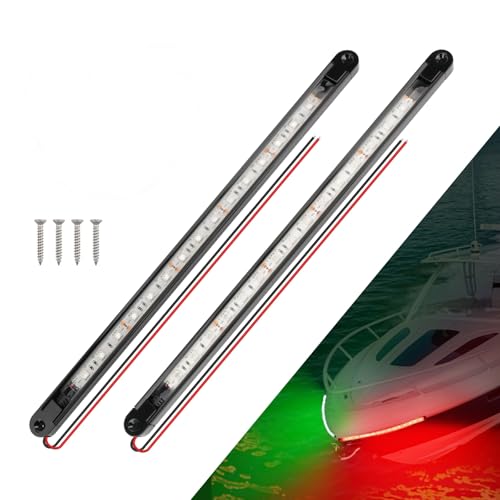
【PERFECT GIFT FOR BOAT OWNERS】: These boat nav lights not only enhance safety but also add a touch of elegance to your boat. These stylish LED lights not only improve safety but also enhance the aesthetics of your boat, making it stand out on the water

Visibility & Safety: Red and green LED navigation lights provide up to 225° visibility for safe night boating. Perfect for small boats, pontoon, and fishing vessels under 39.4 ft (12 m), compatible with 12V DC systems
Stay Legal: Visibility Rules by Boat Size
Vessel length determines the minimum visibility distances for your navigation lights. For boats under 12 meters, your masthead light must be visible for at least 2 nautical miles, while sidelights only need to be visible for 1 nautical mile. As your vessel size increases to 12 to 20 meters, the masthead light’s visibility requirement jumps to 3 nautical miles. For vessels 20 meters and over, it increases further to 5 nautical miles, and at 50 meters, the masthead light must be visible for 6 nautical miles. Sidelights and sternlights for vessels of 50 meters and larger also need to be visible for at least 3 nautical miles. For reliable nighttime operation, consider using Garmin Striker 4 models for ice fishing to ensure your electronics are robust and weather-resistant. When selecting a portable fish finder for your boat, prioritize models with high-quality performance to help you navigate safely in low-visibility conditions.
Your power source must support these visibility ranges, so ensure your system provides proper voltage regulation to maintain consistent brightness. Remember, nautical miles differ from statute miles — this is key for legal compliance. Matching your lights’ visibility range to your vessel’s length ensures you stay within legal requirements when operating at night.