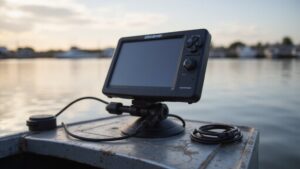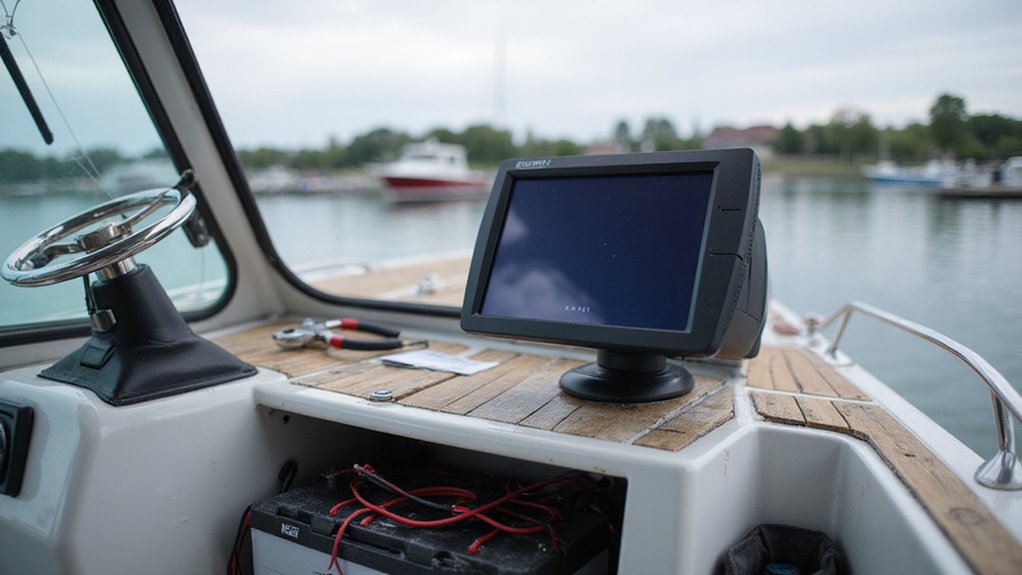
Wiring a fish finder to a battery might seem tricky, but with the right steps, it’s straightforward. Knowing how to connect it properly can prevent damage and keep your device running smoothly.
By the end, you’ll understand how to wire your fish finder safely using the correct wire size, fuse, and connection points.
Keep reading for a simple guide to get your setup ready and avoid common mistakes.
What You’ll Need to Wire a Fish Finder to a Battery
To wire a fish finder to a battery, you’ll need several specific components to ensure a safe and effective connection. Start with the fish finder unit itself and a 12V battery suitable for marine use. The manufacturer’s power cable should have a red lead for positive and a black lead for negative, which will connect directly to the battery. When preparing the wires, use a wire stripper to remove approximately a quarter-inch of insulation for a clean crimping fit.
Gather ring terminals to secure your connections, along with heat-shrink tubing to insulate them effectively. An inline fuse holder with a 3-amp fuse is essential; it protects your gear from power surges or shorts. Use marine-grade tinned wire, which resists corrosion in harsh environments, for running the cable from the battery to the fish finder. For boat owners comparing models, top fish finders often include detailed wiring diagrams for various hull types. A model like the Garmin Echomap UHD2 93SV pairs well with the GT56 transducer for high-quality imaging. Beginners often prefer easy-to-read displays that simplify navigation and sonar data.
A crimping tool will help you attach ring terminals securely, while wire strippers are necessary to prepare the wire ends cleanly. To verify proper voltage and ensure the connections are correct, a multimeter is a helpful tool. Cable ties are useful for organizing and securing the wires, preventing movement and abrasion. Also, consider a battery holder for easy mounting and maintenance access.
Always remember to maintain the battery regularly and practice smart power conservation, especially during long trips, to extend your battery life and avoid unexpected shutdowns. Following this list ensures you have all the essential tools and parts for a safe, reliable wiring setup.

Product Information:This handy electrical wire connection set ncludes 4 clearly marked quick connect plugs that let you patch and disconnect 6 to 12 gauge (0.08"-0.16") wire pathways from 12V, 24V, or 36V batteries, supporting currents up to 50 amps

[Package]110Pcs in total. Wire range:Red (AWG 22–16), Blue (AWG 16–14),Yellow (AWG 12–10)。Sizes: #10 1/4" 5/16" . 9 specification in total(with a storage box)
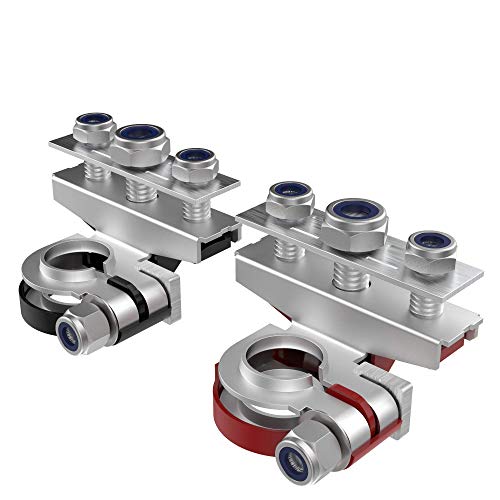
Exact Dimensions: These battery terminals measure approx 2.16 x 1.37 x 1.77 inches (as pictured), precision-engineered for a perfect fit on standard top-post battery posts without modification
Choose the Right Battery and Cable Gauge
To choose the right battery capacity, start by considering your fishing schedule. For half-day trips, a 7–10Ah battery is sufficient, providing 6–8 hours of power for a typical 7-inch fish finder or trolling motor. For a full day, you’ll want 12–15Ah to ensure uninterrupted operation. Tournament anglers often select 20–35Ah batteries to cover longer periods or multiple devices, and multi-day users might need 35–50Ah batteries for extended use. Always factor in your device’s amp draw, as a device running at 1A will deplete a 10Ah battery in about 10 hours. Matching the battery’s amp-hour rating to your needs helps prevent unexpectedly losing power mid-trip. For comparison, top marine Bluetooth speakers also require careful battery selection to ensure consistent sound performance on the water. Catfish anglers can find detailed battery recommendations in reviews of the best fish finders for their needs. For instance, the Garmin Striker Vivid 7CV is a popular choice that pairs well with a properly sized battery for reliable operation.
Selecting the appropriate cable gauge depends on the distance of your run and the load current. For short runs, typically less than 10 feet, 12–14 AWG wire is usually enough to handle moderate loads. Longer distances, over 10 feet, require thicker wire—such as 10–12 AWG—to avoid voltage drop that can impair device performance. Aim for a maximum of 3% voltage drop to keep sensitive electronics functioning properly. Always measure the actual run length before choosing your cable gauge; guessing can lead to using wire that’s too thin, which risks power instability and possible damage. Properly matching the battery capacity to your usage and sizing the cable gauge accordingly ensures reliable power delivery.

Premium Material: Crafted from premium silicone material, 6 gauge battery cables offer superior flexibility and bend resistance compared to PVC cables, enabling effortless routing. With exceptional high and low temperature tolerance, they are the ideal choice for inverter batteries and marine power systems

【Marine-Grade Corrosion Resistance】 Built to withstand the relentless salt and moisture of life on the water, this 12 AWG Marine Wire uses premium Tinned Copper. Each strand is coated in tin to prevent oxidation, ensuring your power stays consistent and your connections stay clean.

6-Pack 4 AWG Battery Cable Set: Includes 3 red positive and 3 black negative 4 gauge battery cables, each measuring 12 inches (30 cm). The matched cable set is ideal for connecting batteries in parallel or series and for short power connections between batteries, inverters, bus bars, and electrical systems
Install the Inline Fuse on the Positive Lead
To install the inline fuse on the positive lead, place it as close to the battery terminal as possible, ideally within a few inches. This minimizes unprotected wire and ensures any fault quickly cuts power, limiting damage. First, cut your positive wire near the battery. Insert the inline fuse holder between the two cut ends, then crimp the connections securely using a crimping tool. Cover the crimps with heat-shrink tubing or electrical tape for insulation. For a reliable setup, you may also want to consult reviews of top speedometer picks for your boat adventure to ensure your dashboard instruments match your wiring standards. Installing the fuse holder near the battery terminal follows the same mounting tips that ensure a clean and reliable connection for any marine electrical component. If you suspect a wiring fault, you can use a multimeter to test for abnormally low readings that indicate a short circuit, similar to how you would check oil pressure without a gauge.
Select a fuse with the rating specified in your fish finder’s manual and avoid exceeding it. Use a blade or glass inline fuse that matches this rating. Keep the fuse holder accessible for easy inspection and replacement. Before connecting to the battery, apply dielectric grease to the ring terminals to prevent corrosion and maintain reliable contact. Finally, test the circuit with a multimeter to confirm proper wiring before powering your device.

For use with ATO or ATC fuses
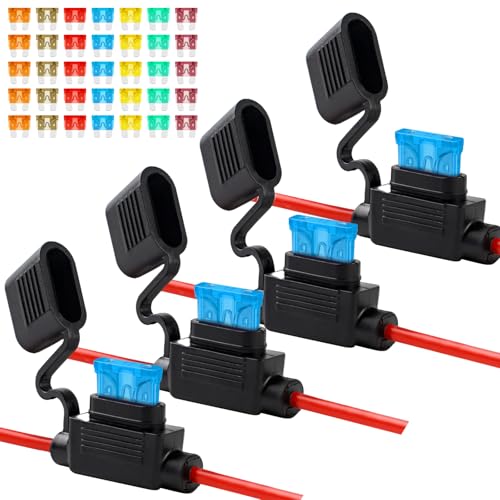
【PACKAGE INCLUDE】 4 packs of 12AWG inline fuse holders and 35 standard blade fuses (5 each of 5A, 7.5A, 10A, 15A, 20A, 30A, 40A). Suitable for 12V automotive and marine circuit protection

WHAT YOU GET: The package includes 6 pack 12AWG inline fuse holders and 66 pcs standard blade fuses (6 each for 2A, 3A, 5A, 7.5A, 10A, 15A, 20A, 25A, 30A, 35A, 40A)
Wire Your Fish Finder to the Battery: Red and Black Connections
After installing the inline fuse near the battery’s positive terminal, connect your fish finder’s power leads: red to the positive terminal and black to the negative terminal. Ensure you’re only using these two wires; additional wires are for accessories or the transducer, not directly from the battery. Use butt connectors to make secure, color-matched connections—red-to-red and black-to-black. Before crimping, verify that the connectors are compatible with your wire gauge to avoid loose connections. Cover each splice with heat-shrink tubing or another insulation method to prevent shorts. Boaters often consult top marine radio reviews to compare reliable electronics for their vessel, ensuring quality power setups. A 10 amp-hour battery like that used for the Garmin Striker provides approximately 43.47 hours of continuous operation for extended fishing sessions. Consulting a best boat switch panel review can help you integrate multiple electronics with a central power distribution system. A failed relay often exhibits signs like a clicking sound with no horn activation before you test the horn circuit separately.
Reversing the polarity by connecting red to negative or black to positive can prevent the unit from powering on and may cause damage. Crimp the connectors firmly so vibrations don’t loosen the connection over time. Always double-check the battery’s polarity before attaching the wires—red to the positive terminal and black to the negative. Completing this wiring process ensures a reliable, safe power supply for your fish finder.

Package Included: 50 pcs red waterproof wiring connectors for 22, 20, 18, 16 gauge wires, 40 pcs blue waterproof wiring connectors for 16, 14 gauge wires, 10 pcs yellow waterproof wiring connectors for 12, 10 gauge wires—total 100 pcs

Tinned Copper Core: Butt connectors use a heavy-duty copper core, strong crimp, higher conductivity

One-Step Solder & Seal: These solder stick wire connectors bond in one step with just a heat gun, no crimping tools needed; A faster alternative to traditional soldering connectors that saves time on every wiring project
Route Wires to Avoid Voltage Drops and Interference
Routing your wires correctly is essential to avoid voltage drops and interference that can disrupt your fish finder’s performance. Keep the positive and negative power leads together as a direct pair from the battery to the unit. This tight cable routing reduces the loop area, which in turn minimizes voltage drop and electromagnetic pickup. Make the cable run as short as possible, avoiding detours through switch panels or long shared circuits, as extra length adds resistance and causes line loss. For example, many anglers find that Lowrance ice fishing models perform best when powered by a dedicated battery circuit. For ice fishing setups, choosing a Humminbird Helix 7 model with a built-in power management system can further simplify wiring and reduce voltage drop. When selecting a switch panel, ensure that its boat labels are clearly marked to prevent confusion during installation.
For better noise reduction, separate your power wires from sonar, transducer, and data cables by at least 20 centimeters. If crossing these cables is unavoidable, do so at a 90-degree angle rather than running parallel, to prevent noise coupling. Never zip-tie transducer leads to trolling motor or high-current wiring, as this can introduce interference. Additionally, route the fish finder harness away from motors, pumps, VHF, and tachometer cables. Cut the cables to the minimum length needed and avoid coiling excess slack, which can act as an antenna and pick up unwanted signals.
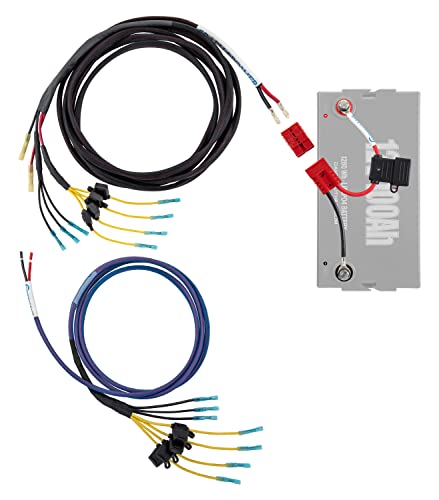
A DEDICATED POWER BACKBONE FOR YOUR ELECTRONICS: 16 feet of 8 gauge sheathed marine wire to the console and 13 feet to the bow, run from one fused connection at the battery. Your graphs stop sharing a circuit with bilge pumps and livewells.

FOUR DEVICES, ONE BATTERY: Wire a fish finder, GPS, light bar, and one more accessory to a single 12V battery through four separate quick-connect leads. Unplug the whole kit or just one device, no tools needed.

DEDICATED CLEAN POWER SYSTEM FOR MARINE ELECTRONICS: Unlike factory boat wiring, the Sea Clear Power harness delivers clean, direct battery power to your fish finders, GPS units, LiveScope, ActiveTarget, MEGA Live, and other marine electronics. Reduce voltage drop, electrical interference, and inconsistent performance for a more dependable system.
Test Your Connection With a Multimeter Before Powering On
To ensure a proper connection before powering on your fish finder, start by testing the circuit with a multimeter. Set the multimeter to DC voltage and measure the battery’s voltage by placing the red probe on the positive terminal and the black probe on the negative terminal. A healthy 12-volt battery should read between 12V and 12.6V; readings below this indicate a weak or discharged battery. Also, confirm that the voltage remains stable at the fish finder’s power plug. A significant drop between the battery and the device suggests damaged wiring or poor contact. A fully charged AGM battery typically shows around 13.2 volts, confirming readiness for operation.
Next, verify the polarity at the power leads. Use the multimeter to ensure the red probe contacts the positive wire and the black probe the negative. Reversed polarity could cause damage to the fish finder. Then, switch your multimeter to continuity mode to check the fuse and wiring. Remove power from the system and test the fuse by placing the probes at both ends. A good fuse will show near-zero resistance, while an open circuit indicates a blown fuse or broken wire. Only proceed to power on the fish finder after confirming correct voltage, proper polarity, and intact wiring. These precautions help prevent potential damage caused by wiring errors.
Seal Connections With Marine-Grade Wire and Dielectric Grease
After verifying proper voltage, polarity, and continuity with your multimeter, sealing your connections against moisture and corrosion is crucial. Use tinned marine-grade wire, which features fine-stranded construction and tinning that significantly resist corrosion and electrolysis compared to standard automotive wire. This type of wire acts as the first line of defense against harsh marine conditions. For additional protection at the display end, consider using a night vision camera designed for marine use, which often includes sealed connectors and corrosion-resistant housings. For the best results on a small vessel, consult a top depth finders for small boats review to ensure your display unit matches the ruggedness of your wiring. Like marine speakers, marine-grade wire is designed to withstand constant exposure to saltwater and UV radiation.
When sealing the connector itself, apply a thin layer of dielectric grease around the exterior and the O-ring seal, avoiding contact with the metal contacts. The grease forms a barrier that blocks moisture, salt, and vibration from reaching the connection. Make sure the connector is securely crimped before applying the grease; the grease is only for sealing an already solid connection. Always clean and dry the terminals beforehand to ensure good adhesion.
Use only a small amount of dielectric grease—just enough to cover the surface lightly. Overapplication can cause mess and potentially interfere with the connection. Taking this extra step provides a significant boost in the longevity of your marine electrical connections, especially in environments where exposure to saltwater and moisture is constant.
5 Wiring Mistakes That Can Damage Your Fish Finder
Using improperly sized wires can severely damage your fish finder. An undersized wire causes a voltage drop, which can lead your unit to reboot or freeze unexpectedly. Loose or corroded connections are another common mistake; they create intermittent shutdowns, disrupting your fishing experience. Sharing power with noisy boat circuits can introduce electrical interference that distorts the fish finder’s display. To avoid these issues, always run a dedicated, direct feed from the battery using the correct wire gauge and a properly rated fuse. This ensures stable power delivery and protects your device from potential damage. For a top-tier unit, the Garmin EchoMap UHD 93SV with GT54 transducer is reviewed for reliable performance when properly wired. To further ensure success, compare your unit against reviews of the best fish finder portable models that prioritize stable power management.