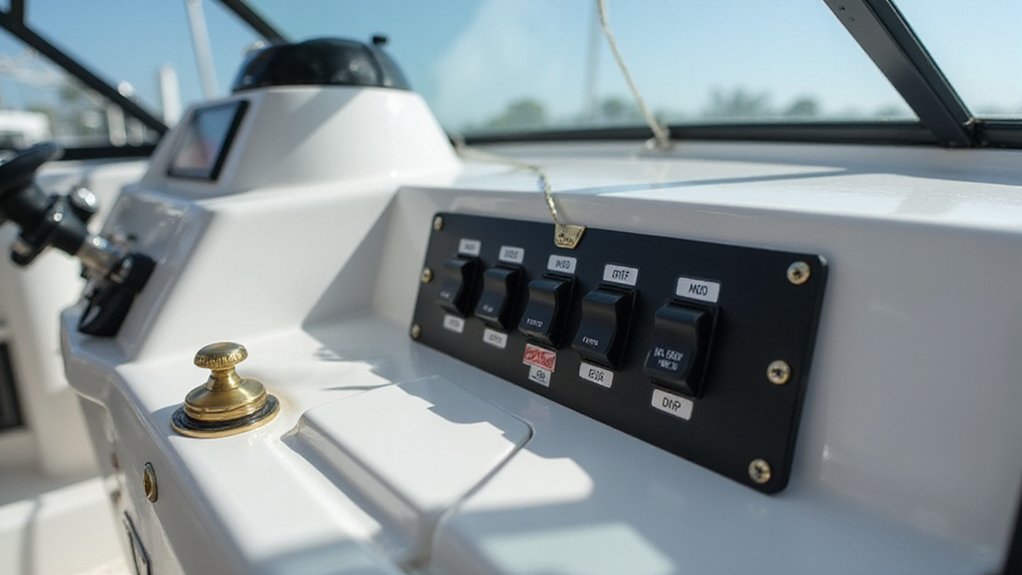
Ever wondered how to wire a boat switch panel properly? The right setup ensures safe, reliable operation of all your boat’s accessories.
By choosing the correct locations, wiring with marine-grade components, and following a step-by-step process, you can create a system that’s both functional and durable.
Keep reading to learn the essential steps for a clean, secure installation.
Plan Your Marine Electrical Panel Location and Layout
Choose a location that stays dry, accessible, and safe. The best spot is in the driest practical area, shielded from spray and dripping hatches. An enclosed, dead-front design ensures moisture protection on both sides of the panel.
Position it for easy reach from the helm, but avoid tight lockers—clear visibility of breakers and labels is essential. Maintain at least 24 inches of working space in front of the panel and 18 inches behind if accessing from the rear. Keep the panel away from battery compartments and zones with flammable vapors to reduce fire risk.
To minimize cable lengths, choose a placement that shortens run distances. For AC panels serving as the main disconnect, locate them within 10 feet of the shore-power inlet. Proper placement improves safety, reduces clutter, and simplifies maintenance. For anglers relying on electronics, consider integrating your panel near a quality saltwater fish finder to streamline wiring and maximize helm organization. Reviewing top fish finders for boats can help you select a model that fits your electrical layout and fishing needs. Additionally, consulting top speedometer picks can ensure your helm gauges match the performance and reliability required for your boat adventure.

IP65 DUST & WATERPROOF FOR MARINE ENVIRONMENTS - Rated IP65 per IEC standard: dust-tight and protected against low-pressure water jets from any direction. Sealed switches, USB/power outlet caps, and a rubber gasket block moisture, rain, salt spray, and debris from damaging internal circuits.

PREVENT SNAP AND ZIPPER STICKING: Rub our snap and zipper lube stick directly on to difficult snaps and zippers to aid with opening and closing! A waterproof lube that stands up to the elements and keeps zippers or snaps working with ease.
Pick Marine-Grade Wire, Terminals, and Breakers
Start your wire gauge selection by choosing stranded, tinned-copper boat cable rated for UL 1426. This ensures reliable performance in a marine environment and prevents corrosion. Avoid automotive wire, as it tends to corrode quickly in saltwater and humid conditions. For optimal sonar performance, consider pairing your system with a top depth finder that matches your panel’s power requirements.
When selecting terminals, use marine-grade, tinned-copper ring terminals with heat-shrink, adhesive-lined barrels. The heat-shrink with adhesive seals out moisture, preventing corrosion, while the ring terminal design provides a secure connection on studs that can withstand vibration. Match each terminal’s barrel size precisely to your wire gauge to achieve a solid, reliable crimp. Use a ratcheting crimp tool, which applies consistent pressure, rather than a cheap plier-style crimper that can damage the terminal or wire.
For breakers, choose marine-rated, DC-compatible models built specifically for the harsh boat environment. Residential or automotive breakers are not suitable—these aren’t designed to endure the constant vibrations, moisture, or salt exposure on a boat. Make sure each breaker’s ampacity matches your wire’s rating to prevent overheating and nuisance trips, ensuring safety and system reliability. For powering sensitive electronics like a fishfinder, consider using a dedicated circuit with a GT56 transducer to maintain clean signal performance.

High Quality:Our marine wire is made of real copper strands and tinned to make sure conduct well,resist corrosion, high durability,flexibility,stability for a long-lasting performance

High Quality:Our marine wire is made of tinned copper to make sure good conductivity,Anti-corrosion, high durability,flexibility,stability for a long-lasting performance

High Quality:Our marine grade wire is made of tinned copper to make sure good conductivity,Anti-corrosion, high durability,flexibility,stability for a long-lasting performance
Run the Main Power Feed and Ground It Right
Run the main power feed from a battery source or main DC distribution point, not from small-gauge accessory wiring. Size the feed for the total load of all circuits, considering the round-trip wire length to keep voltage drop low and meet ABYC standards. Use appropriately thick cable that can handle continuous current and account for installation temperature derating. Place the main overcurrent protection device within 7 inches of the battery positive terminal to ensure quick disconnect during emergencies. Make sure the breaker rating does not exceed your cable’s ampacity to prevent overheating. Ground the panel through a common DC negative bus connected directly to the engine negative terminal. This creates a single, shared return path that minimizes stray current corrosion and simplifies troubleshooting. For those who enjoy both fishing and music on the water, consider a high-quality marine speaker that is built to withstand the marine environment. For ice fishing setups, a Garmin Striker 4 offers reliable sonar for locating structure under the ice. Secure all connections with marine-grade connectors and strain relief, and clearly label the main feed and its breaker for easy maintenance access. For catfish anglers wanting to locate deep holes and structure, consider reviewing the best fish finders during your outfitting process.

1.IP65 Waterproof & Weather Resistant: Specifically engineered for Starlink Mini satellite internet system, our IP65-rated extension cable fully resists rain, snow, dust, and harsh moisture. It works reliably in outdoor, RV camping, marine, and off-grid environments, protecting your power connection from extreme weather all year round
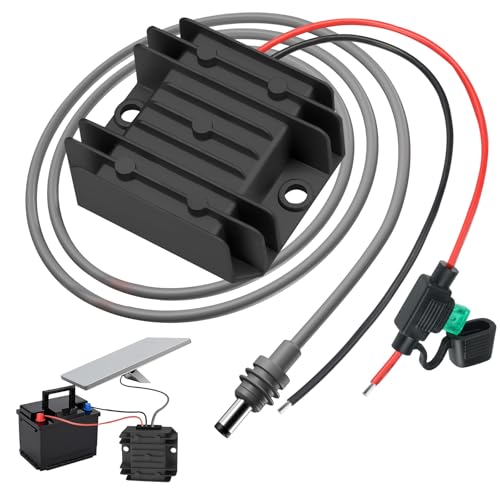
Rock-Solid 30V Power—No Drops, No Lag: Our DC boost converter takes any 9–28V input (from car, RV, boat, or off-grid battery) and delivers a precise 30V 3.5A output—accurate within ±1%—even under heavy load. This means no voltage drops, no signal interruptions, and no frustrating lag while you’re streaming H-D movies, gaming online, or on important video calls. Whether you’re deep in the mountains, out on the water, or traveling cross-country, you’ll enjoy a rock-solid Starlink connection that performs just like it does at home.

【Seamless Starlink Mini Power Solution】Get your Starlink Mini powered up in seconds! Our O-Ring to DC connector makes direct battery connections a breeze. Experience rock-solid, reliable power wherever your journey takes you—no complicated wiring required
Wire Each Accessory to Its Switch and Ground Bus
Connect each accessory’s positive lead to its switch output using marine-grade tinned copper wire sized for the current draw. Run each accessory’s negative wire back to the ground bus; this acts as the central return point. Do not use the hull as a return path, as it can cause electrical noise and corrosion issues. Bond the ground bus directly to the battery negative terminal to ensure a proper reference point for all circuits. While reviewing the guide, consider that the best switch panel often includes a built-in ground bus to simplify installation. To ensure clean circuit identification, match each switch sticker with the corresponding fuse block label during installation. For bank fishing setups, choosing a portable fish finder with a built-in battery can simplify this wiring process. For boats using mechanical speed sensors, selecting a pitot tube type matched to your hull design ensures accurate water speed readings.
Choose branch wiring sizes based on the amperage and circuit length to prevent voltage drops or overheating. Always verify that a fuse protects the positive side of each circuit, and match the fuse rating to the accessory’s current draw. Clearly mark each switch, wire pair, and load for quick troubleshooting. Confirm correct polarity before making final connections—reversed leads can cause equipment damage.

【Smart LED Diagnostic Indicator】Stop guessing which circuit failed. Our fuse block each of the 6 load features a built-in LED that lights up when a fuse blows or a short occurs, letting you identify and fix issues in seconds. *Note: A small residual voltage may be detected without a fuse due to the internal LED circuit resistance, This does not indicate a fault, leakage, or safety issue. If you are using highly sensitive testing equipment, please be aware this reading is an expected characteristic of the built-in diagnostic system.

【Terminal】- Negative bus bar 12v marine, 4 x M8 (5/16")terminal studs and 6 x M4 (#8) screw design.

What You Get: 150A Negative Bus Bar kit includes 2x stainless steel M6 studs, 6x M4 screws, 6x adhesive heat-shrink terminals, 2x extra screws, and a transparent dust-free protective cover for secure wiring
Mount, Seal, and Test Every Circuit Before Going Live
Before going live, you must disconnect all power sources to ensure safety. Use an ohmmeter to verify continuity and correct terminal mapping, confirming that your wiring matches your circuit design. Next, employ a multimeter to check voltage levels and ensure readings are within expected ranges. Turn on each branch circuit individually, verifying that load labels correspond correctly to the circuits. For comparison, the Garmin Striker 4 fishfinder offers reliable performance in marine environments, emphasizing the importance of quality components in your setup. Understanding how to adjust transducer sensitivity helps prevent false readings from debris and thermoclines. Selecting a top electronics box for your boat can further protect sensitive components from moisture and physical damage.
When mounting the panel, select a dry, protected location that minimizes direct water contact on both the face and back side. Cut the opening precisely so the panel sits flush; this ensures an even gasket compression for a dependable seal. Fasten the panel with corrosion-resistant screws, tightening them gradually in a cross pattern to maintain an even seal and prevent distortion.
Apply a continuous bead of marine-grade sealant around the cutout before seating the panel. This step prevents water from seeping behind the panel since water intrusion can cause corrosion and electrical faults. Also, apply sealant around wire-entry points and connector backs to protect against moisture ingress and maintain system integrity.
After installation and initial testing, turn on each circuit one at a time, monitoring to ensure each load operates safely and that labels match the circuit loads. Inspect all fasteners, gasket edges, and sealant application to confirm they remain properly seated and effective. Finally, document the test results thoroughly, recording continuity, polarity, and circuit functionality for future reference.

【Size】- Outer size of the project box: 7.87"x 4.72"x2.95"(200 x 120 x75 mm); Inner size of the project box:7.52" x4.37" x 2.68" (191 x111 x68mm)

【Specifications】Product name: Electrical Box; Waterproof rating : IP65; Qualification:CE、ROHS; Material: ABS, PC; Net Weight: 190g; Main Color: Gray,Transparent.

【Specifications】Product name: Electrical Box; Waterproof rating : IP65; Qualification:CE、ROHS; Material: ABS; Net Weight: 190g; Main Color: Gray.