Having trouble understanding what your fish finder is showing or how to set it up? Knowing how to interpret sonar images and properly mount your device can make a big difference in your fishing success.
This quick intro will guide you through the basics to help you get started and find fish more easily. Keep reading for step-by-step instructions.
Power On and Read Your Fish Finder Display
Power on your fish finder by pressing the main power button and allowing the splash screen to fully load. Check the battery voltage readout to ensure proper battery maintenance, preventing dim screens or sudden shutdowns. Confirm the display illuminates evenly and that no warning icons appear, serving as a basic display calibration check. Make sure the sonar is active and not in standby or simulator mode. View the screen as a moving timeline: the right edge shows the newest data below your boat, while the vertical axis represents depth. Read from left to right to interpret older returns. Locate the depth scale and the solid bottom line—these serve as your key reference points for reading fish arches and bottom contours effectively. For catfish anglers, selecting a model with a wide cone angle helps cover more water near the bottom where catfish often hold. Understanding these reference points also enables you to identify different bottom compositions like mud, sand, or rock for better lure selection. For enhanced visibility in low light, consider a fish finder built with LED-lit displays inspired by the same quality standards used in top marine speakers.

WHITE & BLACK BACKGROUND: This wireless fish finder comes with clear LED display and 2 screen background selectable. It's easy to read the screen in bright sunlight or at night. This is a great partner for you to go Ice Fishing, Lake Kayak Boat Fishing.

🌟【5" IPS Display & True 1080P HD Clarity 】Experience a real upgrade in underwater visibility. This 5" IPS underwater fishing camera delivers true 1080P HD, capturing fish movement, size, and species with crystal-clear detail—without the distortion or lag common in 1000TVL models. Instantly judge how fish react to your bait and adjust your technique in real time. The color-optimized, fish-friendly display helps avoid spooking your target, giving you a sharper view and a higher catch rate.

【4.3" HD LCD Screen with Real-Time Underwater Viewing】Featuring a 4.3-inch HD display and a 720P underwater fishing camera, this system delivers clear real-time images of fish movement and underwater structures. Whether ice fishing, lake fishing, or boat fishing, it helps anglers locate fish more efficiently and improve catch success.
Mount the Transducer for Accurate Sonar Readings
Mount the transducer on a clean-water location on the transom, avoiding turbulence behind strakes or steps. This ensures smooth water flow for reliable sonar readings. For boats with stepped hulls or deep-V designs, a thru-hull transducer can provide a cleaner installation by eliminating turbulence entirely. Position the transducer slightly below the hull—about 1/8 inch—to maintain consistent contact with the bottom at speed. Keep the face parallel to the waterline, using shims if necessary to correct hull angle. Confirm that the sonar beam stays clear of propeller wash and keel obstructions to prevent interference. Proper mounting minimizes bubbles and drag that can block readings. Before drilling holes, temporarily position the transducer and test it in shallow water. Adjust the depth or angle if readings jump or become inconsistent. Seal the mounting holes well to prevent leaks, and route excess cable loosely to reduce noise and strain. For side imaging transducers, ensure the motor lower unit clearance when trimming to avoid impact. Selecting the right fish finder for boat will improve readability regardless of your hull type. A fuel tank sending unit can also be mounted similarly to ensure accurate fuel level readings without interference.
Adjust Range, Frequency, and Sensitivity for a Clearer Picture
Adjusting the range, frequency, and sensitivity settings is crucial for a clearer underwater picture. Start by setting the range to approximately double the actual depth you are monitoring. For instance, if the bottom is around 50 feet, set the range to about 110 feet. This avoids crowding the display with too many echoes and helps separate targets more effectively. Most modern units feature High Chirp technology, which sweeps across multiple frequencies for clearer, multi-target images in shallow water. For reliable communication on the water, consider pairing your fish finder with a marine CB radio for improved coordination and safety. Understanding how Garmin ECHOMAP integrates sonar and navigation can further enhance your fishing strategy. For the best results in deeper water, a unit like the Garmin Echomap UHD2 93SV with its GT56 transducer provides exceptional target separation and clarity.
Select the appropriate frequency based on water depth. Use high frequency, around 200 kHz, for water under 100 feet to capture sharp details. Switch to low frequency, between 50 and 83 kHz, for greater depth. Transducer positioning influences your choice, but water clarity is the biggest factor for sensitivity adjustments. In clear water, set sensitivity between 65 and 75 percent, while in murky conditions, lower it to 55–70 percent to reduce noise. Increase sensitivity until clutter appears on the display, then back it off slightly to avoid excess noise. Change only one setting at a time to maintain a clear, accurate view.

Dual Beam Sonar: Choose from a narrow and a wide beam for great detail or a generous coverage area, helping you identify fish, structure and contours.

Product Overview: White transducer mounting plate with 2 pcs screws, 12" X 3.5" X 0.75"

FISHREVEAL: Fish are easier to find and easier to identify. FishReveal combines the target separation of Lowrance CHIRP sonar and the high-resolution images of structure from DownScan Imaging to makes fish light up on your display.
Read Fish Arches, Bottom Contours, and Underwater Structure
For identifying bottom features, look at the thickness and brightness of the bottom line. A thick, bright line usually reveals a hard bottom such as rock or gravel. A thin, faint line might mean soft mud or sand. Steep changes in the bottom line signal drop-offs, ledges, or steep underwater walls. Mounds or humps that rise before dropping away mark underwater structures like reefs or ridges. Structures like rock piles often appear as jagged, irregular bumps, while cover like weed beds shows as fuzzy, more diffuse returns. Fish tend to relate to these features—concentrations often gather near edges, drop-offs, or structures offering cover. On the screen, these fish often appear as fish arches that indicate a target passing through the sonar beam. Understanding how fuel sending units work can help boaters interpret electronic signals for depth and structure readings. To make the most of these readings, ensure your device is set up with a chartplotter and fish finder combo that offers high-resolution sonar and GPS mapping for precise navigation.
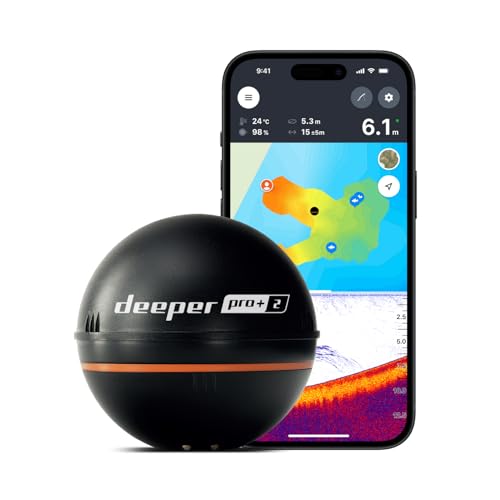
READY TO PERFORM: Wide beam, mid, and narrow beams make covering large expanses or drilling down on specific spots available at your disposal; Ideal for elite anglers who want to take their matchplay to the next level

READY TO GO - Easily find where your next catch is hiding with the Deeper START Fish Finder! The lightweight and sleek design makes for a seamless reel without any messy wires or fiddly external batteries required. Ideal for shore anglers and family trips who want to get on with catching!

It is a portable and castable fish finder that comes with a wireless sonar probe/sensor. The maximum distance between the sensor and the handheld unit is 262FT/80M. No need to drill hole in your boat hull to install the sensor any more. Two small holes on the sensor allow you to tether it with your fishing line and cast it onto water as far as you want.
Match Boat Speed to Your Sonar’s Scroll and Ping Rate
Match your boat speed to your sonar’s scroll and ping rate is essential for clear and accurate data display. Set your scroll speed equal to or just slightly above your boat’s speed. This helps prevent targets from appearing stretched or compressed, maintaining sonar clarity. When drifting slowly, increase the scroll setting so you can read each return longer. For slow trolling or idle scanning, a midrange scroll setting is usually most effective.
Your sonar’s ping rate must also align with your speed. Faster travel requires higher ping rates to keep detail consistent and avoid gaps in the data. At around 4 mph, a low ping rate can leave spaces between sonar pulses, diminishing bottom detail. Boost the ping rate when moving quickly to prevent smearing or loss of information. When stationary or fishing in one spot, set both scroll and ping rates high to maximize clarity. If you’re unsure, start with the Auto scroll setting and then manually adjust if the display appears laggy or compressed. For precise control of data display, an oil pressure gauge with sensor offers similar attention to matching sensor speed to environment for accurate readings. Understanding how CHIRP technology transmits a continuous sweep of frequencies helps ensure your sonar returns are clear even at varying speeds.
Mark Waypoints on Productive Structure and Fish Schools
Mark a waypoint precisely at the moment a productive structure or fish school appears on your screen. Waiting even a few seconds can cause the target to scroll off your view, forcing you to rely on memory rather than visual cues. When placing a waypoint, center your cursor directly on the back or most prominent part of the structure or school before saving. Label each point clearly with information such as structure type, depth, or date to make it easy to identify later. Adding symbols or different colors to mark high-percentage spots versus general locations can help prioritize your search zones. A failing oil pressure gauge often results from a faulty sending unit, which can be confirmed by testing its resistance with a multimeter. For accurate readings, the transducer must be mounted so the bottom of its housing sits level with the hull. Proper placement of the all-round white light is also critical for visibility and legal compliance when operating at night.
When bait balls or fish arches show, mark each separate school immediately. Their positions tend to shift with currents and changes in light, so saving each school individually enables you to create a repeatable trolling pattern around these edges. Use the track back feature to revisit past bait locations and preserve critical school data even if visual cues fade. Dense clusters of fish near cover, or around contour changes like ledges or humps, are often feeding zones—pay special attention to these areas because fish behavior is closely linked to underwater terrain features.
After saving your waypoints, review them carefully to connect productive marks into an efficient route. Returning to these key spots on subsequent trips saves time searching and helps refine your approach, increasing your success on the water.
Tune Sensitivity and Frequency for Murky or Deep Water
In murky or deep water, adjusting your sonar’s sensitivity and frequency is essential for clear readings. Start by setting the sensitivity to approximately 50-70% in murky conditions to minimize suspended-particle clutter, and reduce it by 10-15% if water clarity worsens. In deep water, increase the sensitivity to 70-85%, or even up to 100% beyond 100 feet. This helps compensate for signal loss at greater depths.
First, optimize the sensitivity by viewing the bottom echo, then gradually raise the gain until weak targets are visible without introducing noise. Match the frequency to the water depth: use low frequencies such as 83 kHz for deep water and higher frequencies for shallower areas. A top-rated castable fish finder often includes automatic frequency tuning for consistent performance. After setting sensitivity and frequency, adjust your range to the appropriate depth. The goal is to select the highest sensitivity that remains clear and readable at your current depth and water clarity. For the best sonar performance, consider using portable fish finders that are designed to excel in varied conditions. Before heading out, verify that your device’s software files are current to prevent outdated sonar algorithms from hindering your adjustments.