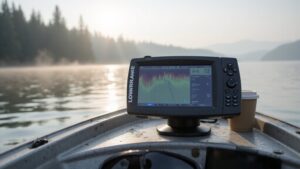
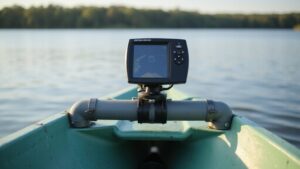
Ever wonder how to mount your transducer through a scupper hole without drilling into your hull? Building a DIY transducer mount offers a simple, hull-friendly solution that keeps your boat’s integrity intact.
With just some basic materials and careful measurements, you can create a secure, waterflow-aligned setup. Keep reading for a straightforward step-by-step guide to make it happen.
Materials You’ll Need for a DIY Scupper Mount
You’ll need several key components before starting your DIY scupper mount. Begin with a PVC pipe or nipple measuring between 1¼-inch to 2-inch in diameter, typically 4, 5, or 6 inches long, to match your scupper depth. This ensures a snug fit and proper support for the transducer. Next, gather your transducer along with its factory hardware to secure it properly. For anglers using high-performance units, pairing this mount with the GT56 transducer delivers exceptional target separation and clarity on detailed maps. You should also prepare the tools and parts from a standard trolling motor installation guide for a clean wiring setup.
To center the transducer, pick up a screw-on cap or reducing bushing. For adjustable compression and a secure hold, choose a wing nut and a threaded rod. Bungee cords and zip ties are essential for locking everything firmly in place and preventing movement during use. Use stainless or corrosion-resistant fasteners for longevity, especially in wet conditions. Reinforced knots stay tight over extended periods, maintaining stability even in rough water. For a more permanent installation, consider how top fish finders often include mounting templates that can guide your alignment.
For finishing touches, select mounting adhesives to affix clips and a weatherproof sealant or paint to protect cut edges from moisture. Your toolkit should also include a drill, a hole saw for cutting precise openings, and a file to smooth rough edges. Proper preparation with these materials ensures your DIY scupper mount will be durable and functional.

DURABLE THERMO-PLASTIC FLAPPER ENSURES LONG-LASTING PERFORMANCE - Crafted from high-quality thermo-plastic, our scupper valve flapper is resistant to sun and chemical damage, providing reliability in harsh marine conditions without curling or rotting.

DURABLE THERMO-PLASTIC FLAPPER - Flexible thermo-plastic flapper resists sun and chemical exposure so it will not curl, rot, or lose sealing ability in harsh marine environments.

ENHANCED WATER DRAINAGE - Our premium flush mount scupper valve features a durable thermo-plastic flapper designed to withstand harsh marine conditions, ensuring your boat stays dry and safe from unwanted water intrusion.
How to Measure Scupper Hole Diameter and Depth for a Snug Fit
To measure your scupper hole diameter and depth for a snug fit, start with the diameter. Focus on the narrowest usable section in the round, straight part of the hole, not at the flared openings. Use a caliper or a flexible measuring tape to take readings at multiple points around the hole to account for tapering or burrs. Record measurements in both metric and imperial units for compatibility checks. Aim for a diameter close to 0.95 inches to 1.5 inches, which is a typical compatibility range for most mounts. For catfish anglers, selecting a model with a reliable fish finder ensures you can read structure and thermoclines where catfish hold. Confirming your light height meets maritime compliance can also prevent citation issues at night. Using a dedicated transducer bracket can simplify the process of securing the unit to the mount.
Next, measure the depth from the top opening of the hole down to the bottom exit. Use a rigid ruler or a depth rod by inserting it carefully along the hole’s path. If there is an internal step or obstruction, measure to that point to avoid underestimating the necessary depth. Most mounts handle depths from approximately 1.58 inches to 9.25 inches. Accurate depth measurement ensures your mount will fit without bottoming out or being too loose.
Finally, confirm the shape and taper of the hole. Look for mold seams or rough edges that could reduce the effective usable diameter. To achieve a snug fit, test the mount or its section that inserts into the scupper before final assembly. The mount should fit tightly without requiring force; a loose fit can cause leaks or instability, while a forced fit might damage the hole or the mount.

For use mounting transducers in kayak scuppers

NO-DRILL SCUPPER MOUNTING: Uses an existing kayak scupper or drain opening, allowing transducer installation without drilling or permanent hull changes

[Probe Compatibility] A precision mount custom-tailored for four specific sonar probe sizes, designed to securely anchor the probe within the drain hole.
Step-by-Step: Build Your Scupper Mount in 5 Steps
To build your scupper mount in five steps, start by gathering the necessary parts and tools. This includes a PVC pipe for the body, a top cap, bungee cord, and stainless steel hardware for corrosion resistance. Begin shaping the PVC body to fit your scupper hole by cutting it to the desired length. Notch one end if your transducer requires a flat seat for proper positioning. Unlike commercial options, this DIY version is cost-effective but you may still want to compare top transducer mounting brackets for alternative features. Drill mounting holes and a pass-through for the cable before assembling the parts. Be sure to smooth all edges with sandpaper to avoid snags and prevent stress cracks over time. The total project cost is under $8 CAD, making it a highly inexpensive DIY solution. For a reliable installation, ensure critical sealing and alignment steps from the guide are followed to prevent water intrusion. A horn relay wiring guide emphasizes clean and reliable connections to avoid electrical faults in marine environments.
Next, thread the bungee cord through the drilled holes, ensuring even tension. Fit the top cap onto the assembly. Use a stainless steel bolt and wing nut to clamp the parts together securely, which helps stabilize the mount. Tighten just enough to hold everything in place—avoid over-torquing to prevent cracking the plastic. Insert the assembled mount into the scupper opening from below, seating the shoulder snugly and checking that it stays centered without wobbling. When everything is stable, fully tighten the fastener, tie off the excess bungee, and trim any remaining material. Lastly, inspect all contact points for burrs or rough edges before placing your transducer or watercraft in the water.
How to Attach the Transducer and Route the Cable Without Pinching
To attach the transducer without pinching the cable, ensure you mount it so that its face runs parallel to the water flow, which helps produce cleaner sonar readings. Center the transducer snugly against the mounting surface but avoid over-tightening the fasteners, as this can deform the bracket and damage the cable. If the hardware tends to compress or pinch the cable, consider alternative mounting methods such as using straps or bungee cords to cushion the cable path. For better results on a jet ski, always select a top fish finder designed to withstand high-speed vibration and water impact, such as those reviewed for superior performance and value in rugged conditions. A blocked pitot tube can give false speed readings, so never assume your sonar’s speed data is accurate without cross-checking.
Route the cable with a service loop near the connector to prevent tension during vessel movement. Before any entry point through the hull or equipment mounting, create a drip loop—this means hanging the cable so excess slack falls below the connection, reducing the risk of water intrusion. Secure the cable every 12 to 18 inches with adhesive clips to keep it organized and prevent unnecessary movement. Also, use small loops near rotating joints for shock absorption when routing the cable.
Avoid sharp bends at the scupper or mounting edge; instead, use split loom tubing or a dedicated cable guard where the cable contacts the hull to distribute stress evenly. Keep tie-downs or clips light so they do not pinch or deform the cable under tension. Regularly check that no hardware or moving parts can compress or trap the cable during operation, ensuring reliable performance and minimizing damage risks.

【Enjoy Fishing Life Better】 Frustrated because the picture on your electronics wasn’t the same as advertised? 7400931 MHX XNT Transducer Bracket is a nice addition for your boat that helps your skimmer transom mount transducer to find fish easier to find and get the right scan image. Efficiently improve your transducer running performance without letting go of any fish!

Professional:The transducer mounting plate is specially designed for XNT transducer, Compatible models XNT 9 20, XNT 9 20 T, XNT 9 QB 90 T, XNT 9 QB 90, XNT 9 SI 180 T

🛥️[Product Overview] Stern Pad, Screwless Transducer Mounting Plate kit, Marine-Grade Transducer Mounting Board Hardware Kit.
Testing Your Scupper Mount: Fix Vibration, Looseness, and Poor Sonar
To test your scupper mount effectively, follow these steps to ensure stability and signal clarity. First, run a vibration test at the dock or driveway by powering on your fish finder. Watch for screen flicker, noise bands, or an intermittent bottom lock, which indicate potential issues. Shake the mount gently by hand; any visible movement suggests sonar degradation once paddling begins. Simulate paddle strokes to check for flex under side loading. A secure mount should show no drift and retain signal clarity during repeated jostling. For a reliable electrical connection, ensure you connect the fish finder to your battery using the correct gauge wire and inline fuse as outlined in the guide. For comparable audio and navigation upgrades on a budget, consider a marine stereo that offers clear performance without sacrificing durability. Before heading out, verify you have a registered EPIRB aboard for emergency signaling if you venture offshore.
Check the fit of your scupper insert—it should slide in easily without force. Overtightening can deform components and cause more issues. Tighten until the mount is seated properly, then recheck fasteners after your first water run because vibrations can loosen connections. If the mount shifts under paddle force, you risk losing stability and clear sonar returns.
Once on the water, observe the sonar display. A stable bottom trace with no fuzzy returns or dropouts indicates a good mount. If turbulence causes noise or the picture degrades at speed, either reposition the mount or add spacers to remove play. At rest, the sonar should be clear; if it worsens with speed, you may need to address stability or depth issues with the setup.

Replace Worn Out Flapper Scuppers - the Flow Max ball scupper features multiple mounting openings to make retrofits quick and easy - no filling holes or re-drilling

【Superior Shock Absorption】High-performance rubber isolators absorb vibrations and shocks, protecting sensitive electronics from damage during marine operations. Ideal for trolling motors and boat mounts.
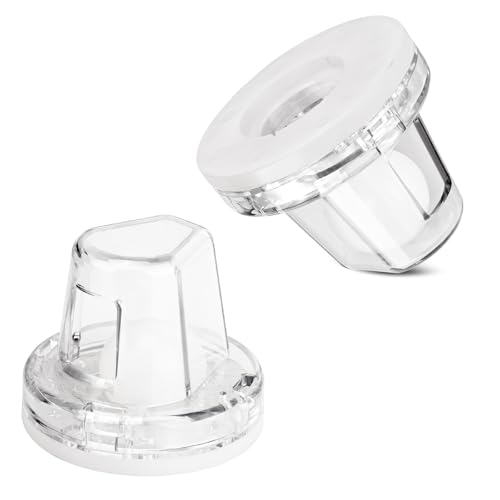
【Widely Applicable】Self bailing scuppers for boats is designed for hull tubes above 1-1/8 inches, with a diameter of 3 inches and a height of 2-1/4 inches, bailing scupper is compatible with most boat types and sizes, ensuring a perfect fit for your boat.
Why a Scupper Mount Beats Drilling: No Permanent Mods Needed
A scupper mount beats drilling because it uses your kayak’s existing drain holes, eliminating the need for permanent modifications. This means you avoid common pitfalls like mis-drilling, damaging reinforced hull sections, or creating water ingress points. Since you won’t need to seal new penetrations, your kayak’s hull remains intact, helping maintain its resale value. Compatibility is broad—many scupper sizes work with popular transducers, making the setup straightforward. For example, wireless depth finders offer a clean installation without cables routed through scupper ports. Installation involves simply inserting hardware into the existing holes, requiring no adhesives or curing time. When you want to remove or reposition the mount, it’s just as easy—no tools or modifications needed. This reversibility keeps your kayak versatile for upgrades, transport, or sale, all while providing stable, vibration-free sonar performance without risking irreversible damage to your vessel. For precise navigation, you can also pair your setup with a reliable boat compass to ensure accurate heading readings. You can also use a scupper plug to create a watertight seal around the transducer cable, ensuring no water enters the hull. For those seeking quality and performance, pairing your mount with a marine-grade amplified speaker system ensures clear audio even in rough conditions.
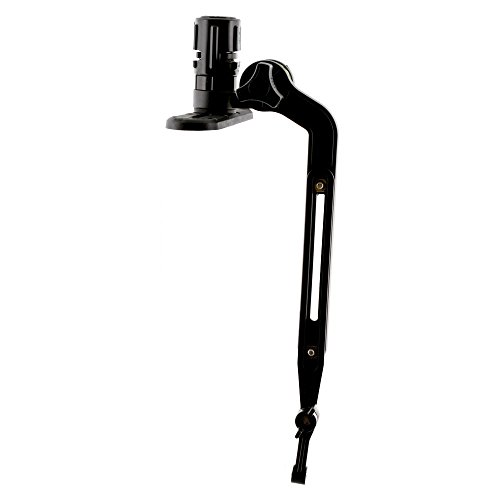
Designed for kayak and SUP anglers needing an easy way to install transducers for Transport as well as other Scotty accessories

Complete Kit + Broad Compatibility: Everything you need is in the box—mount base, kayak gear track, transducer arm, and hardware. Compatible with most Garmin, Lowrance, and Humminbird fish finders. One mount, endless possibilities.

COMPATIBLE WITH - Transducer Mount Bracket Compatible with OLD TOWN Sportsman Kayaks.Works on all Garmin transducers with the 5 bolt configuration!