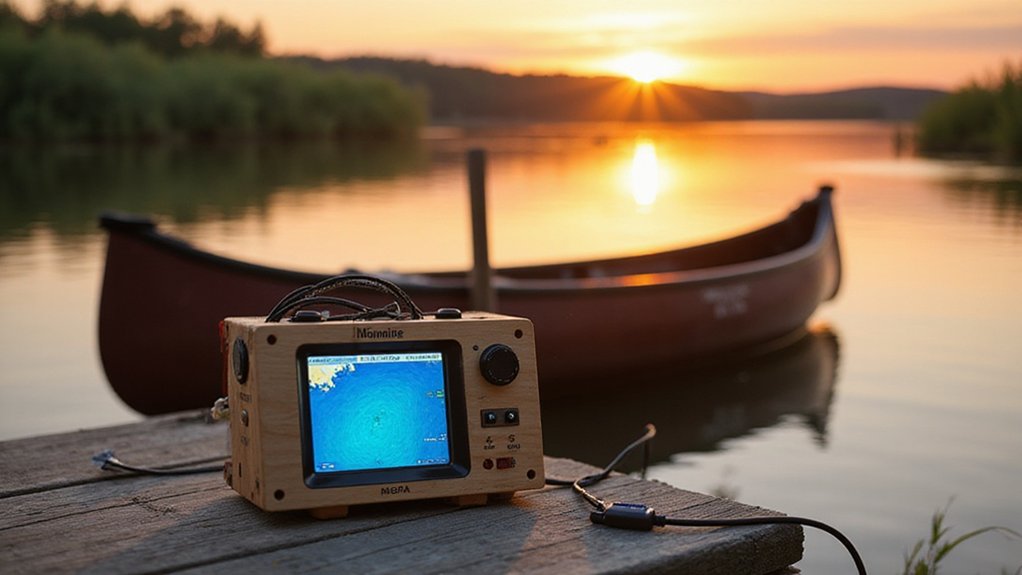
Looking to save money by building your own portable fish finder box instead of buying a kit? You can cut costs by around $35 to $85 by choosing your own case and assembling it yourself.
With a few basic components like a 12V battery, waterproof connectors, and a secure display mount, you’ll be ready for your next fishing trip.
In this article, you’ll learn every step to create a sturdy, waterproof setup that works just as well as commercial options—if not better.
Stay with me for the full breakdown to get your fish finder ready to go.
Why Build a Portable Fish Finder Box Instead of Buying One?
Building your own portable fish finder box is a smart alternative to buying one. It typically costs between $35 and $85, especially if you reuse spare batteries or adapt existing tool batteries. You avoid paying premium prices for commercial battery kits, as a basic DIY setup can provide the same reliable power. For those who want a professional-grade result, reviewing the top fish finders for boats can help guide your choice of unit to mount in the box. Many of the best options, like those reviewed in the Humminbird Helix 5 with GPS guides, offer excellent GPS accuracy for marking waypoints. For serious anglers, comparing quality and performance across top brands ensures you select a unit that matches your fishing style.
Customization is another major benefit. You can size the box to fit your specific fish finder unit, add a charging port, and incorporate accessories like a switch or transducer storage. The extra space also allows you to store your phone or tackle, which most pre-made boxes lack. Using a small plastic toolbox from Bunnings and a 4Ah battery creates a waterproof power solution for under $30.
Portability is significantly improved. You create a self-contained kit with a handle for easy carrying, making it simple to move between kayaks, boats, or the shoreline without reinstalling hardware. This type of setup also helps protect your electronics from theft and shocks, ensuring dependable performance during full days on the water—all without the high factory price.
Pick Your Box: Toolbox, Cooler, or Watertight Case
Choosing between a toolbox, cooler, or watertight case depends on your specific needs for protection, portability, and budget. A toolbox offers easy modifications and sturdy walls that support your gear, making it a convenient option for customization with paint or decals. However, its material isn’t highly resistant to water, so you’ll need to add sealing to protect against light splashes. A cooler provides excellent insulation and buoyancy, which helps protect your finder from impacts and floating if dropped in water, but its bulk can make it less portable. For full submersion protection, a watertight case is ideal, featuring hard polymer shells and IP67-rated gaskets that ensure durability against impacts and moisture. Proper placement of the temperature gauge is critical to avoid false readings from engine heat or sun exposure, ensuring your fish finder’s sensor data remains accurate. The GT56 transducer is reported to deliver exceptional clarity for detailed underwater imaging, and is a perfect fit for this build. An Apache 1800 hard case is an excellent example of a watertight case that uses foam inserts to snugly house the electronics and prevent movement. Your best choice depends on how much protection you need versus how portable and budget-friendly your solution should be. For reliable communication on the water, a top-rated marine band radio ensures you stay in contact while fishing.

Travel Storage Case: This hard EVA case mady by EVA is lightweight enough for daily use or travel.The weight of this case waterproof is 0.43lb, you can just tie it on wrist by its handstrap and won’t feel heavy at all.Take this case to travel with your devices and fish finder,it will not only provide protection to your device but also easy to carry and store.

Impact-Resistant Hard Shell 16" Airtight Marine Fishfinder Case: Features customizable foam for GPS fish finders, marine GPS chartplotters, transducers, sonar boat depth finders and accessories. Hand pluck the interior foam to the size required

Hard Shell Protection: This CASEMATIX rugged waterproof fish finder carry case is compatible with a variety of portable fish finders & depth finders for boats, transducers and fishing boat accessories. For everyday storage or Jon Boat Accessories
Parts You’ll Need for a DIY Fish Finder Box
Once you’ve chosen the right box, gathering the necessary parts ensures a clean and reliable setup. Start with a 12V battery pack, but always include an inline fuse on the positive lead to prioritize battery safety. Use a fuse holder or block to keep wiring organized and accessible. Avoid hardwiring everything directly; instead, opt for battery harness pigtails with color-coded red and black leads, which simplify connections and reduce mistakes. For the connections, select water-resistant connector types like ring terminals for terminal posts and crimp connectors for splices to prevent corrosion and ensure durability. Marine-grade wire is essential because it resists moisture and corrosion, extending the life of your setup. For a budget build, you can use a 5 amp-hour battery from Harbor Freight for under $80.
For the transducer, pick up a mount along with stainless steel hardware to withstand exposure to water and weather. Use cable glands to create watertight seals where wires pass through the box, preventing moisture entry. Incorporate a waterproof switch to control power easily and reliably. To enhance moisture protection further, apply shrink tubing over connections and gel-seal connectors for extra waterproofing.
You’ll also need essential tools such as wire cutters, wire strippers, and a crimper. Using these tools correctly helps ensure tight, secure connections and prevents issues down the line. Remember, careful selection and organization of parts play a crucial role in creating a long-lasting, dependable fish finder box.
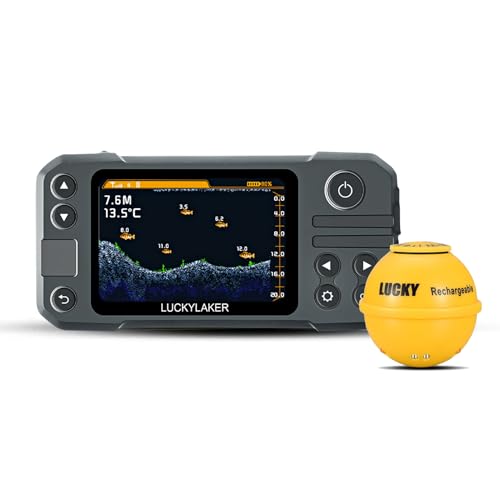
Wireless Control & Operation : Experience the ultimate freedom with the LUCKY portable fish finder, featuring a MASSIVE 853FT OPERATION DISTANCE—one of the longest ranges on the fishing market! No wires. No limits. Just cast your sonar sensor and unlock the secrets below from your boat, kayak, or shore.

【High Quality】Marine NMEA 2000 8-Way Splitter Micro-C Cable Made of PVC material, oil resistant,high temperature resistant,seawater-resistant,fire retardant,ensuring durability, corrosion resistance, and anti-rust performance.
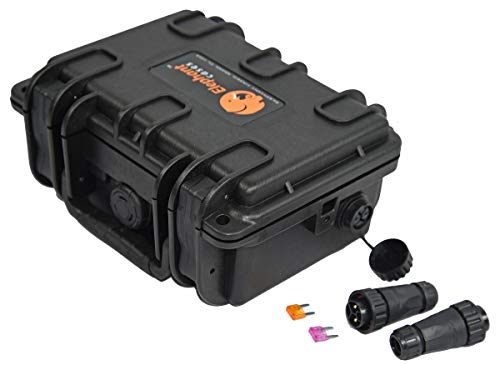
Fits standard 12V-7AH / 9AH Batteries with dimenssions of 5.9" x 2.6" x 3.7" Inches with male spade Terminals.(Battery not included)
How to Arrange the Battery, Display, and Wiring
Place the battery low and near the centerline inside your portable fish finder box. This positioning improves stability and balance, especially when the box is moved or in rough water. Keep the battery close to the display and the power entry point to minimize cable length, which helps reduce voltage drop and clutter. Secure the battery firmly with straps or brackets to prevent shifting during transport or vibrations. Ensure there’s easy access for charging without having to remove the entire setup, making maintenance more straightforward. When selecting a unit, look for models with side imaging that helps identify catfish structures along the bottom. The red wire from the power cable connects to the positive terminal of the battery for proper power delivery. For accurate speed readings on the water, consider using a top speedometer pick that integrates well with your fish finder setup. For the best performance on small boats, choose a model built for shallow water navigation that can scan narrow channels effectively.

Say goodbye to the hassle of charging multiple devices: This 12V lithium battery kit includes a 4-in-1 charging cable that supports USB‑C, Micro USB, and Lightning connectors. It can charge smartphones, GPS devices, cameras, Android phones, tablets, and other electronic devices simultaneously, Paired with this lithium battery, it keeps your devices fully charged anytime, anywhere outdoors
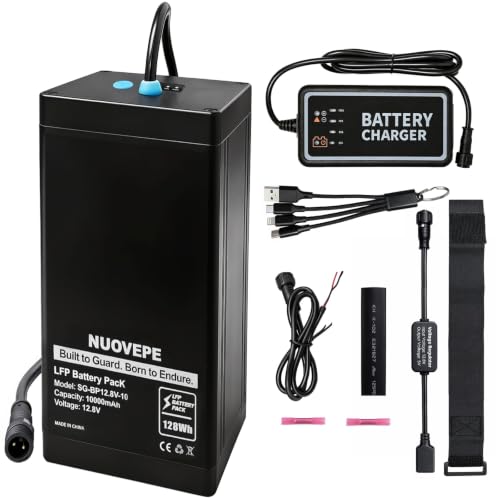
Say goodbye to the hassle of charging multiple devices: This 12V lithium battery kit includes a 4-in-1 charging cable that supports USB‑C, Micro USB, and Lightning connectors. It can charge smartphones, GPS devices, cameras, Android phones, tablets, and other electronic devices simultaneously, Paired with this lithium battery, it keeps your devices fully charged anytime, anywhere outdoors

It is a portable and castable fish finder that comes with a wireless sonar probe/sensor. The maximum distance between the sensor and the handheld unit is 262FT/80M. No need to drill hole in your boat hull to install the sensor any more. Two small holes on the sensor allow you to tether it with your fishing line and cast it onto water as far as you want.
Drill and Seal Your Portable Fish Finder Box for Splash Protection
When sealing your portable fish finder box, every hole you drill is a potential leak point. Precision is crucial. Match each hole’s diameter exactly to the gland or fitting’s size—oversized holes reduce gasket compression and increase the risk of leaks. Position penetrations high on the box wall to minimize splash exposure. Use IP-rated cable glands that seal tightly around your cables to ensure material compatibility and waterproofing. Apply silicone sealant only as a secondary barrier; it should not replace proper fittings. Clean all surfaces thoroughly before application to ensure good adhesion. For best results, refer to top picks on quality to choose a side imaging unit that will deliver clear underwater views. Inspect the continuous silicone gasket line around the lid or entry points; any twists, debris, or gaps compromise the seal. Always use sealing washers on fasteners to prevent leaks. After drilling, check for light gaps or uneven compression by shining a flashlight around penetrations. Conduct a spray test to identify weak points before heading out on the water. For optimal performance, pair your sealed box with a Garmin transducer that ensures reliable signal clarity and depth readings. Reviewing the top Lowrance fish finders for ice fishing can help you select a model with proven cold-weather performance.

【Complete Cable Gland Kit – 25 Pieces】Includes 25 pieces in 5 popular sizes: PG7 (×7), PG9 (×5), PG11 (×5), PG13.5 (×4), PG16 (×4). Covers cable diameters from 3mm to 14mm – ideal for most electrical wiring projects.

Various Size: There are 50 pieces of cable gland waterproof Adjustable 3-16mm to meet your needs.And 6 waterproof cable gland models with gaskets in a PP box.(Package includes: PG7x20 pcs, PG9x10 pcs, PG11x6 pcs, PG13.5x5 pcs, PG16x4 pcs, PG19x5 pcs)

Materials:UL approved Nylon PA66(Flammability UL 94V-2) for A.C.F parts EPDM rubber for B.D parts
Wire the Power System: Battery, Fuse, Switch, and Voltmeter
Start with a 12V DC battery as your power source. Connect the positive terminal directly to an inline fuse as close to the battery terminal as possible. This short placement ensures effective protection against short circuits by preventing excessive current from reaching the wiring if a fault occurs. From the fuse, run a wire to a switch on the positive line, allowing you to turn the power on or off without disconnecting the battery. Then, continue the positive wire to your fish finder. Connect a voltmeter in parallel across the switched supply line to continuously monitor voltage levels. Never connect the voltmeter in series, as that would alter the circuit’s operation. All negative conductors should be wired straight to the battery’s negative terminal or to a common ground bus, keeping the wiring loop short to reduce voltage drops and clutter. When selecting an inline fuse, match the fuse rating—3A, 5A, or 10A—to the current draw of your device, ensuring proper protection without nuisance blowing. Understanding key screen readouts helps you interpret voltage and sonar data for accurate results on the water. Use waterproof connections and soldering for reliable joints, and organize all wiring onto a single pole for a cleaner appearance and easier future maintenance. For additional reliability, consider using a portable fish finder battery specifically designed for consistent performance in outdoor conditions. Choosing a depth finder for boat use ensures compatibility with transducers and mounting hardware suited for marine environments.
Mount the Display and Secure the Battery Inside
Mounting the display and securing the battery inside creates a compact, portable unit. Align the display mount with the footprint of the battery box to prevent overhang and tipping during transport. Use a box sized for a 12V 7Ah to 10Ah lithium pack, with enough interior space for connectors and cable bends. Marine speakers are built to withstand harsh marine environments and resist moisture, UV rays, and salt corrosion. Secure the battery with foam padding or Velcro straps to prevent movement caused by vibration. Attach the display assembly using a quick-release track knob, allowing for easy removal without drilling. Keep the unit balanced by centering the components and manage cable exits with grommets to reduce water entry. A locking lid on the battery box ensures containment, while tidy wiring makes charging straightforward. The battery box also functions as a mounting platform for electronic accessories, integrating directly with a kayak’s track system. For saltwater use, selecting a fish finder with a high-sensitivity CHIRP sonar ensures reliable performance in deep or turbulent conditions. The Lowrance Elite FS 9 with 3-in-1 transducer offers excellent value for users needing a versatile all-in-one sonar solution. Combining these elements into a single module simplifies hardware, improves portability, and offers a robust, space-efficient solution.
Transducer Mounting Options for Your Fish Finder Box
The best transducer mount depends on how often you’ll move your unit and your preferred setup. Suction-cup mounts are ideal for temporary use—they attach quickly to smooth hull surfaces without damaging them and can be removed easily. Clamp-on mounts are better for semi-permanent setups; they use marine-grade hardware to grip the transom or trolling motor, making them easy to move between boats. For full adjustability, a universal rotating bracket allows 360-degree aiming, helping you avoid turbulence and keep the transducer facing forward or parallel to the boat’s centerline. Pole-arm mounts extend the transducer upwards by a foot or more, making them suitable for kayaks or canoes where clearance is limited. Skip through-hull mounts if your setup is portable; they require permanent drilling and sealing, which defeats the purpose of a portable fish finder box. Always choose your mounting option based on how frequently you’ll be relocating or removing the unit. For maximum performance, ensure the mount is compatible with live sonar technology for clear, real-time underwater imaging. For those seeking permanent installation, referencing marine amplifier with bluetooth reviews can help ensure your audio system matches the rugged durability of your boat.

3" diameter and approx. 1" height (compressed) neoprene rubber

Suction Cup Kit - Suction cup kit for portable skimmer transducers

Easily attaches FishTrax Transducers to any non-porous surface
Test Your Fish Finder Box Before the First Trip
Before heading out, you need to do a complete system check of your fish finder box to identify and resolve potential issues at home. Start with battery maintenance: measure the resting voltage with a multimeter. A healthy 12-volt battery should read between 12.6 and 12.8 volts. If your reading falls between 12.2 and 12.5 volts, it’s partially discharged and should be recharged before use. A voltage below 12.0 indicates weakness, while 10.5 volts or lower signals the battery is failing and needs replacement. For a fully charged AGM battery, the multimeter should display around 13.2 volts, which confirms it is ready to power the fish finder.
Next, apply basic troubleshooting steps. Verify that the battery polarity is correct, ensuring positive and negative terminals are connected properly. Inspect the inline fuse with a multimeter to confirm it’s not blown. Check the voltage at the fuse under load during startup to see if the system maintains consistent power. These steps help catch simple issues that could prevent the fish finder from operating correctly.
Power on the head unit and observe the startup process. It should perform a normal boot, with a stable display and responsive menus. Test the sonar in water — you should see reliable depth measurements, clear bottom detection, and stable readings over time. Run the system long enough to load-test the battery, making sure its voltage remains steady during continuous operation.
Finally, inspect the battery case for any swelling or leaks, which indicate damage. Verify that switches and circuit breakers function correctly. Only after completing all these checks should you consider the fish finder box ready for your trip, ensuring reliable performance on the water.