Trying to decipher what your fish finder is telling you can feel overwhelming at first. You might wonder what those lines and dots really mean and how to spot fish among the clutter.
By the end of this, you’ll understand how to read the display, identify the bottom, and spot fish figures easily.
Here’s a simple breakdown to get you comfortable with your fish finder and start catching more fish.
Reading a Fish Finder: What You Need to Know
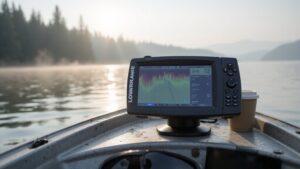
To interpret your fish finder’s screen correctly, start by understanding its layout. The right edge displays real-time data from your transducer, while the left shows older returns, creating a moving timeline. Your depth reading appears in a corner, giving quick access to the current depth. The vertical space on the screen is filled by the water column, representing the depth from surface to bottom. Fish are shown as arches, which indicates their movement through the water. Unless you’re using side-imaging, fish won’t be represented as left-or-right indicators on the main display. Recognizing these key elements helps you make accurate readings and better understand what the sonar is showing. For example, fish close to the bottom may indicate vegetation or dense cover rather than individual fish. For ice fishing, dedicated Lowrance ice fishing units offer specialized flasher or split-screen modes to improve target separation in cold conditions. When selecting a model for open water, consider boat-mounted fish finders that integrate seamlessly with your vessel’s electronics for consistent performance. A fuel sending unit failure, by contrast, requires testing the sender’s resistance with a multimeter to check for accurate readings.

Delivers uninterrupted depth readings from 2.5 to 600 feet on the largest display available on an In-Dash Depth Sounder up to 60 mph. Transducer Frequency-200 kHz

Use mount to attach fishfinders and other marine accessories to your boat

Rugged Dash Mounts for Fish Finders: Elevate your fishing experience with PROcise Outdoors' DEK-It Dash Mounts, designed to secure your fish finder screens in harsh conditions. Available in single (10-1/16in) and dual (24.75in) versions, these mounts are crafted from durable aluminum (3/16in thick) and are proudly made in the USA. They fit most flat-faced consoles and support Humminbird, Lowrance, and Garmin electronics
How to Spot the Bottom and Tell What It’s Made Of
To identify the bottom on your fish finder, look for the strongest, continuous return line at the lowest part of the screen. This line represents the seabed or lakebed. The hardness of the bottom influences its appearance: a hard bottom like rock or gravel reflects more sonar energy, producing a thin, bright line. A soft bottom such as mud absorbs more sound, resulting in a thicker, darker band. Echo strength correlates with bottom density, so harder bottoms reflect sound more strongly and appear brighter on screen. To ensure you have adequate lighting for nighttime navigation while fishing, consider pairing your fish finder with navigation lights that meet safety requirements on the water. Additionally, using a mechanical oil pressure gauge can help you monitor engine health while trolling. Understanding how CHIRP technology separates overlapping frequencies can improve bottom detection clarity.
You might also notice a faint secondary return below the main line when the bottom is hard. This is caused by a double bounce of the sonar signal off a rough surface like rocks or gravel. Color clues are helpful: bright yellows or reds typically indicate hard surfaces, while darker blues or greens tend to represent softer sediments like mud.
Line thickness, brightness, and color all work together to give you clues about the bottom type. Muddy bottoms appear as thick, soft, and dark signals; sandy bottoms are moderate in density; and gravel or rocky bottoms remain thin and bright. Using these visual cues will help you accurately interpret what lies beneath the water.
Why Fish Show Up as Arches (and When They Don’t)?
When a fish swims through your sonar cone, it appears as an arch because the sonar signal strength varies depending on how close the fish is to the transducer’s center. As the fish enters the beam’s edge, the return signal is weak, creating the start of the arc. When the fish passes through the center, the signal strengthens, forming the highest point of the arch. As it moves out of the other side, the signal weakens again, completing the curve. Additionally, boat movement can distort the fish’s apparent size and shape, altering how the arch appears on screen. Choosing a portable fish finder with a wider cone angle can help produce more consistent arches. Blobs can also indicate bait balls clustered together, appearing as dense patches rather than individual fish. Properly wiring the transducer ensures a clean power supply and reduces electrical interference that can distort the sonar signal.
Perfect arches indicate the fish swam through the middle of the beam, showing it was directly in the sonar’s path. If a fish moves quickly, you may see only a dot or a short line, since it traversed the beam too fast for a full arch to form. Stationary fish or those that only cross the edge of the beam appear as flat lines or partial arches. Display settings also play a role; weak signals or narrow beams can distort or flatten the shape. Remember, a clear, full arch means the fish passed through the center, while incomplete shapes suggest a quick or peripheral crossing.
How to Tell Baitfish From Structure and Cover
Baitfish typically appear as suspended clouds or scattered dots that drift slowly, while structure and cover are fixed features on the bottom. To tell them apart, look for behavior: baitfish form tight clusters of tiny marks that move or reposition, signaling they are roaming. In contrast, structure appears as distinct shapes like mounds, lines, or abrupt depth changes that stay anchored. Focus on the appearance of these features—vegetation looks fuzzy or vertical, rocks produce dense returns, and submerged timber rises firmly from the bottom. Comparing density helps too: bait balls are tightly packed, whereas structure features are more defined and spaced out. A bright anchor light ensures you can safely stay on the water after dark while continuing to scan the same area. Repeatedly scanning the same area can confirm what you’re seeing; stationary features indicate structure or cover, while shifting baitfish clusters reveal active roaming. Recognizing these differences helps you interpret your sonar screen with confidence. For enhanced stability when reading these details, consider securing your device with top ram mounts for a steady view on the water. Additionally, understanding how fuel tank sending units operate can help you maintain consistent boat performance while focusing on sonar readings.

Dual Beam Sonar: Choose from a narrow and a wide beam for great detail or a generous coverage area, helping you identify fish, structure and contours.

2-in-1 Ultimate Angler Combination - Engineered specifically for kayak and SUP anglers, this premium mounting system allows you to install your fishfinder display screen and transducer arm simultaneously on a single sleek setup. No more cluttered decks—just a streamlined, high-efficiency fishing workspace that keeps your essentials perfectly positioned.

WAVE RIDER MOTION RESPONSIVE DESIGN: This Deeper fish finder arm adjusts by up to 8in while mounted, allowing Deeper Sonar to remain on the surface to ensure constant connectivity with your smartphone.
What the Colors on Your Fish Finder Actually Mean
Colors on a fish finder represent the strength of sonar returns, not actual underwater hues. Brighter or warmer colors like red and yellow indicate stronger echoes from hard objects or dense targets, such as rocks, gravel, or dense fish. Cooler colors like blue and green signal weaker returns, which typically come from softer bottoms like mud or silt, or smaller, less dense fish. For new anglers, learning this color scale is the first step toward choosing the best fish finders for beginners that match their fishing needs. For example, the Garmin Striker 4CV provides excellent clarity on these color returns for anglers on a budget. For the bottom, red or yellow usually means a harder surface like stone or gravel, while green or blue suggests a softer bottom such as mud. When it comes to fish, brighter colors often mean larger or denser fish are present. Fish can appear in different colors to suggest size and activity, with yellow indicating the strongest return from larger fish. Understanding this color scale is directly tied to how a fish finder works, interpreting the strength of sonar echoes from its transducer.

It is a portable and castable fish finder that comes with a wireless sonar probe/sensor. The maximum distance between the sensor and the handheld unit is 262FT/80M. No need to drill hole in your boat hull to install the sensor any more. Two small holes on the sensor allow you to tether it with your fishing line and cast it onto water as far as you want.

READY TO GO - Easily find where your next catch is hiding with the Deeper START Fish Finder! The lightweight and sleek design makes for a seamless reel without any messy wires or fiddly external batteries required. Ideal for shore anglers and family trips who want to get on with catching!
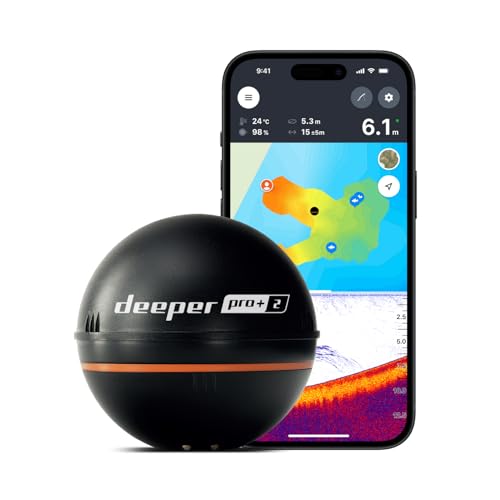
READY TO PERFORM: Wide beam, mid, and narrow beams make covering large expanses or drilling down on specific spots available at your disposal; Ideal for elite anglers who want to take their matchplay to the next level
Key Settings: Sensitivity, Frequency, and Beam Width
Choose your frequency based on your fishing conditions. Use 200 kHz for detailed images in moderate depths, where clarity helps identify fish and structure. For shallower water, 83 kHz provides broader coverage, making it easier to scan larger areas quickly. In deep water, drop to 50 kHz to improve penetration, allowing the sonar to reach farther below the surface. The Elite FS fish finder and chartplotter includes models that leverage these frequency settings for high-quality performance and value. For consistent readings on a pontoon boat, a reliable gauge is essential to monitor engine and battery performance while fishing. Pairing the right sonar unit with a sturdy protective electronics box ensures your gear stays safe from spray and impacts on the water.
Adjusting the frequency affects the resolution and scan area. Higher frequencies offer finer detail but have limited range, ideal for precise assessments. Lower frequencies cover more area with less detail but can penetrate deeper. Match the frequency to your target depth and the detail you need for a successful scan.

This amazing fish finder is specially designed for amateur and professional fishermen to find fish location, depth and bottom contour of water, perfect to be used in the sea, river, lake and fantastic for detecting schools of fish in any particular area.

Dual Spectrum CHIRP Sonar: Delivers views of fish arches and fish-holding structure with two ways to search — Wide Mode for maximum coverage and Narrow Mode for detailed scanning; Precise 2D target separation powered by Low-Q transducer
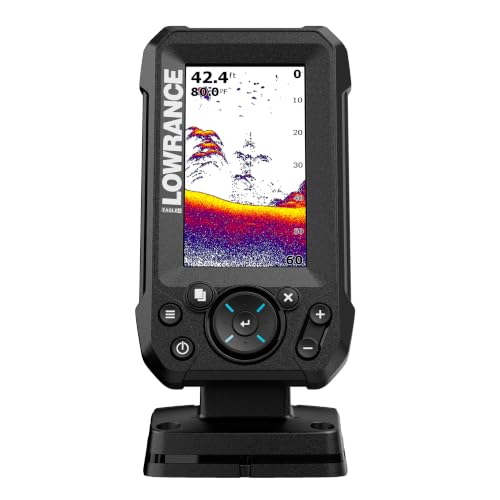
EASY TO SEE: The 4-inch IPS portrait screen stays clear in bright sunlight, from wide viewing angles, and through polarized sunglasses.
3 On-the-Water Drills to Master Fish Finder Reading
Run these three on-the-water drills to develop your fish finder interpretation skills. First, drift across a known area to map the bottom. Watch the screen scroll as you move and identify hard bottoms by their stronger returns compared to soft bottoms. Mark changes such as humps and depressions that appear repeatedly on successive passes; these are key structure features for fishing spots. A clean and reliable install of your unit, including proper transducer placement, ensures these bottom readings are accurate and free from interference, so refer to mounting and wiring tips for the best results. For accurate bottom mapping, you should also verify that your key settings are calibrated for the current water depth.
Second, drop a jig or bait beside the transducer and monitor its descent in real time. Match what you see on the screen to the bait’s actual depth to improve your understanding of what objects in the water column look like. Pay attention to small objects as they move through the sonar cone, training your eye to spot subtle suspended targets that often hide fish. Understanding that different frequencies and cone angles influence how these targets appear on the display helps you avoid misinterpreting their size.
Third, make multiple passes over the same spot to compare stationary structures and moving fish marks. Look for arches or targets that shift position, which indicate fish. Use down imaging to verify if a return is a fish, cover, or bottom feature. Shadows help reveal object height and shape, so practice recognizing rocks, trees, and weed edges before identifying fish.

Please see the "Stern Pad Strength Demo Video" on You-tube

【Enjoy Fishing Life Better】 Frustrated because the picture on your electronics wasn’t the same as advertised? 7400931 MHX XNT Transducer Bracket is a nice addition for your boat that helps your skimmer transom mount transducer to find fish easier to find and get the right scan image. Efficiently improve your transducer running performance without letting go of any fish!

Product Overview: Black transducer mounting plate with 2 pcs screws, 12" X 3.5" X 0.75"