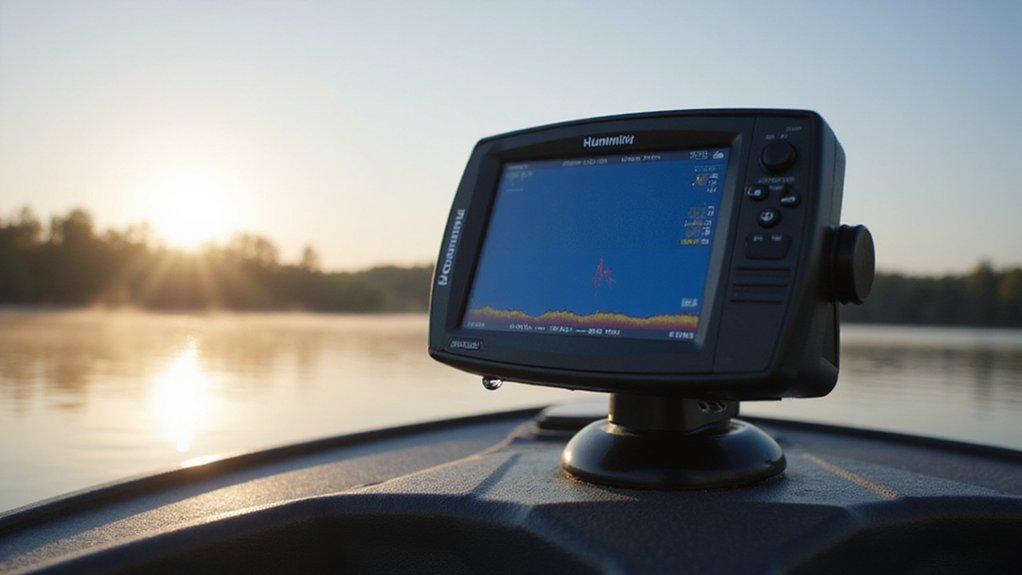
Figuring out what your sonar screen shows can feel tricky at first, but once you understand the display, locating the bottom and spotting fish gets easier.
Your Helix 5 highlights key signals like the bottom line and fish arches, although turning off Fish ID helps you see raw data more clearly.
With a few simple tweaks to sensitivity and chart speed, you can instantly improve detection and find hidden targets.
Keep reading — I’ll walk you through the essentials to master your sonar screen quickly.
How to Spot the Bottom on Your Helix 5 Sonar
To spot the bottom on your Helix 5 sonar, look for the strongest, lowest continuous return on the display, which indicates the ocean or lake bed. A hard bottom appears as a thin, bright line, while soft sediments show a thicker, less intense trace. Avoid confusing isolated marks higher in the water column for the bottom; focus on the deepest consistent signal. If the bottom line disappears but the digital depth still shows a reading, your sonar range is likely set too shallow for current conditions. Adjust the range manually or use auto-range to maintain a continuous bottom line. Keep an eye on the right edge of the screen, as new sonar data enters from that side, revealing the freshest bottom position. For anglers targeting deep structure, selecting a unit with superior target separation can help distinguish bottom composition more effectively. Picking a model with quality and value can also ensure clearer returns in deeper saltwater. A clean, unbroken trace confirms your transducer is reading correctly through the moving water. Recognizing bottom types improves fishing success by allowing you to focus on hotspots while quickly eliminating unproductive water zones. Pairing your sonar with a bimini top stern light keeps your boat visible and compliant during late-evening fishing trips near these productive areas.
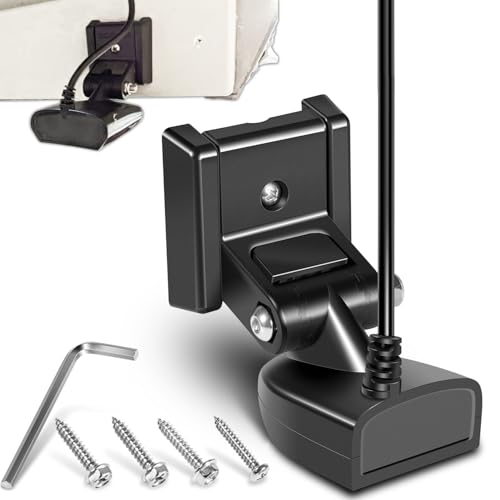
XNT-9-HW-T 710274-1 Transom Temperature Transducer for Humminbird HELIX with Dual Spectrum CHIRP

CHIRP Down Imaging: Filters out visual noise and clutter for a clear view beneath your boat; CHIRP Digital Sonar processing delivers detailed imaging to simplify fish finding

Dual Spectrum CHIRP Sonar: Delivers views of fish arches and fish-holding structure with two ways to search — Wide Mode for maximum coverage and Narrow Mode for detailed scanning; Precise 2D target separation powered by Low-Q transducer
Three Ways Fish Appear: Arches, Streaks, and Fish Icons
Fish icons replace raw returns with symbols, including depth readouts. These icons vary in size to indicate the strength of the return, but don’t rely solely on them—rocks or weeds can also trigger similar signals. Arches are the most reliable evidence of fish, providing clear and direct indications. Streaks suggest partial encounters, hinting at the presence of fish but not as definitively. Remember that Fish ID symbols are not guaranteed to be actual fish, but just objects with similar sonar signals. For instance, bait balls often appear as dense blobs of clutter rather than distinct fish icons. Understanding how sonar technology detects objects underwater will help you interpret these returns more accurately. To achieve the best performance, adjust your sensitivity and chart speed settings based on water depth and boat speed.
For more accurate detail, turn off Fish ID and interpret the raw sonar displays yourself. This allows you to see through false signals and better distinguish real fish from clutter. Keep in mind that different sonar models may display these icons differently, so understanding your equipment’s specific symbols is crucial.
How White Lines and Bright Returns Reveal Fish and Bottom Hardness
WhiteLine enhances your understanding of bottom hardness by highlighting the strongest sonar returns with a white border. It acts primarily as a clarity tool, helping you distinguish the bottom from fish hovering just above it. Brighter returns from hard bottom types like rock or gravel reflect sonar signals strongly, resulting in a sharp, thin white line. Conversely, softer materials such as mud or sand produce a thicker, dimmer line. When using WhiteLine, target separation improves because the outline of the lakebed becomes clearer, making fish near the bottom stand out more prominently against that crisp border. Double echoes are a useful clue—they often indicate a dense, hard bottom. To interpret bottom hardness accurately, consider both the line’s thickness and its brightness; a bright, thin, white border signals a hard substrate, while a diffuse, thick line points to softer material. For optimal radio reception while on the water, pairing your sonar with a top marine antenna ensures clear communication and signal reliability. Combining these visual cues allows you to read both fish and bottom type effectively. For a clear comparison of top stern lights for boat visibility in low-light conditions, refer to the buyer’s guide. Choosing a top speedometer also helps you maintain optimal sonar performance by allowing precise boat speed adjustments.
How to Identify Structure, Wood, and Rocks Underwater
To tell structure, wood, and rocks apart underwater using your Humminbird Helix 5, focus on their distinct sonar signatures. Structure, like reefs or ledges, appears as shapes attached to the bottom with sharp contour breaks; look for drop-offs or edges where fish often ambush. Wood shows up as irregular vertical returns—standing timber looks tall and narrow, while brush piles appear as tangled, fuzzy clusters. Stumps are short and blocky, standing out from softer bottom features. Rocks tend to be hard and dense; isolated boulders show as rounded lumps, and gravelly areas produce a rugged, broken bottom line. Using Down Imaging provides a picture-like view that clearly separates wood from rocks, making identification easier. Pay attention to bottom composition: sediment layers typically appear smooth, whereas areas with rocks look uneven or jagged. For enhanced clarity, consider upgrading to a Livescope Plus system for real-time, detailed views of underwater objects. Underwater vegetation often shows as wispy, mid-water returns near structures. The Helix 5’s narrow beam helps isolate these details, enabling you to quickly spot potential ambush spots for fish. Many anglers find that comparing top picks for the Helix 5 with GPS helps ensure they select a model with the best performance for identifying these underwater features. For catfish anglers, matching your sonar settings to the best fish finders for bottom-hugging fish can greatly improve your success rate.
Use the RTS Window for Instant Sonar Feedback
The RTS (Real Time Sonar) window provides instant feedback on what’s directly beneath your boat. It displays a live feed of sonar returns without interrupting the main screen. The window updates at the fastest possible rate for your depth, showing only the bottom, structures, and fish within the transducer beam. Stronger returns appear darker: a thin, dark band indicates a hard bottom, while a thicker, grayer band signals a softer bottom. Fish passing through the beam cause quick changes, giving you immediate confirmation of movement. Unlike the arches or bait balls seen on other sonar screens, the RTS window prioritizes speed over shape detail. Anglers accustomed to the high-contrast returns on a Garmin Striker 4CV will find the RTS window similarly effective for identifying hard versus soft bottoms. Shore anglers will appreciate this instant feedback for locating underwater structure without needing a boat.
For consistent results, keep the transducer well-maintained—clean and free of debris. Accurate signal calibration is essential to ensure the RTS window reflects true return strength rather than noise. Access the RTS setting through the Sonar menu; choose Wide mode for a broader signal coverage or Narrow mode for sharper intensity changes. Remember, the live RTS window remains active even if you freeze the sonar history to analyze previous echoes.

Superior Sealing Performance: It is equipped with advanced sealing materials and structures, which can effectively prevent the intrusion of dust, water, and other foreign substances, ensuring reliable connection and stable operation in various harsh environments, such as on ships sailing in rough seas or in outdoor industrial settings.

Worlds clearest and most complete live sonar: best-in-class resolution shows fish, structure and lure movement in real time

Dual Beam Sonar: Choose from a narrow and a wide beam for great detail or a generous coverage area, helping you identify fish, structure and contours.
When to Use Zoom and Split-Screen Views
Use zoom when you need to focus on tight targets or specific depth bands. It enlarges a narrow area, making it easier to distinguish targets like fish close to the bottom or hiding inside cover. You can adjust the magnification with the plus and minus keys, with up to 16x zoom available on 2D sonar. This helps improve sonar calibration and target identification by revealing individual returns from clutter. For nighttime anchoring, ensure your boat has a bright anchor light for safety and visibility. Similarly, choosing the right horn button can enhance your boat’s alert system and overall safety. Mastering gain adjustment is also critical, as it reduces noise while keeping faint targets visible on the zoomed display.
Split-screen views are ideal when you want to compare signals from different frequencies side-by-side or keep multiple displays visible at once. This layout allows you to analyze signal shape and strength on both beams, increasing confidence in your targets. It’s also useful for broader display customization, such as viewing sonar data alongside your chart, eliminating the need to switch screens constantly.
Choose zoom when depth detail is your priority, particularly in situations with tight targets or clutter. Opt for split-screen when you need simultaneous context, frequency comparison, or a more comprehensive view of your sonar and navigation data together.
How to Fix Sonar Glitches That Hide Fish and Bottom Detail
To fix persistent sonar glitches that hide fish and bottom detail, start by verifying that the transducer cable is fully seated at the head unit. Ensure you have selected the correct transducer in the sonar source menu. Check that the transducer is properly placed—completely submerged, free from debris, and avoiding aerated water, as air bubbles can erase bottom detail and fish arches. Look for turbulence from hull or trolling-motor mounting, since disturbed water causes intermittent sonar signals. Additionally, if you test each transducer individually and they maintain good bottom lock, this indicates hardware integrity and points to a faulty Y cable when both are connected. For beginners, choosing a model with side imaging technology can dramatically improve your ability to spot underwater structure and fish. For those seeking reliable performance without overspending, a budget marine stereo can also be a valuable upgrade for onboard entertainment.
Power interference is another common cause. Route transducer and power cables separately from other electrical wiring to prevent signal noise. Tighten all power connections, check the battery terminals, and make sure the fuse and cables are in good condition. Weak power supplies lead to erratic sonar performance; a stable, direct battery connection helps stabilize readings. If problems persist, test with a known-good transducer to isolate whether the fault lies with the transducer or the system itself.

EXTENDED REACH FOR BOATS: Adds 110 inches (9.2 feet) of heavy-duty extension length to easily bridge the gap between your bow trolling motor transducer and console fishfinder.
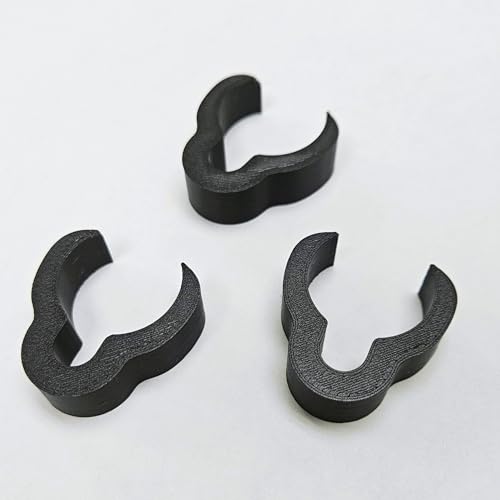
Perfect Fit – Designed to fit 1 1/8” and 1 1/4” transducer poles Secure Hold – Clips snap firmly in place and will not slip off freely 3 Pack Value – Includes three clips for complete cable organization Cable Protection – Prevents tangles and keeps cables safe from snags Made for Anglers – Streamlined design tested for real fishing conditions

Garmin CHIRP Integration: Connects select Garmin fish finders to Minn Kota motor with Built-In Dual Spectrum CHIRP transducer
Tweak These Sonar Settings to See More Fish Instantly
Adjust your Helix 5 sonar settings for better fish detection. Increase Sensitivity from the default 10 to around 12 or 13 to reveal smaller fish and baitfish. Be cautious: setting it too high will cause noise to clutter your display. Turn off Fish ID+ to see raw arches instead of symbols, which provides more accurate information. Narrow your Range by setting specific Upper and Lower limits to focus on the zone where fish are likely to hold; auto range can make the view too broad and less useful. Activate Max Mode on SwitchFire to detect subtle targets more effectively. Additionally, using a lower sensitivity setting reduces sonar clutter and emphasizes prominent targets like larger fish. Match your Chart Speed to your boat’s movement—if your boat is moving fast, increase the speed to keep the arches properly shaped. Finally, check your unit’s performance by confirming Battery calibration and installing the latest Software updates. Cleaning up your screen by hiding unused views helps the fish marks stand out clearly.

Waterproof Design: Fish finder sunshade protective screen cover features a durable ABS plastic construction, providing comprehensive defence against splashing water and marine environmental corrosion while safeguarding your Humminbird 411660-1 Helix 5 Chirp GPS G3 display.

HEAVY-DUTY ALL-ALUMINUM CONSTRUCTION: Built from marine-grade aluminum alloy with a corrosion-resistant black finish, this mount delivers superior strength and rigidity compared to plastic mounts. Designed to handle vibration, wind, and rough water without flexing or loosening over time.

Perfect Protection for Fish Finder: If you love marine fishing and own a Helix 5 fish finder or depth finder, you may worry its screen might be shattered or hurt by sun some day. Our Helix 5 unit cover is uniquely designed for you to resolves those worries. The Helix 5 unit cover is waterproof, sun proof and dust proof, a great way to keep your fish finder protected when not in use. It will keep your new fish finder with depth, GPS, sonar, etc. working for a long time.
Why Your Helix 5 Screen Colors Change With Depth and Conditions
Your Helix 5 screen colors change with water depth and conditions because they reflect the strength of each sonar return, not the actual depth. As you move into deeper water, returns become weaker, causing cooler palette colors such as blues and greens to dominate the display. In murky or cluttered water, weaker signals are compressed and often blend together, making it harder to distinguish different objects or fish. Conversely, in clear water, strong returns from the bottom and fish are more distinct, sharpening the outline and intensifying color contrasts. For rapid identification of water depths, the depth colors setting enhances visual representation of underwater terrain.
Your selected color palette also influences this effect. For example, the Original Palette uses cyan for weak and red for strong signals, providing clear visual cues. The Gray palette, on the other hand, displays shades from light gray to black, emphasizing contrast differently. Rough water conditions scatter sonar energy, creating irregular and patchy color patterns that can be confusing. To maintain reliable color interpretation, it’s important to set your water type correctly—whether Fresh, Salt (shallow), or Salt (deep). Matching the water setting to your environment ensures your screen’s colors accurately reflect real returns, helping you interpret your sonar data more effectively.