Ever wonder how a fish finder actually works? It’s pretty fascinating—using sound waves to detect what’s beneath the surface and show you a clear picture of water depth, structures, and even fish.
With a few simple settings adjustments, you can improve what you see on the screen. Keep reading to learn how sonar makes all this possible.
What Is Sonar and Why Do Fish Finders Use It?
Fish finders rely on sonar because underwater acoustics are far more effective than light or radar in murky water. Sound waves travel long distances beneath the surface, making them ideal for detecting objects in dark or cloudy conditions. When you operate a fish finder, it sends out a pulse of sound and waits for echoes to return. By measuring how long it takes for the sound to bounce back, the device calculates the depth and identifies objects like fish, rocks, or the seabed. Sonar technology generates sound waves that spread around the environment, detecting objects even at a distance. For boat owners, choosing the right device depends on understanding top fish finders for boats and their specific features. Each model offers different depth capabilities that affect how well they suit various boating environments. Understanding emergency positioning is also critical for safety, as a separate distress beacon can transmit your location to rescue services if you ever need help offshore.
Sonar doesn’t depend on visibility, so even in poor water clarity, it can produce clear images of what lies beneath. It works by receiving reflected sound waves, or echoes, which differ depending on the surface they hit. Different objects—such as fish, vegetation, or wrecks—reflect sound uniquely, allowing the device to distinguish between them. Stronger echoes often indicate harder surfaces or larger fish, while weaker ones may signify softer objects or smaller fish.
This echo-location process translates sound reflections into visual displays on your screen, transforming the unseen underwater environment into an interactive map. It enables anglers to interpret what’s below instantly, making sonar an essential tool for effective fishing regardless of water clarity.
The Transducer: Your Fish Finder’s Eyes and Ears
The transducer is your fish finder’s eyes and ears. It sends sound pulses into the water and listens for the returning echoes. Inside, piezoelectric elements convert electrical signals into sound waves, then transform the echoes back into electrical signals that the sonar unit processes. Proper installation angles are crucial; even a slight tilt can misdirect the sonar beam, so you must ensure it points straight down or at the correct angle for your imaging needs. Maintaining the transducer is also important—keep its face clean and free of fouling to preserve signal strength. Common frequency choices include 50 kHz for broad coverage and 200 kHz for detailed images. Mount it on the transom, trolling motor, or inside the hull, but avoid turbulent water and bubbles to optimize performance. For boat owners, understanding the differences between chirp and traditional sonar can help you choose the best transducer for your needs. Unlike traditional sonar, CHIRP technology uses a sweep of frequencies in each pulse to produce clearer target separation and less noise. To further enhance performance, consider pairing your fish finder with a dedicated marine amplifier for clearer sound alerts in noisy environments.

Application:The Transom Transducer Fits for Humminbird Helix.For HELIX 5 CHIRP G2/G3–GPS-equipped models only; For HELIX 7 CHIRP G2/G3/G4–GPS-equipped and CHIRP DI G2 models; For HELIX 7 CHIRP G2N/G3N/G4N–All models; For HELIX 8 CHIRP G3N/ G4N–All models; For HELIX 9 CHIRP G2N/G3N/G4N–All models; For HELIX 10 CHIRP G2N/G3N/G4N–All models; For HELIX 12 CHIRP G2N/G3N/G4N–All models; For ICE HELIX CHIRP G2/G3 and newer–All models in Open Water Mode.

Airmar 200KHZTHRU HULL TRANSDUCER

Great Product
How a Single Ping Reveals Fish and Bottom
A single ping instantly reveals what lies below your boat by sending a brief ultrasonic sound pulse downward. This pulse travels through the water until it hits an object more dense than water, such as the seabed or a school of fish. When the sound wave bounces back, your fish finder’s transducer listens for the echo. The time it takes for the echo to return directly indicates the depth; a faster return means shallower water. Adjusting the sensitivity setting can help reduce clutter from weak echoes while still detecting subtle underwater details like submerged weeds or small baitfish. Learning to adjust the frequency and chirp settings further enhances your ability to distinguish between different types of fish and bottom composition.
Different targets reflect sound waves with varying strength. Hard bottoms like rock produce strong, clear echoes, while soft, muddy bottoms generate weaker signals. Smaller objects such as fish, weeds, or debris create faint, partial echoes. Although a single ping captures only a moment in time, it provides valuable information about the location of the seabed and any floating or submerged structures above it. The color of the return helps classify each target, with yellow indicating strong returns from larger objects like big fish or rocks. For serious anglers, choosing one of the best saltwater fish finders can greatly improve target separation and clarity in challenging marine environments.
How Frequency and Beam Width Shape What You See
You’ll use the wide beam to scan a broad area quickly and then switch to a narrow beam for precise location pinpointing. A 20° beam at 50 feet spans about 18 feet across, providing a large footprint suitable for initial searches. At 20 feet, the same beam covers only 7 feet, offering more detail but less area.
Depth significantly affects coverage because the beam’s footprint widens as water depth increases. In deep water, a wide, low-frequency beam helps you cover more ground efficiently, catching large objects or terrain features from afar. When you move into shallower areas, switching to a high-frequency, narrow beam gives you crisp detail, helping you identify small objects or features on the bottom. Recognizing these patterns on screen helps you distinguish fish arches from clutter like weeds or debris. For a reliable and durable setup on your boat, consider pairing your sonar with a top marine sound bar for clear audio while you fish. Many anglers choose a transducer mounting bracket to keep their transducer securely in place for consistent readings.
This approach balances broad detection with detailed inspection, ensuring you don’t miss anything at depth while still getting clear images when close to the bottom.

【Wide Application】: Designed to easily attach 4-pin, 8-pin or 12-pin scanning transducers. Replaces Part Numbers: 010-12006-11, 0101200611.

【Enjoy Fishing Life Better】 Frustrated because the picture on your electronics wasn’t the same as advertised? 7400931 MHX XNT Transducer Bracket is a nice addition for your boat that helps your skimmer transom mount transducer to find fish easier to find and get the right scan image. Efficiently improve your transducer running performance without letting go of any fish!

Replaces Part Numbers: MKR-15 transducer mounting kit cross references part 1840201 and 410150-1, specially designed to install sonar transducer on the lower unit of Mi-nn Kota bow-mount or transom-mount trolling motors. Fits motor lower unit sizes: 3-1/4", 3-5/8", 4", 4-1/2"
What Your Fish Finder Screen Is Actually Showing You
Your fish finder screen displays a range of information, but understanding what you’re seeing requires knowing how the display relates to underwater conditions. The vertical axis shows the depth, with the strongest return indicating the bottom. A thick, bold line means a hard bottom like rock or gravel, while a thin line suggests softer sediments such as mud or sand. Surface clutter, which often appears as scattered small marks near the top, is usually just turbulence or floating debris and can be ignored. Fish are typically represented as arches, dots, or short marks on the screen. Dense bait schools appear as cloudy, blurry blobs. Keep in mind that not every dot or arch indicates a fish ready to bite; underwater noise, caused by high sensitivity settings or choppy water, can create false targets. To avoid misinterpretation, adjust your sensitivity to reduce clutter and false signals while still detecting weak targets. Thermoclines appear as faint horizontal lines at specific depths where temperature changes sharply. Fish often suspend around thermoclines, so spotting these lines can help locate active fish. Use the changes in the bottom contour, like ledges or drop-offs, to identify structure that fish might relate to. The right side of the screen updates with the newest data, so observe how fish behavior shifts in response to depth changes and cover types for better targeting. Human judgment may outperform software misinterpretation of bottom features when assessing subtle differences in return strength. A failing tachometer on a boat can produce erratic needle movements similar to the false signals seen on a fish finder screen. For smaller vessels, compact models like the top depth finders reviewed for small boats offer reliable performance without taking up much space.
How to Read Fish Arches on Your Fish Finder
When you see a fish arch on your screen, it indicates the fish’s movement through the transducer beam rather than its actual shape. A full, rounded arch signifies that the fish passed through the center of the beam, resulting in a stronger echo. Thicker arches generally point to a larger fish or two fish close together. Thin or partial arches usually mean the target is at the edge of the cone or is a smaller fish. Water currents can also influence arch shape by pushing fish into or out of the beam differently. Fish behavior plays a role too—active fish near bait or structure create clearer, more defined arches compared to those hugging the bottom. Additionally, the position of the arch on the screen offers clues: mid-water arches tend to be more convincing indicators of fish, whereas bottom marks could simply be weeds or debris. The strength of these signals is further linked to the color palette used, where red indicates strong echoes from fish near the transducer center and yellow represents weaker echoes from the cone’s edge. Reading these arches accurately helps you understand not just whether a fish is present, but also its movement, size, and activity level. Recognizing how bait balls appear as dense, irregular clusters can help you distinguish them from single fish arches. Just as a quality bimini top stern light ensures safety and visibility on the water, understanding your sonar readings improves your fishing success. Understanding these readings is much like choosing a boat switch panel, where knowing the right features for your setup improves overall performance.

READY TO GO - Easily find where your next catch is hiding with the Deeper START Fish Finder! The lightweight and sleek design makes for a seamless reel without any messy wires or fiddly external batteries required. Ideal for shore anglers and family trips who want to get on with catching!

✦ Fish Finder and Depth Finder : It is a portable fish finder that could display approximate fish location and water depth. The sonar transducer can be attached to the hull of kayak or boat in order to understand the changing of water depth when you are moving by. The water depth detection range is between 3ft(1m) and 328ft (100m) when the transducer is completely immersed in the water.

Shows you what is in the water: water depth, approximate fish location (suits for all sorts of fish), fish size(small/median/big), short & tall weeds, sand & rocks on bottom. Suitable for fishing from a kayak, off the dock, and ice fishing. It can be used in fresh water as well as salt/sea water.
Setting Up Your Fish Finder for the Best Picture
To ensure your fish arches appear clearly on the screen, proper transducer placement is essential. Mount it in clean water flow, level with the waterline, and avoid positions behind strakes, rivets, or other obstructions that can cause turbulence. Even a slight tilt from perfect level reduces image clarity, so after launching, verify the angle and make adjustments as needed. For ice fishing, a flasher-style display is often preferred for real-time returns when drilling holes.
Adjust your frequency based on water depth: use higher frequencies in shallow water for sharper images and detail, while lower frequencies penetrate deeper in deep water. Set sensitivity manually by increasing it until you start seeing random noise or dots, then reduce slightly to prevent clutter. Match your range setting to your actual fishing depth to optimize target detection, and fine-tune brightness and contrast in small increments to improve visibility. For catfish in deep river channels, consider a unit with dual-frequency operation to balance detail and depth penetration. Setting the range shallow, typically no deeper than 30 feet, enhances pixel density for easier fish identification on the screen.
Calibration procedures are important for adapting your fish finder to local conditions. Check your manual for specific steps, and perform calibration regularly for the clearest images. A stable power supply is crucial; ensure your battery connection is secure to avoid screen flicker or loss of detail. Finally, make sure only one transducer is actively sending pings at a time to prevent cross-interference that can distort your image.

Hst-dfsbl depth transducer with temp, Mfg.# 000-0106-77, 50/200kHz, 35/12 degree beam angles, With temperature sensor

Dual Beam Sonar: Choose from a narrow and a wide beam for great detail or a generous coverage area, helping you identify fish, structure and contours.

【DUAL FISH FINDINDER MOUNTING BRACKET】 Mount two marine electronics on one compact bracket, keeping a fish finder, chartplotter, GPS, or sonar display together for easier viewing. An efficient dual-screen solution for anglers running multiple displays on boats, kayaks, and fishing consoles.
Why Weak Echoes, Weeds, and Murky Water Make Fish Disappear
Weak echoes, weeds, and murky water can cause fish to disappear from your sonar screen even when your transducer is properly placed and sensitivity settings are optimized. Weak echoes from small or baitfish often get buried in background noise, making them hard to distinguish. Thick weed beds scatter sonar signals, blending fish marks into the canopy and hiding smaller targets. Murky water filled with sediment and plankton raises overall noise levels, obscuring faint fish signals amid the clutter. Additionally, algae interference can further degrade image clarity. Changes in water temperature may shift fish to different depths but won’t improve a noisy or cluttered display. Strong currents affect sonar transmission and interpretation, further distorting the already faint returns. As a result, your sonar may show fewer fish than are actually present because the weak signals are masked or lost amid background clutter.

It is a portable and castable fish finder that comes with a wireless sonar probe/sensor. The maximum distance between the sensor and the handheld unit is 262FT/80M. No need to drill hole in your boat hull to install the sensor any more. Two small holes on the sensor allow you to tether it with your fishing line and cast it onto water as far as you want.
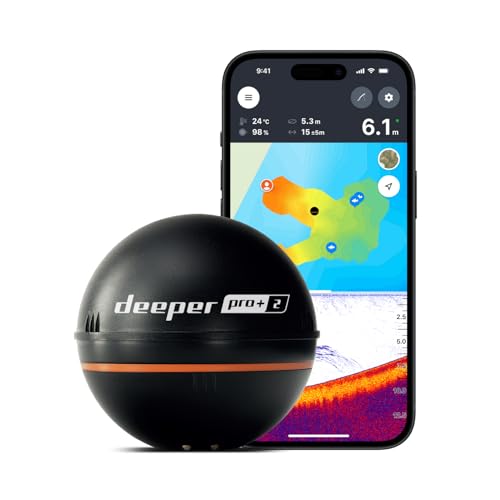
READY TO PERFORM: Wide beam, mid, and narrow beams make covering large expanses or drilling down on specific spots available at your disposal; Ideal for elite anglers who want to take their matchplay to the next level

【𝐄𝐚𝐬𝐲 𝐭𝐨 𝐔𝐬𝐞 】 Reelsonar portable fish finder is Easy to use, With a depth range of 135 feet and rechargeable battery life of 10+ hours, IOS and Android apps Bluetooth fishfinder with sonar