
If you’ve ever wondered how fish appear on your Garmin Striker 4, you’re not alone. Unlike the simple fish icons often shown on other fish finders, the sonar on the Striker 4 displays fish as full or half arches.
These shapes give you a clearer idea of where the fish are and how they’re moving. Keep reading to learn how to interpret these signals accurately.
What Those Fish Arches and Blobs Actually Mean on Your Striker 4
On your Striker 4, fish arches and blobs are visual cues for identifying fish presence and movement. A full arch indicates a fish passed directly through the sonar cone’s center, meaning the fish moved smoothly through the beam. A half-arch, on the other hand, suggests the fish only clipped the edge of the cone, resulting in a partial or compressed image. Understanding this technology requires knowing the parts involved in your boat setup to ensure accurate readings. Blobs usually represent bait schools or dense, overlapping returns from underwater targets near structure, signaling areas where fish might be feeding or hiding. The shape and clarity of these marks are also affected by your selected frequency and cone width, as narrower cones like 200 kHz improve target separation while wider beams like 77 kHz scan larger areas. Understanding how to tell real fish from clutter is key to avoiding false readings from debris or thermoclines. For the best performance, selecting a device that matches your specific boating needs can simplify sonar interpretation significantly, such as consulting reviews of top fish finders for boats to compare options.
Environmental factors like water clarity and temperature influence how strong echoes appear and how marks are shaped. Clear water typically produces sharper, more defined arches, while murky conditions can make them appear dull or unclear. Temperature shifts can change fish activity and movement patterns, affecting sonar reading accuracy. Proper transducer placement is crucial; if it’s misaligned or angled incorrectly, you’ll see skewed or weak signals, making interpretation difficult.
Turning off fish symbols shows raw sonar readings. This makes it easier to distinguish between actual fish and other structures, as you focus on the shape and movement patterns of the returns. Remember, the arch shape reflects how fish move through the sonar beam, not their size or species, so pay attention to the pattern and behavior rather than just the mark itself.

Clear Vu scanning Sonar shows you more of what is in the water around your boat; This high frequency sonar gives near photographic images with detailed representations of objects, structure and fish

Designed for Garmin Striker 4 Series: Tailor-made sun visor compatible with Garmin Striker 4 fish finder displays, improving screen readability in bright outdoor conditions; NOT compatible with Striker Plus 4/Vivid 4cv.

Aluminum Alloy Construction: Crafted from high-temperature die-cast aluminum alloy, this mount boasts a durable polyethylene powder coating, ensuring adaptability to various rigorous environments.
How Boat Speed and Beam Position Change Fish Shapes
Boat speed and beam position significantly influence how fish appear on your Striker 4. When you slow down, fish stay within the sonar cone longer, creating distinct, full-arched appearances on your water column visualization. Conversely, increasing your speed results in fish signals appearing as short streaks or dashes because they pass quickly through the sonar beam. The location where a fish crosses the beam also affects its display. Center-beam passes produce bright, well-defined arches with thicker midpoints, making signal strength interpretation straightforward. Off-center passes often generate partial arches or isolated spots, which can be mistaken for smaller or different targets. Therefore, a long arch might indicate a slow-moving boat or a wide beam setting rather than a large fish. For high-quality audio during your fishing trips, consider pairing your electronics with best marine speakers with amp for clear sound on the water. For ice fishing applications, pairing a Lowrance unit with a flasher mode provides precise real-time feedback for targeting fish beneath the ice, similar to how a dedicated ice fishing flasher functions. Recognizing how speed and beam position alter fish shapes helps you interpret your sonar readings more accurately. For instance, a fish entering or leaving the cone may appear as a partial arch, consistent with the sonar functionality principles of the Garmin Striker 4. Mastering the marine radio settings for clear communication can further enhance safety and coordination while navigating to your fishing spots.
Should You Leave Fish Symbols On or Off?
Turning fish symbols on or off on your Garmin Striker 4 depends on your need for simplicity versus detail. When symbols are turned on, raw sonar echoes are replaced with generic icons, creating a clean, easy-to-read display. This is useful for quick reference when juggling color options or adjusting power settings during a fast-paced fishing situation. Turning symbols off reveals the true sonar returns, showing detailed structure, bait, and bottom changes that icons might mask. Reading the intensity and shape of the echoes directly requires practice but provides more accurate information about what’s beneath the surface. Start with symbols enabled if you’re new to interpreting sonar, and switch them off once you gain confidence in your understanding. For catfish anglers, turning symbols off helps identify preferred catfish habitats like deep holes or channel edges that icons might obscure. Keeping symbols on allows for quicker, more straightforward decision-making, while turning them off offers more precise, detailed data crucial for serious analysis. Choosing to display symbols at all relies on understanding that Fish ID can misidentify debris, bubbles, or vegetation as fish. For optimal clarity in low-light conditions, consider pairing your unit with a night vision camera for enhanced underwater visibility. Ultimately, your choice balances speed of interpretation against the depth of information you need. Upgrading your setup with a high-quality stern light ensures you remain visible to other boats while you focus on the screen’s detailed sonar returns.

Easy-to-use 4-inch color fishfinder with new vivid scanning sonar color palettes to easily distinguish fish and structure; tilt/swivel bailmount bracket included

Sharp 720p HD resolution presents a clear view behind your vehicle when in reverse; wirelessly pairs with your compatible Garmin navigator

CUSTOM FIT FOR GARMIN 4": Specifically designed for Garmin Striker Plus 4 and Striker Vivid 4cv, ensuring a snug fit without blocking the screen or buttons.
Why Fish Can Appear as Streaks, Dots, or Black Spots
Fish can appear as streaks, dots, or black spots depending on their position relative to your sonar beam. Since your Garmin Striker 4 emits a cone-shaped sonar signal, the exact location of a fish inside that cone determines its displayed shape. A fish crossing the center of the beam creates a clear, full arch, while one near the edge produces a partial mark or black spot. Fast-moving fish often appear as streaks or short lines because they traverse the cone quickly. Conversely, stationary or slow-moving fish tend to show up as dots or blobs because they linger within the sonar’s detection zone. Black spots specifically result from weak, side-angle returns when a fish barely touches the beam before moving out of it. Your boat speed and sensitivity settings influence how these marks stretch or compress, emphasizing movement and position over precise size or identity. For more accurate readings, a well-wired switch panel ensures your sonar receives consistent power without electrical interference. Adjusting your sensitivity and depth range settings on the Garmin Striker 4 can help clarify whether a mark is a fish or structure. Relying solely on shape can lead to false positives because other objects in the water also produce arch-like returns. To reduce confusion, consider how a quality anchor light can help you stay stationary for more consistent sonar readings.
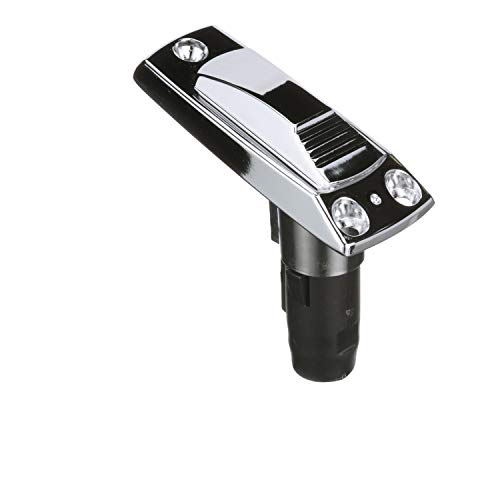
UNIVERSAL COMPATIBILITY: Engineered specifically for 12-degree angled poles; perfectly fits Frosted Globe 5110, Anti-Glare 5300, and Bi-Color 5091 series pole lights.

Easy to install and use: 7 pin on off on rocker switch with DPDT design (double pole double Throw), rated at 20AMP/12VDC and 10AMP/24VDC. Can be installed or replaced on the original rocker switch panels. It is easy and simple to set up. Can control 2 loads.

ULTRA-BRIGHT MARINE LED LIGHTING: Discover the brilliance of Marinexplore's 5W LED Navigation Anchor Lights, outshining a 30W bulb with a 3 Nautical Mile visibility, designed for ultimate safety on pontoon boats, fishing boats, and yachts.
How to Tell a Fish From Bait or Structure on Your Screen
When distinguishing a fish from bait or structure on your Garmin Striker 4 screen, focus on shape, movement, and context. A fish usually appears as a clean arch or half-arch, shaped by Sonar as the cone passes over it. Bait, however, shows as a fuzzy cloud or a tight cluster of small returns rather than a single distinct mark. Structure remains fixed and often appears as stable lines, ledges, or jagged spikes; it doesn’t move. Fish tend to behave differently from bait and structure—curved, isolated marks suggest a game fish, while stacked or horizontal marks often indicate bait or slow-moving targets. Adjusting the sensitivity settings ensures you don’t miss weaker returns from fish near the bottom. For the best boat audio experience, consider pairing your fish finder with a top marine sound bar to enhance your time on the water. Be cautious not to mistake straight vertical lines or dense massings at the bottom for fish. Instead, rely on raw sonar echoes over fish icons for accurate identification, emphasizing the shape, movement, and behavior of what you see on the screen. For instance, loose schools of moderate-sized fish on sonar often point to gizzard shad preferring muddy bottoms with minimal vegetation.
How to Adjust Sensitivity for Better Fish Returns
Once you’ve identified a likely fish on the screen, adjusting sensitivity helps you see it more clearly. On your Striker 4, sensitivity is controlled by the gain setting, which adjusts the sonar receiver sensitivity. To tune it manually, open the menu and select Gain. Increase gain until noise first appears in the water column, then reduce it slightly. This creates a balance between visibility of fish arches and screen clutter. Remember to adjust each frequency separately if you’re using split-frequency screens. Calibration isn’t necessary here, but you should tweak power settings based on water conditions. In deeper or clearer water, set higher gain to improve weak signal detection. In shallow or muddy water, lower gain to reduce clutter and interference. Auto gain modes are available—Auto High enhances weak returns, while Auto Low minimizes noise. It is also important to note that cold weather below 32°F can reduce battery efficiency by 10-20%, which may affect how long you can fine-tune these settings. Always check the display after adjusting. Raising gain makes weaker fish arches more visible, but can also introduce noise. Lowering gain cleans up the screen, removing unwanted clutter but possibly hiding faint fish. Your objective is to keep fish returns clear while eliminating enough background noise to interpret the screen accurately.
Quick Tips for Accurate Fish Reading on the Striker 4
To read fish accurately on your Striker 4, focus on analyzing the shape and consistency of the return signal rather than just its presence. A full arch typically indicates a fish crossed the sonar cone’s center, suggesting a strong hit. In contrast, a half-moon shape suggests the fish clipped the edge of the beam, producing a weaker or less reliable target.
Wave patterns on the screen can be deceptive; they may create false marks that mimic fish. Look closely at the clarity and stability of the arches to distinguish real targets. Underwater vegetation or clutter often generates scattered, inconsistent echoes, so prioritize clean, isolated arches when identifying fish. Higher-frequency 200 kHz provides a narrow, focused beam that enhances target separation, making it easier to pick out individual fish. If more area coverage is needed, switch to 77 kHz for a wider view, keeping in mind this reduces detail and separation. Turning off automatic fish symbols enables you to view raw echoes, providing a clearer picture of what’s beneath. Use split-screen zoom to enlarge suspicious marks and inspect them closely. Repeated passes over the same spot help confirm whether a target is truly present or just an echo anomaly. Accessing Sonar Setup allows you to adjust fish symbols to match your skill level.