Wondering how to test if your fuel sending unit is working properly? It’s a quick check you can do with just a multimeter, helping you determine whether your fuel gauge issue is caused by a faulty sender or wiring problem.
Once you understand the process, you’ll be able to pinpoint the problem more confidently. Keep reading for step-by-step instructions.
What Your Fuel Gauge Tells You About a Bad Sending Unit?
If your fuel gauge is stuck on empty or full, the most common cause is a failing sending unit. A dead needle that never moves, despite refueling, usually indicates a broken float or resistor within the unit. Erratic jumps or sudden drops to empty often point to worn sender contacts or corrosion. To properly diagnose, check if the gauge reading changes when you turn the ignition on and off. Start by inspecting the wiring near the tank for corrosion, damaged wires, or loose connectors. A consistent reading that ignores your actual fuel usage suggests the sender isn’t reporting changes correctly. A faulty variable resistor or float movement can cause the fuel gauge to fluctuate, which signals age-related wear on the resistor. Combining observations of gauge behavior with resistance tests of the sending unit provides the most accurate diagnosis. For a more stable and accurate reading, consider the importance of correct gauge placement to avoid vibration-induced errors. When troubleshooting, checking for corroded wiring connections can prevent misleading readings just as a poor transducer mount affects a fish finder’s performance. Since marine environments accelerate corrosion on electrical components, ensuring watertight seals on all connections is critical for reliable sender operation.

Great marine fuel sending unit replacement for broken boat fuel sending unit in marine boat fuel tank.

Great marine fuel tank sending unit replacement for broken marine fuel sending unit in marine boat fuel tank.
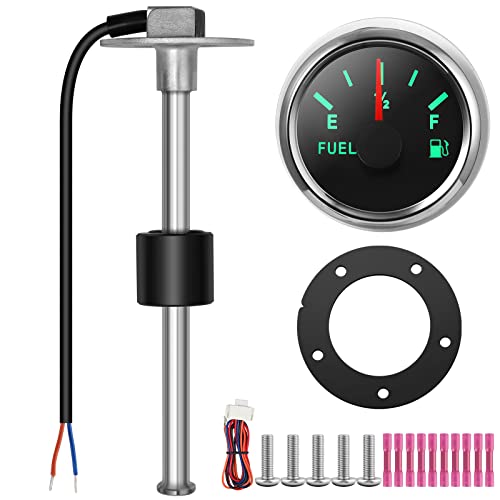
[High Precision and Long Life]: The exterior is made of stainless steel, and the interior is controlled by high-quality reed switches. The sensor is corrosion-resistant, does not rust, has a long life, stable output signal, and accurate measurement. Suitable for gasoline, diesel, water, methanol, etc.
Access the Fuel Sending Unit Safely
To access the fuel sending unit safely, you need to prepare the vehicle to prevent fuel spills, vapor release, and fire hazards. Start by parking outdoors on a flat surface, away from ignition sources, and keep a fire extinguisher nearby. Relieve the fuel system pressure by removing the pump fuse and cranking the engine until it stalls, then disconnect the battery to eliminate electrical sparks. Use a transfer pump to lower the fuel level below the sender opening, transferring fuel into an approved container—never rely solely on the gauge reading. Before opening the tank, clean off any debris around the sender area and perform a ventilation system inspection to ensure vapors can dissipate safely, and be sure to connect the horn relay with clean, secure wiring to avoid shorts during the inspection. If you plan to drop the tank, support it securely and check the fuel tank reinforcement straps for integrity before loosening. Carefully disconnect electrical connectors and hoses, capping lines to prevent leaks. Remove the retaining ring with the proper tool and lift the sender straight out to avoid bending the float arm. For accurate readings during this process, pay attention to keeping the display clear of obstructions just as you would when reading sonar signals on a fish finder. A high-quality chartplotter includes Navionics mapping for superior performance when navigating to a safe testing location.
Tools You’ll Need for the Test
To test a fuel sending unit, you’ll need a digital multimeter set to a low resistance range, typically 200 ohms or 2 kilo-ohms. This allows you to measure the sender’s resistance at empty, half, and full positions, which is essential for accurate readings. Consult your vehicle’s service manual to find the correct resistance specifications for each level; accurate calibration depends on matching these values. Use test leads with alligator clips to ensure solid contact and reliable readings during bench testing. Basic hand tools like sockets or screwdrivers are necessary to access the sender. Before testing, perform a wiring inspection to check for corrosion or broken connector pins. Keeping a clean rag handy helps manage fuel residue, and safety glasses protect your eyes from splashes or fumes. Set up your work on a flat surface for steady, safe testing. Your testing kit should include the multimeter, the vehicle’s manual, alligator clip test leads, appropriate hand tools, and safety gear. The resistance should change smoothly without spikes as you move the float, which confirms the sender is healthy. For those who also enjoy electronics on the water, catfish enthusiasts often rely on similar precision tools to locate their catch. Understanding how sonar technology converts electrical signals into depth readings can improve your diagnostic approach for any marine sensor. A reliable battery with charger ensures your diagnostic tools stay powered during extended field testing.
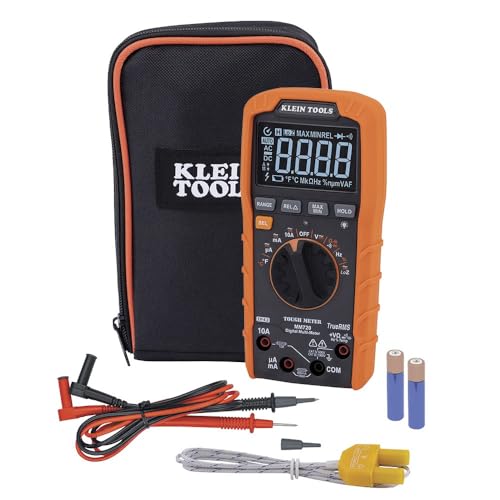
VERSATILE FUNCTIONALITY: Measures AC/DC voltage up to 1000V, 10A AC/DC current, 60MΩ resistance; additional features include continuity, temperature, capacitance, frequency/duty cycle, diode test and low impedance (LoZ)

ACCURATE MEASUREMENTS - The AstroAI DM200M multimeter is designed to accurately test AC/DC Voltage, AC/DC Current, Resistance, Continuity, and Diodes. These accurate readings easily and efficiently diagnose electrical issues.

【10000 Counts TRMS Clamp Meter】FNIRSI DMC-100 digital clamp multimeter provides stable TRMS measurement for AC/DC current up to 600A, voltage, resistance, capacitance, frequency, and temperature. It integrates NCV detection, live wire testing, continuity, and diode checks to support multi-function electrical diagnostics in maintenance and repair scenarios
Check the Circuit and Ground First
Start by checking the circuit and ground connections before testing the gauge. Briefly ground the signal wire to a bare chassis point. If the gauge swings to the expected extreme, the circuit is working correctly. If it doesn’t respond, the issue likely lies in the gauge or wiring rather than the sender. Always verify these basics to avoid chasing incorrect faults later on. Resistance changes within the circuit are detected by the fuel gauge to indicate fuel level. Unlike an anchor light, which must be visible from two nautical miles away to meet navigation requirements, the primary characteristic of a fuel sender is varying resistance based on fuel level. For accurate readings, ensure your Garmin fish finder’s key settings are properly configured to interpret sonar returns. For reliable navigation, consider pairing your setup with a top speedometer designed for marine use.

Wide Application:The electric fuel pump relay kit is 40 Amp and universal for 12V ststem. Relay is 40A,Fuse is 30A. Fit for any device with 12V activation but no more than 40 amperes.

Universal Compatibility: Works with all common sensors including 0-190 ohm, 0-180 ohm, 10-180 ohm, 240-33 ohm and 240-30 ohm signals; One unit fits various fuel tank types

Accurate 240–33 Ohm Output: Standard 240-33 ohms range ensures seamless compatibility with most marine and automotive fuel gauges. Provides stable and accurate readings from empty (240Ω) to full (33Ω). 8" (200mm) probe fits tanks 8.3"-8.9" deep with 21mm resolution
Test the Sender’s Resistance Step by Step
First, set your multimeter to the ohms (Ω) setting, choosing a low range like 200 Ω for better accuracy. Isolate the sender by disconnecting its plug from the wiring harness. Then, probe the signal terminal and ground with the multimeter leads. Move the float through its full range—raising it to the top and lowering it to the bottom—while recording the resistance at each position. A healthy sender should show a smooth, continuous change in resistance without abrupt jumps or dead spots. This indicates the sender is properly calibrated and functioning correctly. Use the same tank position as when mounted to avoid false readings from testing sideways. For boaters relying on backup distress tools, a reliable EPIRB is an essential safety companion. Understanding how a fish finder interprets sonar returns can help you distinguish between structure and fish on your display.
If you encounter an open circuit (OL reading), spikes, or sticky resistance values, the sender is likely faulty. Be aware that a bent arm, contamination, or debris can cause misleading readings, so examine the sender for physical damage or obstructions. Record all resistance values carefully for your diagnosis, paying attention to any irregularities that might suggest a malfunction.
What Should the Resistance Reading Show for Your Vehicle?
Your fuel sender should show resistance readings that match your vehicle’s specifications. For example, a sender designed for a GM car from 1965 onward typically measures near 0 ohms when empty and around 90 ohms when full. Conversely, older Ford or Chrysler units may measure between 73 and 10 ohms, showing high resistance at empty and low at full. Ensuring the sender’s resistance range matches your gauge’s requirements is crucial for accurate readings; a mismatch will give incorrect fuel level indications. For ice fishing, a Humminbird fish finder similarly relies on consistent sensor output to avoid false depth readings. For boaters, a top Garmin Striker 7sv with transducer offers comparable reliability in fish finding by ensuring stable sonar returns. Checking the best fuel tank sending unit reviews can help you verify the correct resistance specifications for your specific vehicle model.
Check for resistance consistency across the range. A good sender provides a smooth, steady change in resistance as the float moves. If you see sudden jumps, open circuit readings, or a stuck value, the sender is likely faulty. Remember, midrange resistance values can vary based on tank shape, so they serve only as rough guides. The key is that your empty and full readings meet the specified ranges; otherwise, it’s time to replace the sender.