Want to add underwater boat lights, but unsure how to do it right? Getting the installation just right ensures your lights stay secure and waterproof, so your boat looks great and stays safe.
By following proper steps, you can confidently mount and wire your lights for a clean, professional finish.
The full guide below walks you through every important detail.
Plan Your Underwater Light Placement First
Plan your underwater light placement before you grab a drill to avoid costly mistakes. Aim to position the fixtures 4 to 12 inches below the waterline at your boat’s normal load, ensuring strong illumination while keeping the lights fully submerged to prevent glare. Carefully consider the lighting angles: wide flood beams (over 90 degrees) produce an even, broad glow and can be spaced further apart, while narrow spot beams (under 60 degrees) provide concentrated light that demands closer spacing. Mount the lights on a flat transom or hull side, and verify inside for obstructions such as ribs or tanks that could interfere with installation. Keep your lights 2 to 4 feet apart for a balanced, symmetrical look and avoid placing them near swim platforms, trim tabs, or lower units that might block the beam. For catfish anglers, reviewing sonar cone coverage from top models can help you understand how beam spread affects your setup. Always double-check your layout from both inside and outside the boat before drilling into the hull. For optimal results, consider the same principles used in top fish finders to evaluate mounting locations and beam coverage.
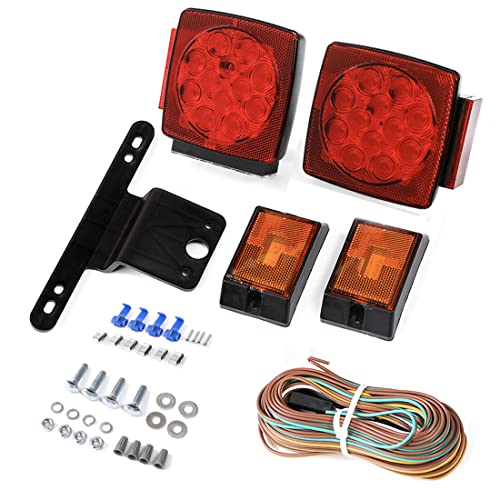
Left and Right trailer tail Lights have 7 functions : stop/turn/tail/rear reflector/side reflector/side marker light/ license plate light. The trailer led lights are suitable for under 80 Inch width towing vehicles, like boat,utility trailer, truck, snowmobile, etc.

TOP MARINE MATERIALS: 12000LM 12V 120W 60LED, 5INCH, RGB 5050LEDs, IP68 Fully Filled Glue (Under water Use ONLY), Patented Chip, Anti-corrosion Marine One-piece All Metal (2025 New Upgrade), Tinned Copper Wire, Personalized Wiring Port. Max powerful design for large boats and marine docks
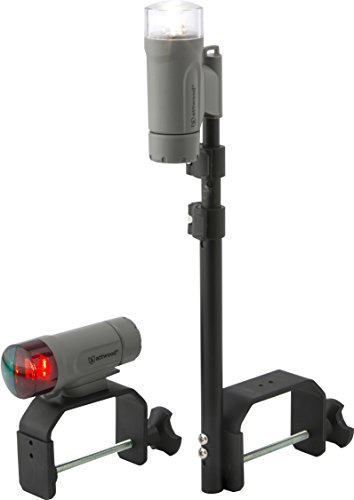
ULTIMATE NIGHTTIME VISIBILITY: Stay safe on small boats or tenders without 12V systems using these compact, high-intensity LED navigation lights
Gather Tools: Pilot Bit, Hole Saw, 3M 4200 Sealant, and Tinned Wire
To drill your holes accurately, you should start with a pilot bit sized between 3 mm and 3.5 mm, matching your light’s template. This small drill bit helps guide the larger hole saw and reduces the risk of cracking fiberglass or gelcoat. Use a drill with variable speed control so you can start at low speed, ensuring the pilot bit walks less and the hole remains centered.
Next, select a hole saw that fits your cable or body opening, typically ranging from 1/2 inch to 3.625 inches. A properly matched hole saw creates a clean cut and reduces chipping. Keep your drill steady and apply gentle pressure; avoid forcing the bit, which can cause damage or uneven edges.
During drilling, maintaining the right speed is crucial—high speeds can melt fiberglass or gelcoat, while too slow might cause the bit to bind. Regularly back out the drill to clear debris from the cut and prevent overheating. After drilling, chamfer the edges with a file or sandpaper to smooth rough spots and prevent chafing of the sealant or wiring. Using quality components during installation ensures better long-term performance and reliability of your setup.
Ensure your drill bits and hole saws are sharp and clean for effective cuts. Misalignment or excessive force can lead to cracked gelcoat or uneven holes, complicating sealing and wiring. Proper preparation and careful operation will yield precise holes ready for waterproof sealing and connection. For accurate results on the water, you can cross-check your sealing technique against the navigation lights rules used for compliance during night operation.
For accurate results on the water, you can cross-check your sealing technique against the key settings and readout principles used in oil pressure gauge monitoring.


Compatiable: Pilot drill bit for hole Saw series(≥9/16" Inch / 14mm), This extra long center drill bit has a 3-1/4" overall length for deep-hole drilling and extra reach;

Please Note for Your Safety: the power tool adapter is screwed into the circle saw bit in a clockwise direction. Therefore, when making holes, please drill in a clockwise direction to avoid the connecting rod of the hole saw from unlocking and falling off due to counterclockwise rotation
Prep the Hull for a Watertight Seal
To ensure a watertight seal, start with a flat, smooth surface on the hull where the light will be mounted. Sand the area around the hole thoroughly to remove old bottom paint, corrosion, and debris. This surface prep is critical; any unevenness can prevent the sealant from adhering properly and cause leaks. After sanding, clean both the hull and the light’s mounting face with acetone and lint-free cloths. This step removes grease, wax, and residue that could compromise the bond. Proper cleaning ensures the sealant bonds directly to clean, bare material, maximizing durability. For additional peace of mind, consider pairing this installation with a marine sound bar for superior audio quality that matches the vessel’s upgraded look. Avoid using alcohol-based cleaners for this cleaning step, and instead rely on acetone to prevent residue that could weaken the seal. For a comprehensive upgrade, selecting a reliable depth finder helps you navigate shallow waters common to jon boats. If you also plan to upgrade your helm, pairing the installation with a top speedometer ensures accurate speed readings for a safer and more enjoyable boat adventure.
Drill the Hole With a Pilot Bit and Correct Hole Saw
To drill a clean hole through a fiberglass hull without chipping, wandering, or causing leaks, start by marking your center point and verifying interior clearance. Use a 1/8-inch pilot bit to drill perpendicular to the surface. This small pilot hole guides the larger cut and helps ensure your hole stays centered. It also confirms that no hidden obstructions are in the way. Match your hole saw exactly to the manufacturer’s specified size for the underwater light housing, since diameters can vary widely. Begin drilling in reverse to score the gelcoat, which reduces chipping. Then, switch to forward rotation at a moderate speed to complete the cut. Wear eye protection throughout, keep your drill steady, and stop if the saw starts to wander from the marked point. Once you finish, inspect the edge for cleanliness and measure the diameter to confirm accuracy. With a precise, centered hole, you reduce the risk of leaks and ensure a proper fit for sealing and installation. For marine electronics, castable fish finder models often use similar installation principles to ensure a watertight seal. Applying a beveled cutting edge to the hole saw can further reduce gelcoat chipping on curved hull surfaces. Choosing a reliable depth finder for boat setups also benefits from this same precise drilling technique to avoid hull damage and maintain a secure seal.

Common Size: Included most common sizes for Homeowners/Crafts, 5 PCS hole saws 1" (25 mm), 1-1/4" (32 mm), 1-1/2" (38 mm), 2" (51 mm), 2-1/8" (54 mm), 1 pc mandrels, 2 pc drill bits, 1 pc hex key in storage case for everyday home drilling hole projects

✿Package Includes: 1 x Glass Hole Saw with Pilot Drill Bit. Cutting Diameter: 2 Inch / 50mm, Cutting Depth: 1.57 Inch / 40mm, Diamond Coating Width: 0.24 Inch / 6mm, Shank Type: 3/8 Inch / 9.5mm Triangular Shank. The ceramic hole saw is packaged in a transparent box, making it easy for you to carry and use.

[Dimensions] 3.74 inch hole saw (95mm hole cutter) 83 mm overall length, 1.2 mm blade thickness, 10 mm shaft diameter, 6 mm center drill diameter.
Mount the Fixture by Feeding Cable and Applying Sealant
To mount the fixture properly, start by ensuring the cable is free of obstructions and the opening is clear. Feed the cable through the hull before applying any sealant, and manage it so the lead exits with no stress or sharp bends. This prevents strain at the housing and ensures a secure fit. Perform a dry fit to verify the fixture’s orientation and length, then remove it for sealing. Understanding how a horn relay manages high current flow can help boat owners protect their electrical system when adding new accessories.
Apply a continuous bead of marine-grade sealant around the back perimeter of the light’s body and at the cable exit area. Use enough to create a watertight seal, preventing water ingress. Press the fixture firmly onto the hull, aligning it evenly to avoid gaps or misalignment. Slight squeeze-out of sealant indicates full contact and proper adhesion. Immediately wipe away excess sealant and keep the lens clean. Fill any unused mounting holes with sealant to eliminate potential leak paths. When interpreting the Garmin Striker 4 screen later, distinguishing real fish from clutter requires attention to arch shapes and bait ball readings. For those who also fish offshore, reviewing top fish finder GPS combos can help you choose a reliable unit for coordinating with your installed lights. Check that the fixture sits flush before allowing the sealant to cure. After the lights are mounted, inside the bilge you should slide a rubber strain relief onto the wires and press it into place to further prevent water intrusion.

DEVELOPED SPECIFICALLY AS A MARINE SEALANT – Stays tough and flexible for a wide range of uses above the waterline

MARINE SILICONE SEALANT - Available in black, white, and clear, this superior heavy-duty adhesive bonds to fiberglass, wood, glass, metal, and plastics. Ideal for above and below the waterline applications

PERMANENT WATERTIGHT SEAL — ABOVE & BELOW WATERLINE — 5200 fast-cure formula creates a permanent, flexible bond that holds against water pressure, hull flexing, and wave impact. Use above or below the waterline for through-hulls, transducers, struts, and hull-to-deck joints.
Seal Around the Cable Entry and Fixture Flange
You must create a reliable seal around the cable entry and fixture flange to prevent leaks. Begin by applying a continuous bead of marine sealant around the cable hole and screw holes. Be sure to coat the cable insulation where it exits the fixture, ensuring the connection is fully sealed. Verify that the cable gland compresses evenly to achieve a watertight fit; gaps here are primary leak points and must be avoided.
Next, bed the fixture flange with a thick, uninterrupted sealant bead around its entire perimeter. Position the fixture so the flange seats evenly against the hull surface. Tighten the screws by hand to prevent uneven bedding, and wipe away any excess sealant. For the cable seal, install a closed-cell foam gasket between the seal housing and hull, matching the gasket size to the cable diameter for optimal compression. Use stainless steel hardware to enhance durability and resist corrosion.
Wire Your Underwater Lights With Fuses and Protected Connections
Fuse each underwater light with an inline fuse on its positive lead, positioned as close to the power source as possible. This setup isolates faults to individual lights and shields the entire wiring run from damage. Use a fuse rated according to your light’s specifications; do not rely on a single fuse for multiple lights, as this increases risk and reduces protection. Proper sizing ensures you safeguard the wiring gauge and prevent overcurrent damage. The correct position of the fuse, located by the power source, mirrors the placement principle used for an oil pressure gauge to ensure accurate and safe readings. Just as a horn button must be rated for its specific electrical load to avoid failure, each fuse must match the light’s amperage rating to ensure reliable protection. For similar reasons, choosing quality marine electronics with proper ratings can help you avoid system failures and ensure long-term performance.
Route the positive leads through their respective fuses before connecting to your vessel’s DC supply, matching the system’s voltage rating. Connect the negative leads directly to the negative bus or supply, ensuring proper grounding to avoid stray currents that could cause corrosion or malfunction. Always use marine-grade waterproof connectors and apply heat shrink tubing at every joint to prevent water ingress and corrosion.
Verify correct polarity before crimping connectors—black wires should connect to the negative terminal, while white or red wires go to positive. Secure all connections firmly to prevent chafing, strain, or accidental disconnection, since the safety and functionality of your entire underwater lighting system depend on these well-protected joints.

Heavy duty 10 (AWG) Gauge red color wire Allows you to splice it into any project

WHAT YOU GET: The package includes 6 pack 12AWG inline fuse holders and 66 pcs standard blade fuses (6 each for 2A, 3A, 5A, 7.5A, 10A, 15A, 20A, 25A, 30A, 35A, 40A)
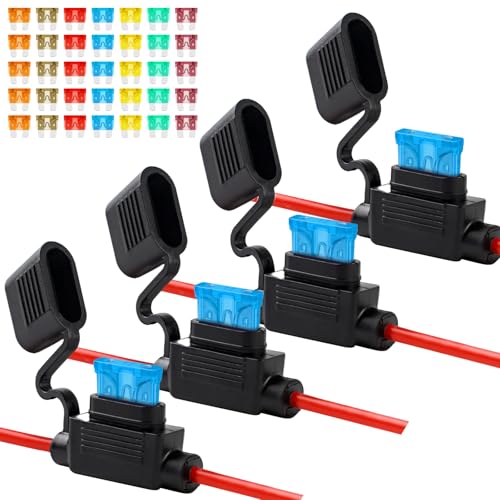
【PACKAGE INCLUDE】 4 packs of 12AWG inline fuse holders and 35 standard blade fuses (5 each of 5A, 7.5A, 10A, 15A, 20A, 30A, 40A). Suitable for 12V automotive and marine circuit protection
Test the System on Land Before Launching
Testing the system on land before launching is crucial because it verifies that all underwater lights form a complete circuit and function correctly in a dry environment. Power each fixture individually to perform basic diagnostics, ensuring consistent illumination across all units. Use a multimeter to check for any power loss or wiring issues, and don’t skip the lighting calibration step—ensure all brightness levels match throughout the system. To prevent corrosion later, periodically apply dielectric grease to electrical connections. If a light flickers or fails during this stage, you’ll avoid the trouble of hauling the boat out later to fix it. Confirm that smart controls respond immediately during the test, as delayed reactions can signal connectivity problems. Conducting this land-based check significantly reduces the risk of discovering faults after launching, saving you time and frustration during your dive. For added performance and reliability, consider pairing your lights with a marine amplifier to boost audio clarity while you work. Consider pairing your lights with a reliable EPIRB for emergency preparedness in case of electrical failures offshore. Make sure every function is fully operational before you splash into the water. Understanding how pitot tube readings relate to water speed can help you verify your boat’s performance metrics after installation.
Inspect Alignment, Clearance, and Leak-Free Seals
To ensure proper alignment, the light must sit flush against the hull with the mounting face square to the surface. Verify this before applying sealant, since uneven positioning can create gaps that compromise the seal’s integrity. Even slight tilts or misalignment can lead to leaks later on. Pay attention to orientation markings—some fixtures specify that markings face upward or that the fixture sits perpendicular to the waterline—to ensure consistent and proper installation.
Next, check the clearance around the fixture. Look for internal obstacles such as hoses, wiring looms, or stringers that might interfere with installation or future maintenance. Make sure there is at least six inches of space around the unit, especially around the LED module, so you can service it later without difficulty. Once the area is clear, dry-sand it to create a smooth surface for sealant adhesion.
Apply a continuous bead of sealant around the perimeter of the fixture and the stem. When tightening to the manufacturer’s specified torque, watch for squeeze-out—excess sealant pushed out of the joint—which indicates sufficient sealant volume. No squeeze-out suggests too little sealant, potentially risking leaks. After installation and once the boat is launched, immediately inspect the fixture for leaks. Then recheck again after a short period, ensuring the seal remains intact and no moisture appears around the fixture. Do not leave the boat unattended until you confirm the installation is leak-free.