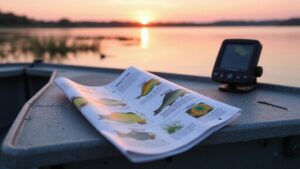
Struggling to read your Lowrance fish finder? It might seem complex at first, but understanding what you’re seeing on the screen can dramatically improve your fishing.
Think of the display like a map—fish show as narrow arches or tiny blips, while structure appears as wider patches. Getting the settings just right can make a huge difference in revealing what’s below.
Keep reading to learn how to interpret your screen and find the best fishing spots.
How to Read Fish Arches and Symbols on Your Lowrance
Fish arches only appear when your boat moves and a fish passes through the sonar cone. To accurately identify baitfish, look for thin, clustered dots or small marks that generate weak, scattered returns. Dense bait schools show up as thicker, more intense color clusters. When interpreting suspended fish, focus on arch thickness rather than length. A thick, vivid arch indicates a stronger echo and a larger fish target. Partial arches mean the fish barely entered the cone. Sonar pulses create these echoes by bouncing off objects in the water column. Don’t rely solely on Fish ID symbols; they simplify the image but can hide important details. Instead, combine the shape of the arch, color intensity, and surrounding structures for a more reliable reading. This method helps you distinguish a large suspended fish from a bait school or bottom clutter. Watch out for blobs and bait balls that can indicate dense forage fish rather than a single large target. For optimal visibility at night, ensure your screen settings are adjusted to match the high-performance lighting of your boat’s navigation system.

FISHREVEAL: Fish are easier to find and easier to identify. FishReveal combines the target separation of Lowrance CHIRP sonar and the high-resolution images of structure from DownScan Imaging to makes fish light up on your display.

COMPACT FISH FINDING: The 5-inch display fits smaller consoles while providing CHIRP sonar, DownScan Imaging, and detailed charting.

ACTIVE IMAGING 3-IN-1 INCLUDED: Find fish and structure with CHIRP sonar, SideScan and DownScan Imaging with FishReveal
Read Depth, Water Temp, and Speed Readouts Like a Pro
You can read depth, water temperature, and boat speed like a pro by treating these readouts as a real-time dashboard. The depth number indicates the water below your transducer, not the total depth of the water body. If it flashes or shows erratic numbers, you’ve lost bottom lock, which means the sonar can’t keep track of the bottom contour. Water temperature provides clues about surface conditions; sudden shifts often signal thermoclines or inflows that could attract fish. Just as in an electrical setup, ensuring a clean and reliable connection for your transducer wiring prevents intermittent signal loss. For buyers selecting gear, choosing a reliable speedometer from the top speedometer picks ensures accurate speed data for trolling patterns. Reviewing top depth finders can help match your unit to your boat’s hull and fishing style.
Boat speed helps you replicate successful trolling passes or drift patterns precisely. These three readouts are typically displayed in a corner of your screen or as a digital overlay, giving you immediate feedback on your current situation. Overlay data is accessible by tapping the power key and selecting “edit overlay” to customize your display preferences. Keep an eye on water clarity as well—clearer water allows better sonar penetration and target visibility. Monitor your battery voltage because low power can cause unreliable readings or dropouts. Together, these data points confirm your boat’s position, water conditions, and movement, helping you adjust your technique in real time.
Matching temperature breaks with depth changes can help you locate fish-holding structures. For best results, keep units consistent across all displays for quick and accurate comparisons.
Best Lowrance Settings for Clearer, Clutter-Free Sonar
To achieve a clearer, clutter-free sonar image on your Lowrance unit, start by turning off Auto Sensitivity and adjusting it manually. Gradually lower the sensitivity until unwanted noise diminishes, typically between 65% and 85%. This precise setting helps eliminate weak clutter without losing relevant targets.
Next, focus on interference management. Enable Noise Rejection but keep it at the lowest effective level to preserve detail. In choppy water, increase Surface Clarity to reduce wave-induced clutter from the water’s surface, improving target detection below. For algae or pollen conditions, using a high chirp frequency can further optimize detection. For anglers using a float tube, a compact unit with a dedicated transducer mount simplifies installation and reduces interference. Understanding what the screen readouts mean is key to interpreting sonar returns accurately. If you plan to build a stable setup, following a DIY fish finder mount guide can ensure the transducer stays securely positioned for consistent readings.
Finally, optimize your scan performance. Increase Ping Speed to enhance update rates and better manage interference from nearby sonar units. Set Scroll Speed near maximum to maintain a steady, real-time view of the water column. Adjust ColorLine to mute softer noise while emphasizing stronger echoes, resulting in a sharp, clutter-free display. These settings work together to give you a clean, detailed view beneath the water surface.

Dual-Frequency Operation (83/200 kHz) – Offers reliable depth readings and fish detection in both shallow and deep-water environments

2-in-1 Ultimate Angler Combination - Engineered specifically for kayak and SUP anglers, this premium mounting system allows you to install your fishfinder display screen and transducer arm simultaneously on a single sleek setup. No more cluttered decks—just a streamlined, high-efficiency fishing workspace that keeps your essentials perfectly positioned.

【Enjoy Fishing Life Better】 Frustrated because the picture on your electronics wasn’t the same as advertised? 7400931 MHX XNT Transducer Bracket is a nice addition for your boat that helps your skimmer transom mount transducer to find fish easier to find and get the right scan image. Efficiently improve your transducer running performance without letting go of any fish!
Separate Fish Targets From Structure and Clutter
To separate fish targets from structure and clutter on your Lowrance screen, focus on recognizing distinct echoes. Fish targets often show as narrow, arch-shaped marks or isolated blips, standing out from wider, irregular patches of structure like rocks or weedbeds. Use color enhancement features to assign a different hue to fish echoes, making them easier to identify against the background of bottom cover or clutter. Pair this with signal filtering to reduce noise, which helps prevent surface clutter or thermoclines from mimicking fish. Adjust sensitivity to detect weak fish signals, but avoid setting it so high that clutter and noise overwhelm the display. Watch for echoes that repeat at the same depth over multiple passes; consistent returns are more likely to be fish than random junk. Favor clean, separate arches and discrete blips over large, messy patches, and fine-tune noise rejection settings to maintain a clear screen while still catching subtle fish signals. A quality boat switch panel can help organize sonar power reliably, minimizing electrical noise that interferes with fish identification. For equally clear audio performance on deck, consider a marine subwoofer with enclosure to enhance your onboard experience. To further enhance identification, switch between different sonar views for comprehensive analysis of fish targets versus surrounding structure. For reliable navigation in challenging conditions, consider the binnacle compass fundamentals for maintaining heading accuracy.
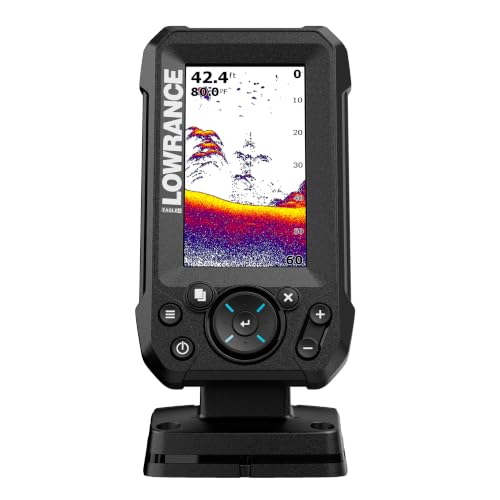
EASY TO SEE: The 4-inch IPS portrait screen stays clear in bright sunlight, from wide viewing angles, and through polarized sunglasses.
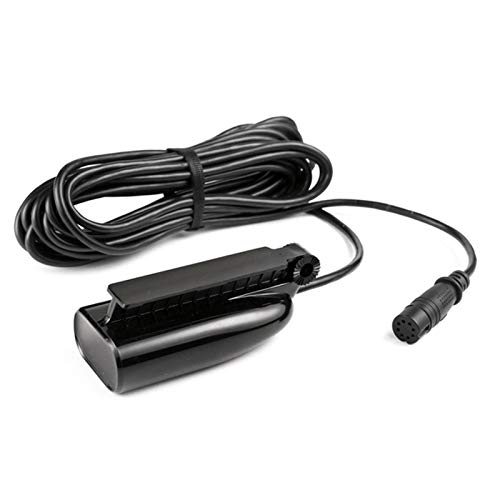
FITS: Lowrance HOOK² 5, 7, 9 and 12 inch Fish Finder models.
READY TO PERFORM: Wide beam, mid, and narrow beams make covering large expanses or drilling down on specific spots available at your disposal; Ideal for elite anglers who want to take their matchplay to the next level
Read Bottom Hardness and Contour to Pinpoint Fish
Reading both bottom hardness and contour together allows you to pinpoint fish more effectively. Start by analyzing the contour lines on your Lowrance screen—look for tight, closely spaced lines that indicate steep drop-offs, ledges, or humps where fish are likely to hold. Next, evaluate the bottom composition: a thick, dark return shows a hard bottom, such as rock or gravel, while a thin, light trace indicates soft sediment like mud or sand. Pay attention to transition zones where these different types meet; these edges often serve as feeding lanes for fish. Use color-coded hardness overlays to quickly identify these boundaries. Focus your attention on areas like points, channel edges, or humps that border harder bottom, as they tend to attract more fish. Logging sonar data helps build detailed maps that combine both bottom hardness and contour information. By matching contour breaks with changes in bottom composition, you increase your chances of locating prime fish-holding spots and improve your casting accuracy. These transition zones align with food sources, making hard to soft bottom transitions the key to consistent success. For maximum accuracy, ensure your transducer is properly installed inside the hull to reduce noise and improve signal clarity. Many catfish anglers specifically look for a fish finder with CHIRP to get clearer target separation in these transition zones. For optimal nighttime visibility, consider an anchor light suitable for your sailboat when fishing after dark.