If you’re wondering how to build a simple yet effective way to measure airspeed, making your own pitot tube might be the answer. With just some copper or brass tubing, silicone hoses, and a few tools, you can create a device to help you gauge airflow accurately.
Once assembled, proper calibration will give you reliable readings for your projects.
The full step-by-step process is right below.
What Is a Pitot Tube and Why Build Your Own?
A pitot tube measures the velocity of a fluid—air or liquid—by capturing and comparing pressure data. It works by detecting stagnation pressure, which is the force exerted when the moving fluid is brought to a standstill within the tube. This stagnation pressure is then compared to static pressure, the background pressure of the fluid at rest, to determine the flow’s velocity. Fish finders operate on a similar principle of generating sonar sound waves to map underwater terrain and locate objects, though they measure depth and presence rather than fluid speed. Building your own pitot tube offers a hands-on way to understand fluid dynamics principles. It allows you to see how pressure differences relate to velocity, transforming theoretical knowledge into practical experience. Such DIY setups are ideal for educational demonstrations, basic wind speed measurements, or model testing in wind tunnels. While they lack the precision and durability of commercial sensors, they provide valuable insight into how aerodynamic measurements work. A commercial marine VHF antenna, by contrast, prioritizes antenna performance and cost for reliable communication rather than velocity measurement. Knowing how to build one familiarizes you with the core concepts and offers a cost-effective entry point into fluid mechanics. For saltwater applications, selecting durable materials is critical because saltwater corrosion can quickly degrade unprotected components.
Tools and Materials You’ll Need for Your DIY Pitot Tube
Building your own pitot tube begins with selecting the right tools and materials, many of which you might already have. For material choices, copper or brass tubing are ideal because they are easy to cut and solder. Aluminum can also be used if you want a lighter build. PVC tubing works well for inexpensive prototypes and initial testing. For pressure lines, grab silicone or polyurethane hoses, which provide flexibility and durability. Brass fittings and miniature clamps are essential to prevent leaks and ensure a secure connection. When installing the pitot tube on a boat, remember that the vessel’s stern light must be a white light visible from 135 degrees aft to comply with navigation regulations. To ensure your safety equipment is complete, you might also consider researching the best epirb for boat as a critical emergency beacon for offshore voyages. For anglers who rely on sonar to locate fish, reviewing top fish finders for boats can help identify the best model for your vessel.
Tool selection is equally important. You’ll need a small drill bit—about 1 mm in size—and a hand drill or rotary tool to carefully create the pitot opening. Use a tube cutter to make clean cuts in the tubing. A fine file or sandpaper helps deburr the edges after cutting, preventing damage or leaks. For assembling metal parts, a soldering iron, flux, and solder are necessary. If you’re working with non-metal parts, epoxy or CA glue will keep everything secure. Don’t forget a ruler and marker for measurements, clamps to hold parts steady, and safety gear like eye protection, especially when drilling or soldering.

【1/8" OD X 5/64" ID X 6.5 FT】Refrigeration tube outer dia is 3mm, inner dia is 2mm, total length is 6.5Ft/2m long

【Specification】Annealed UNS C12200 Seamless Copper Tubing, 1/4" (6.35mm) OD x 0.195" (4.95mm) ID, wall thinkness 0.028" (0.7mm), length 10ft (3.05m)
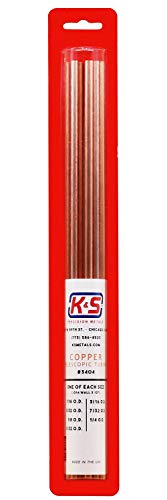
Complete Copper Telescopic Assortment: Includes 7 precision round tubes ranging from 1/16" to 1/4" OD, each 12" long with 0.014" wall thickness, crafted from alloy 122 copper.
How to Assemble the Pitot Static Probe
To assemble the pitot static probe, start with the forward-facing ram-air tube. Ensure its opening is straight and free of obstructions to allow accurate airflow measurement. Next, create the static section by completely sealing one end and drilling several small, evenly spaced holes around its circumference for pressure sensing. Keep these holes clean and free of burrs for precise readings. For a durable and reliable build, choose materials with good resistance to vibration similar to how an anchor light must withstand marine conditions. You can model the mounting approach after a portable fish finder box to keep the assembly compact and easily removable. To prevent wiring issues common in marine electronics, consider using stranded marine wire for all electrical connections to ensure flexibility and corrosion resistance.
Seal all joints with solder or adhesive to prevent leaks caused by vibration. Attach both the ram-air tube and static section securely to a sturdy mounting bracket that resists bending, ensuring the probe remains stable during operation. Route the tubing away from sharp bends or pinch points to avoid kinks and maintain airtight connections. Finally, verify the entire assembly is airtight—check that the ram-air opening stays clear and that the static section is sealed, except for its sensing taps.
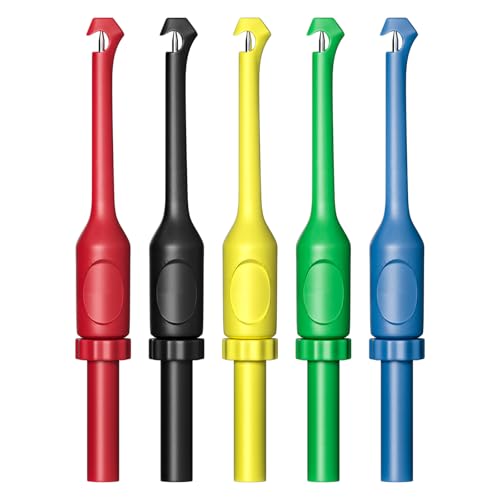
The puncture probes are made of PA and stainless steel materials, which are heat and cold resistant and comfortable to grip.


VOLTAGE and CURRENT -- CAT III - up to 1000V / 10A
Where to Drill Static Ports for Accurate Readings
Drill the static ports approximately one-third of the distance from the wing’s trailing-edge root toward the tail. Proper placement is essential for accurate airspeed and altitude readings. Mount the ports flush with the fuselage side to minimize airflow disturbances. Avoid areas near wing junctures, bumps, or propwash, as these can create turbulence that skews measurements. Place each port on opposite sides of the fuselage to help cancel slip errors—this typically involves drilling on symmetrical sides at the same height. Ensure the opening is positioned at the fuselage’s vertical tangent point, aligned with the airflow to prevent errors caused by misalignment. Start with a smooth, flush, side-mounted location, then refine the position through flight testing for precision. Unlike aircraft, a blocked pitot tube at sea causes erroneous speed readings that may go unnoticed until critical maneuvering is required. For similar attention to detail, choosing a marine sonar unit like the Lowrance Elite FS 9 requires evaluating performance factors such as transducer quality and display clarity. A beginner angler seeking reliable underwater detection should consider a top fish finder with user-friendly sonar settings and clear target separation.
How to Connect and Pressure-Test Your Probe for Leaks
To connect and pressure-test your probe for leaks, start by firmly pushing flexible tubing over the pitot tip or barb until it cannot go further. Secure a tee fitting to branch off to both your pressure source and a manometer. Ensure all drain holes are sealed and visually check the probe for cracks before pressurizing to prevent potential failures. Side-imaging sonar can reveal submerged structure where crappie school, but for this test, apply pressure gradually to approximately 14 millibars, equivalent to about 100 knots of airspeed, to avoid overloading the system. For boats, pitot tubes offer a low-cost speed solution compared to more expensive electronic sensors. The Top Speedometer Picks for your boat adventure often include a reliable pitot tube system for its simplicity and affordability.
During the testing procedure, hold the pressure steady for one minute. A pressure decay equivalent to more than 10 knots at an airspeed of 150 knots indicates a leak. Clamp off the line after pressurizing to isolate the system and improve accuracy. If a leak is detected, reseat the tubing securely or replace the fitting before retesting. Always release the pressure slowly to prevent equipment damage, then disconnect carefully.

PRESSURE GAUGE – Underhill liquid filled 160 PSI water pressure test gauge to measure dynamic pressure with clear and easy to read dial.

✅Easy of Use: With its magnetic flange, the probe securely adheres to metal surfaces, allowing for hands-free operation. This not only frees up your hands but also ensures consistent and reliable measurements.

PRESSURE GAUGE: Underhill A-PHG-160K liquid filled 160 PSI water pressure test gauge to measure dynamic pressure with clear and easy to read dial. From a trusted USA-based company.
How to Calibrate Your DIY Pitot Tube in a Wind Tunnel
Calibrating your DIY pitot tube in a wind tunnel involves comparing its readings against a known standard at various flow speeds. First, ensure the probe is pressure-tested and free of leaks. Position your pitot tube and a reference instrument near the center of the test section, maintaining at least two tunnel diameters of distance to prevent airflow interference. Align both probes directly into the airflow; even small yaw deviations can lead to significant measurement errors. For the best results, consider using a marine Bluetooth speaker to play a steady tone for auditory confirmation of consistent airflow conditions during testing. To further improve accuracy, apply the same sonar sensitivity settings principles used on a fish finder to adjust your pressure transducer’s gain for clearer readings. Using a fish finder with high-quality construction can similarly help ensure your pitot tube’s housing remains rigid and leak-free under pressure.
Set the wind tunnel to steady airflow conditions and record ambient pressure and temperature. Use a zeroed manometer or a calibrated transducer to take paired readings at multiple known speeds. At each velocity, compare the dynamic pressure reading from your DIY pitot tube with the reference instrument’s value. Repeat measurements across the range of target velocities to improve accuracy.
Plot these paired readings to develop a calibration curve or determine a correction factor. This process allows you to convert raw dynamic pressure data into precise flow velocities, ensuring that your measurements are accurate and reliable across different testing conditions. Proper calibration helps you avoid errors caused by setup variability or probe misalignments.

COMPLETE LEAK TESTING KIT – Includes hand pump with gauge, M10/M9/M8 adapters, 60cm hose, and custom carry case. Everything you need to pressure test or vacuum test outboard gearboxes right out of the box.

5KG / 10KG / 20KG high sensitivity weighing sensors with HX711 module are suitable for various electronic platform scales, Kitchen Scale, ingredient scales, packaging scales, as well as automation equipment and testing fields.

pressure transducer /pressure Sender/ Pressure Transmitter, Our material is using top of line 316 stainless steel (not 304)and high temperature auto-graded plastic