Thinking about installing a stern light that’s both legal and reliable? The key is choosing a USCG-certified marine LED lamp with the right beam angle and sturdy hardware.
Getting the placement, wiring, and sealing just right makes all the difference for safety and compliance. Keep reading to see how you can build and mount yours properly.
What a Stern Light Is and Why Rules Matter
A stern light is a required navigation light for vessels under way at night. It is a white light positioned as close to the stern as possible, emitting a fixed 135-degree arc that extends 67.5 degrees from right aft on each side. This specific placement and angle help other boats determine your position and direction, especially during overtaking or low visibility conditions. The light must be visible from at least 2 miles away on smaller boats and up to 3 miles for vessels over 50 meters in length. Compliance with these standards ensures you are properly signaling your vessel’s rear aspect, reducing the risk of collisions. Far from being decorative, a stern light is a legal requirement designed to standardize vessel visibility and promote safety at night. Ignoring these rules not only endangers your vessel but also puts others at risk by creating dangerous blind spots. For your wiring setup, consider using a quality boat switch panel to control navigation lights reliably. For context, side navigation lights on boats follow a separate set of color and arc rules to indicate port and starboard aspects. When selecting components for your build, prioritize LED light quality to ensure reliable brightness and longevity under harsh marine conditions.
Tools and Materials You’ll Need for the Build
To gather the tools and materials needed for your build, start by assembling essential power tools such as a cordless drill, drill bits, and a screwdriver. These are vital for making precise holes and fastening components securely. A wire stripper, crimping tool, and a multimeter will help with electrical connections and troubleshooting.
For wiring, use marine-grade tinned 16-gauge copper wire, which resists corrosion and is suitable for wet environments. Marine connectors, an inline fuse holder (typically 1 amp), heat-shrink tubing, and electrical tape ensure reliable, waterproof connections. Mounting hardware should include stainless steel #10 screws, a sturdy bracket, and cable clamps to secure components firmly.
Weatherproofing your installation is crucial; incorporate marine-grade non-silicone sealant, a grommet to protect wiring through holes, and a heat gun to shrink tubing and seal joints. Don’t forget measuring and marking tools such as a tape measure, pencil, masking tape, sandpaper, and rags for surface prep and clean-up.
Consider your power needs when choosing components. A small 12-volt circuit with a 1-amp fuse is sufficient for LED lights, keeping your power draw minimal and safe. Additionally, always opt for corrosion-resistant parts to ensure longevity in moist or salty conditions. This approach is also recommended when selecting a fish finder for boats, as marine electronics benefit from corrosion-resistant materials and proper power management.

High Quality:Our marine wire is made of tinned copper to make sure good conductivity,Anti-corrosion, high durability,flexibility,stability for a long-lasting performance

HIGH QUALITY: CONEPY marine wire is crafted from high-precision, oxygen-free tinned copper strands, offering excellent conductivity, stability, and corrosion resistance. Its current-carrying capacity is 2-5% greater than that of aluminum wire, effectively preventing interference and ensuring a long service life
High Quality:Our marine grade wire is made of tinned copper to make sure good conductivity,Anti-corrosion, high durability,flexibility,stability for a long-lasting performance
Selecting a Marine LED Lamp and Mounting Hardware
Choose a USCG-certified stern light with a 2 nautical mile (NM) visibility rating for vessels up to 39 feet. This ensures you meet legal requirements and can be seen from enough distance to operate safely. Confirm the light emits a white 135-degree sector to comply with navigation rules and avoid confusion with colored housing options, which do not affect the light’s output. The all-round white light must be placed at the highest point of the boat to ensure visibility from all directions. For a pre-built option, consider a model like the Besramtic stern light, which offers 360-degree visibility from its bright LED array. To further improve signal reliability for your communications, a separate marine radio antenna with a high gain rating can be essential for clarity at longer ranges. For a comprehensive review of comparable equipment, consult a guide like the top depth finders to understand marine electronics selection.
For electrical specifications, look for a lamp rated for 9 to 33 volts DC input and consume around 1 to 2 watts of power. This low power draw helps conserve your battery life, especially on longer trips. If you plan to use solar power, verify that the lamp’s voltage range matches your solar system’s output. Also, ensure that solar charging does not reduce the brightness of the light.
Select mounting hardware made from marine-grade materials such as stainless steel, polycarbonate, or anodized aluminum. These materials resist corrosion and withstand vibration from boat movement. Make sure the hardware includes a transom or deck mount designed to handle harsh marine conditions and maintain secure attachment over time. Waterproofing should be at least IP67 to protect against water ingress in rough conditions.

[ SPECIFICATIONS ]: Model: SFNL011-SB-02 | Voltage: 12V DC | Power: 1W | Visibility: 2 Nautical Miles | Waterproof Grade: IP67 | Level Arc: 135° | Color: White

BRIGHT & SAFE: Equipped with a natural white 4500K LED light, marine led lights for boats ensure visibility up to 2 nautical miles and our running lights meet USCG and ABYC standards for nighttime safety while minimizing battery consumption at 1.5W.

USCG-CERTIFIED SAFETY: This 16" boat anchor light is USCG 2NM and ABYC A-16 compliant, meeting top safety standards for secure night boating
Where to Mount the Stern Light for a Clear 135° Arc
Verify the obstruction clearance from the motor, cabin, or gear when mounting the stern light. For outboard-powered boats, the engine often blocks part of the 135° arc, so you’ll need to mount the light higher or slightly off-center to achieve an unobstructed view. Use a vantage point from the aft-quarter positions to test the light’s angles and ensure it remains visible across the full 135° sector. On sailboats under 20 meters, you can also mount the stern light on the mast, but the same clear arc and unobstructed view requirements apply. Keep the fixture aligned parallel to the waterline and avoid tilting it upward or downward, as this narrows the visibility sector and compromises safety. For a durable and high-quality mounting solution, consider pairing this setup with top marine speakers that offer reliable performance in harsh environments. Comparing the best anchor light options can help you select a fixture that meets the required visibility standards. A RAM mount can also be used to secure the light fixture at the optimal height and angle for an unobstructed 135° arc.

Country Of Origin : China
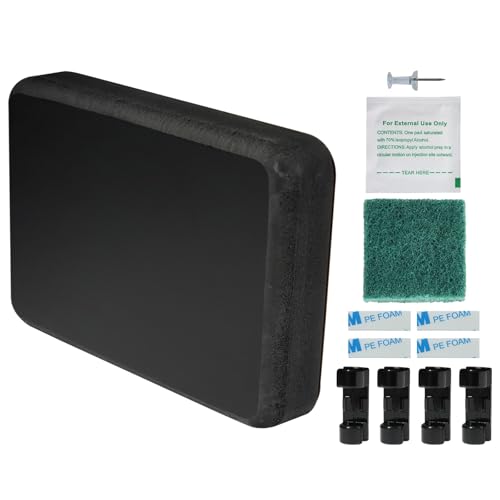
🛥️[Product Overview] Stern Pad, Screwless Transducer Mounting Plate kit, Marine-Grade Transducer Mounting Board Hardware Kit.
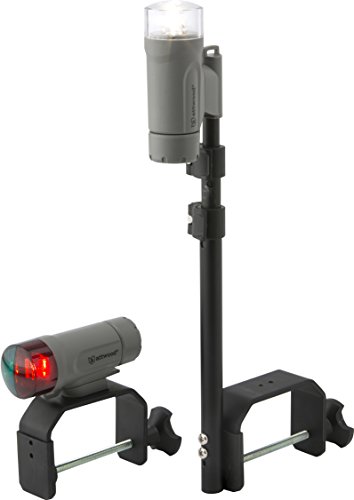
ULTIMATE NIGHTTIME VISIBILITY: Stay safe on small boats or tenders without 12V systems using these compact, high-intensity LED navigation lights
Wiring the Stern Light Circuit Safely, Step by Step
First, power the stern light from the battery through a dedicated navigation-light switch and a fuse or breaker placed on the positive conductor close to the power source. Use marine-grade two-conductor wiring, sized appropriately for the load and run length to ensure safe operation. Route the wiring away from standing water and sharp edges to prevent damage. Follow standard color coding: red for positive and black or yellow for negative, to avoid polarity mistakes at the switch, fuse, and fixture. Proper grounding is essential—connect the stern light’s negative lead directly to the battery negative terminal or the common return bus. Install waterproof, adhesive-lined heat-shrink connectors at every splice, making sure to create solid mechanical crimps before sealing. Verify the fixture’s polarity markings before energizing, especially if using LED lights, to ensure correct operation. Place the switch between the fused positive supply and the light so you can quickly isolate the circuit if necessary. Keep the navigation-light circuit separate from unrelated electrical gear to reduce interference and simplify troubleshooting. Understanding the sonar signal return on a fish finder requires adjusting the gain and sensitivity settings to avoid clutter and see the true bottom structure. To prevent reversed polarity, always use standard color coding for the positive and negative conductors throughout the entire circuit. For similar reliability in other audio equipment, consider a marine subwoofer with enclosure designed to withstand harsh environments. The compass binnacle’s internal damping fluid similarly requires careful sealing to prevent moisture ingress and ensure stable card movement over time.

Package Included: 50 pcs red waterproof wiring connectors for 22, 20, 18, 16 gauge wires, 40 pcs blue waterproof wiring connectors for 16, 14 gauge wires, 10 pcs yellow waterproof wiring connectors for 12, 10 gauge wires—total 100 pcs

MARINE GRADE WIRE CONNECTOR: The Sopoby electrical connectors kit includes AWG16-14 22-18 12-10 3 types gauge, 3 colors 8 sizes crimp insulated ring fork spade butt splices,make wire connection easier

Secure Bond: One-piece tinned copper barrel locks wires securely with minimal voltage drop and high current flow, preventing short circuits on every joint; Corrosion-resistant crimp connectors with heat shrink tubing deliver reliable, long-lasting performance
Testing Your Stern Light Setup Before Finalizing
Ensure your wire gauge is adequate for the current draw to prevent voltage drop, similar to how pitot tube systems require precise pressure readings for accurate speed data. Power up the light alone—no other devices or wiring connected—and confirm it illuminates immediately without flickering. Check the light’s color to ensure it emits a bright white glow without any discoloration. Observe from astern to verify that the fixture’s placement provides an unobstructed 135° light arc; no part of your boat should block this field of view. Similar to how navigation lights are designed with two units to maintain visibility if one fails, your stern light should have a redundant backup system in case of a fuse failure. For aluminum boats, consider a mounting design that isolates vibration just as dedicated fish finder mounts minimize transducer interference. Confirm that the gauge sits within the proper range on the temperature scale to avoid engine overheating, just as you would verify gauge placement for accurate readings.
Crouch low and look at the light from different angles to confirm full visibility, ensuring it can be seen clearly from various positions. Inspect the cable glands and fixture housing for watertight seals, and perform a spray test to mimic wet conditions and verify moisture resistance. Shake the fixture gently to check its stability and secure mounting, especially under vibrations typical while underway. If the light dims or fails to operate properly, recheck your fuse and power connection. Clean the lens to maximize brightness and output, and only consider the setup ready once it meets the required arc, range, and brightness specifications. Log any faults discovered and retest after making necessary corrections.
Common Stern Light Mistakes That Ruin Visibility
Even a well-designed stern light won’t ensure visibility if you make common installation mistakes. The most critical factor is stern light compliance, which requires a clear, unblocked 135-degree arc behind your boat. Obstructions such as your bimini, outboard motor, or gear stowed on the transom can completely block this view. Mount the light too low on the transom, and your boat’s own structure or hardware may hide it from approaching vessels. For anchor light basics, the same white light used at anchor also serves as your stern light when underway, making its proper placement doubly important. A proper installation requires a clean horn button to ensure easy activation of the light during emergency maneuvers. Using a horn relay ensures reliable power delivery to the light, preventing voltage drops that can dim its output at critical moments.
Proper placement is key: the light must sit near the stern and in a central position to provide an unobstructed rear view. Avoid installing the light off-center or higher up on the transom, as these misplacements can diminish visibility and compromise safety. Using a masthead light instead of the correct white stern light not only violates regulations but also confuses other vessels about your direction. Electrical issues like loose wiring, corroded connections, or burnt-out bulbs can also render your light invisible at critical moments.
To maximize your stern light’s effectiveness, ensure it is correctly mounted, free of obstructions, and functioning properly. Regular checks are essential, especially after rough conditions or long voyages. Correct installation and maintenance significantly improve the chances that approaching vessels see you clearly from behind, reducing the risk of collisions.

🛥️[Product Overview] Stern Pad, Screwless Transducer Mounting Plate kit, Marine-Grade Transducer Mounting Board Hardware Kit.

Veteran-owned YOLOtek delivers a thoughtfully engineered PERKO Port Kit built to lock securely into threaded bases on the bow or stern, giving boaters steady navigation lighting that stays put in rough water or during long runs.

🛥️[Product Overview] Stern Pad, Screwless Transducer Mounting Plate kit, Marine-Grade Transducer Mounting Board Hardware Kit.
Inspect and Maintain Your Stern Light
Routine inspections are essential to ensure your stern light functions reliably when needed. Before every nighttime trip or voyage in restricted visibility, turn on all running lights to verify the white stern light powers up correctly. Confirm it shines directly from dead astern across its required 135-degree arc. Check your boat’s size to determine the correct visible range—2 nautical miles for vessels under 20 meters. If you suspect the light is dimming but have no gauge, you can test the fuel level using a manual dipstick or a clean rag to wipe the sender rod, ensuring your electrical system isn’t draining from a faulty sender. During inspection, prioritize lens cleaning to remove salt buildup that can dim the light output. Examine the glass for cracks and inspect plastic lenses for heat damage or crazing that can distort the color. If the lenses are compromised, replace them immediately. Do not overlook electrical hardware: check connections, switches, and wiring for corrosion, which can degrade performance over time. Confirm that mounts remain secure to prevent movement or misalignment. Include battery maintenance in your routine; weak batteries reduce light intensity and may cause the light to malfunction. Finally, verify your stern light complies with ABYC A-16 or UL 1104 standards, as all components influence compliance with COLREGs regulations.